- Types of Sailboats
- Parts of a Sailboat
- Cruising Boats
- Small Sailboats
- Design Basics
- Sailboats under 30'
- Sailboats 30'-35
- Sailboats 35'-40'
- Sailboats 40'-45'
- Sailboats 45'-50'
- Sailboats 50'-55'
- Sailboats over 55'
- Masts & Spars
- Knots, Bends & Hitches
- The 12v Energy Equation
- Electronics & Instrumentation
- Build Your Own Boat
- Buying a Used Boat
- Choosing Accessories
- Living on a Boat
- Cruising Offshore
- Sailing in the Caribbean
- Anchoring Skills
- Sailing Authors & Their Writings
- Mary's Journal
- Nautical Terms
- Cruising Sailboats for Sale
- List your Boat for Sale Here!
- Used Sailing Equipment for Sale
- Sell Your Unwanted Gear
- Sailing eBooks: Download them here!
- Your Sailboats
- Your Sailing Stories
- Your Fishing Stories
- Advertising
- What's New?
- Chartering a Sailboat
- Running Rigging

Sailboat Rigging: Part 2 - Running Rigging
Sailboat rigging can be described as being either running rigging which is adjustable and controls the sails - or standing rigging, which fixed and is there to support the mast. And there's a huge amount of it on the average cruising boat...
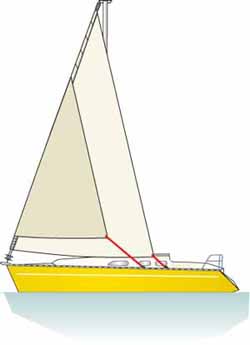
- Port and starboard sheets for the jib, plus two more for the staysail (in the case of a cutter rig) plus a halyard for each - that's 6 separate lines;
- In the case of a cutter you'll need port and starboard runners - that's 2 more;
- A jib furling line - 1 more;
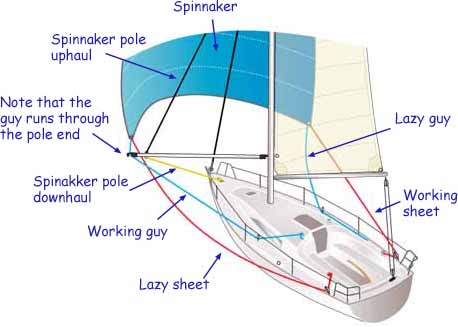
- An up-haul, down-haul and a guy for the whisker pole - 3 more;
- A tackline, sheet and halyard for the cruising chute if you have one - another 3;
- A mainsheet, halyard, kicker, clew outhaul, topping lift and probably three reefing pennants for the mainsail (unless you have an in-mast or in-boom furling system) - 8 more.
Total? 23 separate lines for a cutter-rigged boat, 18 for a sloop. Either way, that's a lot of string for setting and trimming the sails.
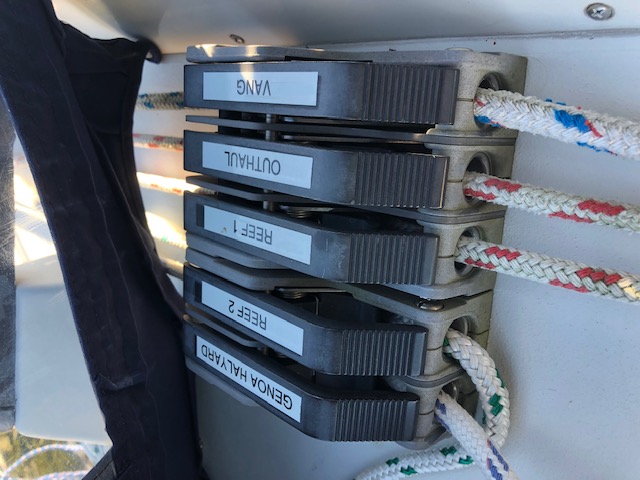
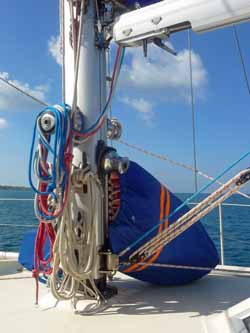
Many skippers prefer to have all running rigging brought back to the cockpit - clearly a safer option than having to operate halyards and reefing lines at the mast. The downside is that the turning blocks at the mast cause friction and associated wear and tear on the lines.
The Essential Properties of Lines for Running Rigging
It's often under high load, so it needs to have a high tensile strength and minimal stretch.
It will run around blocks, be secured in jammers and self-tailing winches and be wrapped around cleats, so good chafe resistance is essential.
Finally it needs to be kind to the hands so a soft pliable line will be much more pleasant to use than a hard rough one.
Not all running rigging is highly stressed of course; lines for headsail roller reefing and mainsail furling systems are comparatively lightly loaded, as are mainsail jiffy reefing pennants, single-line reefing systems and lazy jacks .
But a fully cranked-up sail puts its halyard under enormous load. Any stretch in the halyard would allow the sail to sag and loose its shape.
It used to be that wire halyards with spliced-on rope tails to ease handling were the only way of providing the necessary stress/strain properties for halyards.
Thankfully those days are astern of us - running rigging has moved on a great deal in recent years, as have the winches, jammers and other hardware associated with it.
Modern Materials
Ropes made from modern hi-tech fibres such as Spectra or Dyneema are as strong as wire, lighter than polyester ropes and are virtually stretch free. It's only the core that is made from the hi-tech material; the outer covering is abrasion and UV resistant braided polyester.
But there are a few issues with them:~
- They don't like being bent through a tight radius. A bowline or any other knot will reduce their strength significantly;
- For the same reason, sheaves must have a diameter of at least eight times the diameter of the line;
- Splicing securely to shackles or other rigging hardware is difficult to achieve, as it's slippery stuff. Best to get these done by a professional rigger...
- As you may have guessed, it's expensive stuff!
My approach on Alacazam is to use Dyneema cored line for all applications that are under load for long periods of time - the jib halyard, staysail halyard, main halyard, spinnaker halyard, kicking strap and checkstays - and pre-stretched polyester braid-on-braid line for all other running rigging applications.
Approximate Line Diameters for Running Rigging
But note the word 'approximate'. More precise diameters can only be determined when additional data regarding line material, sail areas, boat type and safety factors are taken into consideration.
Length of boat
Spinnaker guys
Boom Vang and preventers
Spinnaker sheet
Genoa sheet
Main halyard
Genoa / Jib halyard
Spinnaker halyard
Pole uphaul
Pole downhaul
Reefing pennants
Lengthwise it will of course depend on the layout of the boat, the height of the mast and whether it's a fractional or masthead rig - and if you want to bring everything back to the cockpit...
Read more about Reefing and Sail Handling...
Headsail Roller Reefing Systems Can Jam If Not Set Up Correctly
When headsail roller reefing systems jam there's usually just one reason for it. This is what it is, and here's how to prevent it from happening...
Single Line Reefing; the Simplest Way to Pull a Slab in the Mainsail
Before going to the expense of installing an in-mast or in-boom mainsail roller reefing systems, you should take a look at the simple, dependable and inexpensive single line reefing system
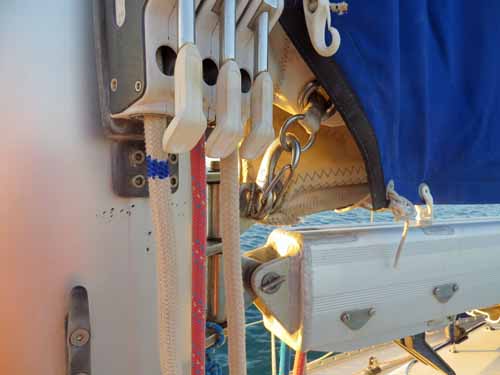
Is Jiffy Reefing the simplest way to reef your boat's mainsail?
Nothing beats the jiffy reefing system for simplicity and reliability. It may have lost some of its popularity due to expensive in mast and in boom reefing systems, but it still works!
Recent Articles
The CSY 44 Mid-Cockpit Sailboat
Sep 15, 24 08:18 AM
Hallberg-Rassy 41 Specs & Key Performance Indicators
Sep 14, 24 03:41 AM
Amel Kirk 36 Sailboat Specs & Key Performance Indicators
Sep 07, 24 03:38 PM
Here's where to:
- Find Used Sailboats for Sale...
- Find Used Sailing Gear for Sale...
- List your Sailboat for Sale...
- List your Used Sailing Gear...
Our eBooks...

A few of our Most Popular Pages...
Copyright © 2024 Dick McClary Sailboat-Cruising.com
- Anchoring & Mooring
- Boat Anatomy
- Boat Culture
- Boat Equipment
- Boat Safety
- Sailing Techniques
Sailboat Running Rigging Explained
Running rigging refers to the essential lines, ropes, and hardware responsible for controlling, adjusting, and managing the sails on a sailboat. They directly impact a sailboat’s performance, maneuverability, and overall safety.
As a result, understanding different running rigging components and their functions can help us optimize our boat’s performance and make informed decisions in various sailing situations. This comprehensive guide delves deep into the world of rigging by examining its essential components and various aspects, including materials, maintenance, advancements, troubleshooting, knots, and splices.
Key Takeaways
- Running rigging consists of movable components like halyards, sheets, and control lines that control, adjust, and handle the sails.
- Synthetic materials like Dyneema, Spectra, and Vectran have revolutionized running rigging due to their superior strength-to-weight ratio, low stretch and abrasion resistance, and increased lifespan.
- Troubleshooting common running rigging problems involves untangling or untwisting lines, resolving jammed or stuck hardware, and ensuring lines hold tension correctly.
- Knowing how to tie knots and splice lines is crucial in connecting running rigging components, securing lines, and adjusting sails.
- To achieve the best performance, the boat's rigging should be tailored to specific sailing needs, either racing or cruising.
- Different sailboat types and configurations require specific running rigging setups.
Difference between running and standing rigging
Before diving into the components, it’s essential to understand the difference between standing and running rigging. Standing rigging consists of the fixed lines, cables, and rods responsible for supporting a sailboat’s mast(s) and maintaining stability. Examples of standing rigging include shrouds, stays, and spreaders.
Running rigging, on the other hand, comprises the movable components needed to control, adjust, and handle the sails. These elements allow us to raise, lower, and trim the sails according to wind conditions and the boat’s course. Understanding the distinction between the two types of rigging is vital in operating a sailboat safely and efficiently.
Components of Running Rigging on a Sailboat
Responsible for raising, lowering, and holding sails in their deployed position. The primary types include the main halyard (for the mainsail), jib halyard (for jibs or genoas), and spinnaker halyard (for spinnakers). They typically run from the head of the sail down to mast-mounted winches or lead back to the cockpit for easy adjustment.
Control the angle of a sail relative to the wind. They connect the clew to the deck or another part of the rigging (e.g., tack), allowing adjustments and fine-tuning of sail trim . The two main types of sheets are mainsheets (for mainsails) and jib/genoa sheets (for headsails).
Control Lines
Essential for adjusting the tension and shape of sails. Examples include outhauls (for foot tension), cunninghams (for luff tension), and reef lines (for reducing the area under high wind conditions). Proper use of these lines allows sailors to optimize sail shape, improve efficiency, and manage their boats in various wind conditions.
Maintenance and Care
Regular inspection.
Routine inspection of your rigging is essential to identify wear, damage, or issues before they escalate into severe problems. Conduct a thorough examination at least once a season or more frequently if you sail extensively. When inspecting, check for signs of chafe, abrasion, corrosion, frayed, or damaged rope sections. Address these issues promptly to prevent further complications.
Cleaning and maintaining
Proper cleaning and maintenance of your rigging will improve its lifespan and maintain its performance. Rinse ropes and cordage with fresh water and mild detergent, if necessary. Lubricate and clean hardware components using marine-grade products, following the manufacturer’s guidelines.
When to replace
Advantages and impact of advanced synthetic materials , advantages of synthetic materials.
- Higher strength-to-weight ratio: Advanced materials like Dyneema, Spectra, and Vectran provide impressive strength while remaining lightweight, ensuring a secure connection and control in an easy-to-handle braid
- Low-stretch and abrasion resistance: These materials are incredibly resistant to stretching, providing improved control and accurate responsiveness. They also maintain their integrity and durability in wear, abrasion, and weathering.
- Increased lifespan: Synthetic materials can endure harsh conditions and resist UV damage.
Impact on Sailing Experience
The use of advanced materials like Dyneema, Spectra, and Vectran has had a profound effect on the sailing experience, with benefits including:
- Improved sail control and responsiveness: These low-stretch materials allow precise, user-friendly, and efficient sail handling and adjustments, leading to better overall performance.
- Enhanced durability and reduced maintenance: High-performance materials resist wear and weathering more effectively, increasing the lifespan of rigging and lowering the frequency of maintenance or replacement.
- Greater performance potential: Advanced materials’ increased strength and lightness improve boat performance to higher levels, especially in competitive racing scenarios.
Troubleshooting Common Problems
- Tangled or twisted lines: angled lines can impede adjustments and create hazardous situations, like tangled jib sheets , which can cause control issues with your headsail. Always coil and store lines properly when not in use to solve this issue. Regularly inspect your lines for twists or tangles, and address them before they become problematic.
- Jammed or stuck hardware: Dirt, corrosion, or damage can cause hardware components like blocks or winches to jam or stick, making it difficult to control the lines. Clean and lubricate your hardware according to the manufacturer’s guidelines to fix this issue. Replace any damaged or worn-out components to ensure smooth operation.
- Lines slipping or not holding tension: Runners may sometimes slip from cleats or winches, causing the sail to lose its desired shape or position. To overcome this issue, ensure you use the proper cleating or winching techniques, and double-check the compatibility of your line materials with your hardware.
When to call a professional
Although boat owners can resolve many rigging issues, there are situations where the expertise of a professional rigger may become necessary. Consider consulting a professional when:
- You feel uncertain about your ability to diagnose or fix a problem safely and effectively
- You need to replace or install new running rigging components that require specialized knowledge or skills
- You have encountered complex issues that may require advanced troubleshooting techniques
The Art of Knots and Splices
Importance of knots and splices.
Knots and splices connect rigging components, secure lines, and adjust sails. Proper knowledge and execution of these techniques allow us to:
- Effectively connect lines and hardware
- Quickly and safely secure or adjust lines under various conditions
- Reduce the risk of lines slipping or coming undone while sailing
- Maintain the integrity and strength of our rigging
Commonly used knots and their uses
Numerous knots are available for various purposes within the rigging. Some of the most common and versatile knots include:
- Bowline: This popular and secure knot is used for creating a fixed loop at the end of a line, often employed for attaching sheets to sails or halyards to shackles.
- Cleat hitch: A handy knot that quickly and securely fasten lines to cleats; widely used for halyards, sheets, and dock lines.
- Figure eight: A practical stopper knot prevents lines from slipping through hardware, such as blocks or clutches.
Techniques for splicing lines
Splicing is joining two lines or creating a loop within a single line by weaving rope fibers together. Splicing often results in stronger, more secure connections than tying knots and can improve the overall aesthetic of your rigging. Some techniques include:
- Eye splice: This technique creates a fixed loop at the end of a line, ideal for attaching hardware, such as thimbles, shackles, or blocks.
- Short splice: This method joins two lines by interweaving their ends, resulting in a strong connection suitable for halyards or sheets.
- End-to-end splice: An effective way to join two lines end-to-end, maintaining the line’s integrity and minimizing chafe or bulk.
Safety Practices When Handling Running Rigging
Basic safety rules.
- Be aware of your surroundings: Before making any adjustments to your sails or lines, evaluate the environment, and pay attention to potential hazards, such as nearby boats, obstacles, or changing wind conditions.
- Communicate clearly: When making adjustments or performing maneuvers, communicate your intentions with your crew to prevent confusion and ensure necessary steps are started promptly and coordinated.
- Use appropriate gear: Wear gloves to protect your hands from rope burns, and always have a knife or multi-tool nearby to handle unexpected situations, such as cutting tangled or jammed lines.
Risk and injury prevention
While handling rigging, take precautions to prevent accidents or injuries:
- Maintain proper body positioning: When working with lines or winches, position yourself securely to avoid sudden slips or loss of balance that could result in injuries.
- Keep fingers clear: Be cautious when handling lines around winches or cleats to prevent pinched fingers or rope burns.
- Avoid standing in a “line of fire”: Be mindful of potential line snap-backs or sudden movements when tension is released from sails or hardware.
Emergency procedures related to rigging
Being prepared for emergencies is crucial. Familiarize yourself with procedures such as:
- Man Overboard Recovery: Practice techniques to quickly stop the boat and retrieve someone who has fallen overboard.
- Rapid sail reduction or deployment: In extreme weather or urgent situations, know how to quickly reef, furl, or set sails to maintain control and stability.
Tips and Techniques for Better Performance
Tips for optimizing performance.
- Regular inspection and maintenance: Ensuring your lines, hardware, and sails are in good condition and correctly cared for is crucial for performance optimization on the water.
- Tailor your rigging: Customize your rigging according to your specific requirements, whether racing or cruising, as this can affect your boat’s overall performance.
Techniques for Smoother Sailing
- Match line materials and diameters to their purpose: Select the proper line material and diameter for each rigging component, such as the mainsheet, to ensure better sail control, reduced friction, and smooth operation.
- Stay organized and avoid line clutter: Keep lines and hardware tidy using organizers and storage solutions to prevent tangles and confusion, leading to inefficiency or unsafe situations on the water.
Additional Sailboat Rigging Components and Techniques
- Guys: These lines, in conjunction with spinnaker sheets, offer lateral control of the spinnaker pole and consequently allow better management of the spinnaker shape as they help balance the tension between forestay and backstay , maximizing its efficiency in downwind sailing.
- Vangs (or boom vang or kicking strap): While controlling the boom’s angle to maintain shape, vangs also help prevent accidental gybes, increasing safety on board.
- Outhauls: By managing foot tension and the sail hoist, outhauls aid in achieving optimal sail shape according to the wind conditions and point of sail . Loosening the outhaul creates a deeper shape for light winds, while tightening it flattens the sail for heavier conditions.
Equipment Organization and Storage
- Line bags or organizers: Store coiled lines for different sails, like staysail, and keep aft rolling furling lines neatly organized to minimize tangles and clutter.
- Clutches or labeled cleats: Label the appropriate hardware for each line to prevent confusion when adjusting sails.
- Winch handle holders: Ensure winch handles are secured in a designated holder when not in use, reducing the risk of accidents or loss overboard.
Different Rigging Setups
- Sloop Rig vs. Cutter Rig: A sloop rig typically has one headsail, like a genoa, while a cutter rig features two or more, requiring additional rigging components like adding extra backstays for support, extra halyards, sheets, and control lines for the cutter rig.
- In-Mast vs. In-Boom Furling Systems: These systems allow easy reefing and sail deployment. Running rigging for furling systems will include additional lines and hardware to manage furling and unfurling processes from the cockpit.
- Racing Boats vs. Cruising: Racing boats may require specialized configurations, such as high-performance lines and lightweight hardware, while cruising sailboats may prioritize more versatile, durable, and easy-to-maintain rigging components.
Final Thoughts
Understanding and effectively managing running rigging is critical to sailing, directly affecting the boat’s performance, maneuverability, and safety. This comprehensive guide offers a detailed breakdown of rigging components, their care and maintenance, troubleshooting, and the essential knots and splices. It also explores the revolutionary impact of synthetic materials, provides safety practices, and highlights the importance of customizing your running rigging according to your sailing needs.
Standing rigging refers to the fixed lines, cables, and rods that support the sailboat’s mast and maintain stability. Running rigging refers to the movable components that control, adjust, and handle the sails.
Critical components of running rigging include halyards, sheets, and control lines. Additional components can consist of guys, vangs, and outhauls.
Synthetic materials like Dyneema, Spectra, and Vectran offer superior strength-to-weight ratio, low stretch and abrasion resistance, and an increased lifespan, resulting in better control and durability of running rigging components.
Ideally, if you sail extensively, you should inspect your running rigging at least once a season or more frequently if you sail extensively. Regular cleaning, lubrication, and replacement of worn-out components should be part of your maintenance routine.
Different sailboat types and sail configurations may require specific running rigging setups. For example, a sloop rig and cutter rig have additional requirements for headsails, thus requiring various running rigging components. Similarly, racing boats and cruising sailboats may require different running rigging setups to cater to their needs.
The Importance of the Sailboat Comfort Ratio
What is an impeller on a boat, related posts, whisker pole sailing rig: techniques and tips, reefing a sail: a comprehensive guide, sail trim: speed, stability, and performance.
- Cookie Policy
- Privacy Statement
© 2023 TIGERLILY GROUP LTD, 27 Old Gloucester Street, London, WC1N 3AX, UK. Registered Company in England & Wales. Company No. 14743614
Welcome Back!
Login to your account below
Remember Me
Retrieve your password
Please enter your username or email address to reset your password.
Add New Playlist
- Select Visibility - Public Private
Running Rigging
Jib Tack, Jib Halyabds, and Jib Sheets.
The jib tack requires to be of great strength, and is made indifferently, accordingly to the judgment of the person who has the fitting out of the yacht, of rope, chain, or flexible wire rope. Rope does very well in vessels under 40 tons, but wire is to be preferred, and it is found to stand better than chain. The jib tack t is fast to the traveller a (Fig. 15), and leads down through a sheave hole * at the bowsprit end (inside the cranse iron) a block is shackled to the end of the tack through which the outhaul is rove. The standing part of the outhaul is put over one of the bitts with a running eye; the hauling part leads on board by the side of the bowsprit. A single rope inhaul is generally fast to the traveller.
The score in the end of the bowsprit has necessarily to be very large, and frequently it is made wider than it need be; at any rate the sheave hole is a source of weakness, and generally if the end of the bowsprit comes off it is close outside the sheave hole, the enormous lateral strain brought on the part by the weather shroud (%) causing the wood to give way. To avoid such accidents as these one or two yachts have the sheave outside the iron, as shown by to. The tack n passes between the ears or "lugs" on the cranse iron at o and p. To o the topmast stay is fitted, and the bobstay block at p. Of course if the score and sheave were put at m, the other score and sheave * would be dispensed with. Generally when the end comes off at the sheave 8 the bowsprit immediately afterwards breaks close off at the stem, unless some one is very smart at letting the jib sheets fly, or in putting the helm down. With the sheave hole at m no such accident would happen.
Jib halyards are, as a rule, made of chain, as it runs better and does not stretch, and the fall stows in a smaller compass when the jib is set; in fact, the fall is generally run through one of the chain pipes

into the forecastle, where it helps a trifle as ballast.* However, several large vessels, such as Livonia, Modwena, and Arrow, have had Manilla rope. The jib halyards are rove through an iron (single) block (which is hooked or shackled to the head cringle of the jib), and then each part leads through an iron (single) block on either side of the masthead (see Fig. 5). The hauling part usually leads down the port side of the mast; the purchase is shackled to the part that leads through the block on the starboard side. In vessels above 40 tons a flexible wire runner is invariably used in addition to the purchase; one end of the runner is shackled to an eye bolt on deck, and the other, after leading through a block on the end of the jib halyard, is shackled to the npper block of the purchase. The purchase consists of a double and single block, or two double; in the former case the single block is below, with the standing part of the tackle fast to it; but where two blocks are used, the standing part of the tackle is made fast to the upper block. As a great deal of "beef" is required to properly set up a jib, it is usual to have a lead of some kind for the " fall" * of the purchase on deck, such as a snatch block. It is, of course, necessary to have a " straight" luff to a jib, but very frequently the purchase is used a little too freely; the result is that the forestay is slacked, and perhaps a link gives way in the halyards; or the luff rope of the jib is stranded (generally near the head or tack, where it has been opened for the splice), and sometimes the bobstay-fall is burst. (We once saw the latter mishap occur on board the Oimara during the match at Southsea.) These mishaps can be generally averted by "easing" the vessel whilst the jib is being set up, choosing the time whilst she is in stays or before the wind, and watching to see that the forestay is not slackened.
Jib sheets in vessels under 80 tons are usually single, but in vessels larger than 80 tons they are double. In the latter case there are two blocks, which are put on the clew cringle; a sheet is rove through each block, and the two parts through the jib sheet holes in the wash strake of the bulwarks; one part of the sheet is then made fast and the other hauled upon.
Fobs Halyards, Fobe Tacks, and Fobb Shebts.
The fore halyards are usually fitted as follows: The standing part is hooked or shackled to an eye bolt under the yoke on the port side, then through a single block hooked to the head of the sail, and up through another single block hung to an eye bolt under the yoke on the starboard side. The downhaul is bent to the head cringle or to the hook of the
* The "fell" of a tackle is the pert that is taken hold of to haul upon.
block. No purchase is necessary, as the sail is set on a stay; but in yachts above 10 tons the luff of the sail is brought taut by a tackle hooked to the tack; the tack leads through the stem head. The tackle oonsists of a single and double block, or two doubles according to the size of the yacht. In yachts of 40 tons and upwards the tack is usually made of flexible wire rope.
Fore sheets in yachts under 15 tons are usually made up of two single blocks. The standing part is made fast to the upper block (hooked and moused or shackled to the clew of the sail). In larger vessels a double, or single, or two double blocks are used, the hauling part or fall always leading from the upper block. In very large vessels, such as 100-ton cutters or yawls, or 140-ton schooners , "runners" are used in addition to tackles. These are called the standing parts of the sheets: one end is hooked on the tackle by an eye; the other end is passed through a bullseye of lignum vitss on the clew of the sail, and is then belayed to a cavel. The sail is then Bheeted home with the tackle.
Main and Peak Halyards, Main Tack, Main Sheet, and Main
The main or throat halyards are generally rove through a treble block at the masthead, and a double block on the jaws of the gaff. The hauling part of the main halyards leads down the starboard side of the mast, and is belayed to the mast bitts. The main purchase is fast to the standing part, and usually consists of a oouple of double blocks, and the lower one is generally hooked to an eye bolt in the deck on the starboard side. In vessels under 15 tons it is unusual to have a main purchase, and when there is no purchase the upper main halyard block is a double one, and the lower a single. However, racing 10-tonners have a main purchase, and many 5-tonners have one. The principal object in having a main purchase in a small craft is that the mainsail can be set better, as in starting with "all canvas down" the last two or three pulls become very heavy, especially if the hands on the peak have been a little too quick; and a much tauter luff can be got by the purchasfl^than by the main tack tackle. Of course the latter is dispensed with in small vessels where the purchase is used, and the tack made fast by a lacing round the goose-neck of the boom. By doing away with the tack tackle at least 6in. greater length of luff can be had in a 5-tonner, and this may be of some advantage. The sail cannot be triced up, of course, without casting off the main tack lacing; but some yacht sailers oonsider this an advantage, as no doubt sailing a vessel in a strong wind with the main tack triced up very badly stretches the sail, looks very ugly.
The peak halyards in almost all vessels under 140 tons are rove through two single blocks on the gaff and three on the masthead, as shown in Plate I. and Fig. 5. Some vessels above 140 tons have three blocks on the gaff, and in such cases the middle block on the masthead is usually a double one. The standing part of the peak halyards to which the purchase is fast leads through the upper block and down on the port side.
The usual practice in racing vessels is to have a wire leather-covered span (copper wire is best) with an iron-bound bullseye for each block on the gaff to work upon, and this plan no doubt causes a more equal distribution of the strain on the gaff. The binding of the bullseye

has an eye to take the hook of the block. In Fig. 16 a is a portion of the gaff, b is the span; c c are the eyes of the span and thumb cleats on the gaff to prevent the eyes slipping, d is the bullseye with one of the peak halyard blocks hooked to it.
The main tack generally is a gun tackle purchase, but in vessels above 60 tons a double and single or two double blocks are used. In addition, some large cutters have a runner rove through the tack cringle, one end being fast to the goose-neck of the boom, and the other to the tackle. In laced mainsails the tack is secured by a lacing to the goose-neck.
The main boom is usually fitted to the spider hoop round the mast by a universal joint usually termed the main boom goose-neck.
The main sheet should be made of left-handed, slack-laid, six-stranded Manilla rope. The blocks required are a three-fold on the boom, a two-fold on the buffer or hone, as the case may be, and a single block on each quarter for the lead. Yachts of less than 15 tons have a double block on the boom, and single on the buffer.
Many American yachts have a horse in length about one-third the width of the counter for the mainsheet block to travel on. For small vessels, at any rate, this plan is a good one, as the boom can be kept down so much better on a wind, as less sheet will be out than there would be without the horse. A stout ring of indiarubber should be on either end of the horse, to relieve the shock as the boom goes over.
The mainsail outhaul is made np of a horse on the boom, a shackle as traveller, a wire or chain runner outhaul (attached to the shackle, and rove through a sheave hole at the boom end), and a tackle. (See Fig. 17.) In small vessels the latter consists of one block only; in large vessels of two single, or a double and single, or two double blocks.
The old-fashioned plan of outhaul, and one still very much in use, consists of an iron traveller (a large leather-covered ring) on the boom end, a chain or rope through a sheave hole and a tackle. This latter plan is perhaps the stronger of the two; but an objection to it is that the traveller very frequently gets jammed and the reef cleats have to be farther forward than desirable, to allow the traveller to work.

Sometimes, instead of a sheave hole, the sheave for the outhaul is fitted right at the extreme end of the boom, on to which an iron cap is fitted for the purpose.
Topsail Halyards, Sheets, and Tacks.
The topsail halyards in vessels under 10 tons consist of a single rope rove through a sheave hole under the eyes of the topmast rigging.
Yachts of 10 tons and over have a block which hooks to a strop or sling on the yard, or if the topsail be a jib-headed one, to the head cringle. The standing part of the halyard has a running eye, which is put over the topmast, and rests on the eyes of the rigging; the halyard is rove through the block (which has to be hooked to the yard), and through the sheave hole at the topmast head. It is best to have a couple of thumb cleats on the yard where it has to be slung; there is then no danger of the strop slipping, or of the yard being wrongly slung.
When the topsail yard is of great length, as in most yachts of 40 tons and upwards, an upper halyard is provided (called also sometimes a tripping line or trip halyard, becausfe the rope is of use in tripping the yard in hoisting or lowering). This is simply a single rope bent to the upper part of the yard, and rove through a sheave hole in the pole, above the eyes of the topmast rigging. The upper halyards are mainly useful in hoisting and for lowering to get the yard peaked; however, for very long yards, if bent sufficiently near the upper end, they may in a small degree help to keep the peak of the sail from* sagging to leeward, or prevent the yard bending.
The topsail sheet is always a single * Manilla rope, as tarred hemp rope would stain the mainsail in wet weather. It leads through a cheek block on the gaff end, then through a block shackled to an eye bolt under the jaws of the gaff; but in most racing vessels nowadays a pendant or whip is used for this block, as shown in Plate I. The pendant should go round the mast with a running eye. By this arrangement the strain is taken off the jaws of the gaff and consequently off the main halyards. A common plan of fitting this block and whip is shown in Pig. 18. The hauling part of the sheet is generally put round one of the winches on the mast to " sheet home " the topsail.
The topsail tack is usually a strong piece of Manilla with a thimble spliced in it, to which the tack tackle is hooked.
Jib-topsail halyards and main-topmast-staysail halyards are usually single ropes rove through a tail block on topmast head; but one or two large vessels have a lower block, with a spring hook, which is hooked to the head of the sail. In such cases, the standing part of the halyards is fitted on the topmast head with a running eye or bight.

• The Oimara, cutter, had doable topsail sheets rove in this way : one end of the sheet was made fast to the gaff end; the other end of the sheet was rove through a single block on the clew of the sail; then through the oheek block at the end of the gaff, through a block at the jaws of the gaff, and round the winch.
Spinnaerb Halyards, Outhaul, &c.
Spinnaker halyards are invariably single, and rove through a tail block at the topmast bead.
The spinnaker boom is usually fitted with a movable goose-neck at its inner end. The goose-neck consists of a universal joint and round-neck pin, and sockets. (Square iron was formerly used for the neck, but there was always a difficulty in getting the neck shipped in the boom, and round iron was consequently introduced.) The pin is generally put into its socket on the mast, and then the boom end is brought to the neck.
At the outer end of the boom are a couple of good-sized thumb cleats, against which the running eye of the after and fore guy are put. The fore guy (when one is used) is a single rope; the after guy has a pendant or whip with a block at the end, through which a rope is rove. The standing part of this rope is made fast to a cavel-pin on the quarter, and so is the hauling part when belayed. The after guy thus forms a single whip-purchase (see Plate I.). The outhaul is rove through a tail block* at the outer end of the spinnaker boom, and sometimes a snatch block is provided for a lead at the inner end on th§ mast. The topping lift consists of two single, a double and single, or two double blocks, according to the size of the yacht.
The upper block of the topping lift is a rope strop tail block, with a running eye to go round the masthead. The lower block is iron bound, and hooks to an eye strop on the boom.
Formerly a bobstay was used ; but, if the boom is not allowed to lift, it will bend like a bow; in fact, the bobstay was found to be a fruitful cause of a boom breaking, if there was any wind at all, and so bobstays were discarded. The danger of a boom breaking through its buckling up can be greatly lessened by having one hand to attend to the topping lift; as the boom rears and bends haul on the lift, and the bend will practically be "lifted" out.
Small yachts seldom have a fore guy to spinnaker boom, but bend a rope to the tack of the sail (just as the outhaul is bent) leading to the bowsprit end; this rope serves as a fore guy, or brace, to haul the boom forward; and when the spinnaker requires to be shifted to the bowsprit, the boom outhaul is slackened up and the tack hauled out to bowsprit end. Thus double outhauls are bent to the spinnaker tack cringle, and one
• Formerly a hole vu out in the boom end, and a sheaye fitted for the outhaul to run through; this plan is now abandoned, as, unless the boom happens to oome with one partionlar side uppermost, an unfair lead may result rove through the sheave hole or block at the spinnaker boom end, and the other through a block at bowsprit end. But generally the large spinnaker (set as such) has too much hoist for the jib spinnaker, and a shift has to be made for the bowsprit spinnaker, which is hoisted by the jib topsail halyards if that sail be not already set; even in such case no fore guy is used in small vessels, but to ease the boom forward one hand slackens up the topping lift a little, and another the after guy, and, if there be any wind at all, the boom will readily go forward. In a five-tonner the after guy is a single rope without purchase, and the topping lift is also a single rope, rove through a block under the lower cap.
A schooner has a main and fore spinnaker fitted in the manner just described, and the usual bowsprit spinnaker as well, which is usually hoisted by the jib topsail halyards.
As spinnaker booms are now carried so very long, they will not go under the forestay; consequently, when the spinnaker has to be shifted, the boom must be unshipped. To shift the boom, the usual practice is to top it up, lift it away from the goose-neck, and then launch the inner end aft till the outer end will clear the forestay, or leech of foresail if that sail be set. If the boom is not over long, the inner end can be lowered down the fore hatch or over the side of the vessel until the other end will clear the forestay (see als<J page 79).
When spinnakers were first introduced no goose-neck was used, the heel of the boom being lashed against the mast. A practice then sometimes was to have a sheave hole at either end of the boom, with a rope three times the length of the boom rove through each sheave hole. One end of this rope served as the outhaul, the other for the lashing round the mast. To shift over, the boom was launched across to the other rail, and what had been the inboard end became the outboard end. Of course the guys had to be shifted from one end to the other. As spinnaker booms are now of such enormous length, it would be almost impossible, and highly dangerous, to work them in this way, although it might do for a five-tonner.
Spinnaker booms when first fitted with the goose-neck were no longer than the length from deck to hounds, so that they could be worked under the forestay without being unshipped. However, it would appear that the advantages of a longer boom are greater than the inconvenience of having to. unship it for shifting, and now, generally, a spinnaker boom when shifted and topped up and down the mast, reaches above the upper cap.
The following plan was worked during the summer of 1876 in the Lily, 10-tonner, but we have never met with it elsewhere. The arrangement was thus described: Take a yacht of say 65 tons, and suppose her 70ft. long and 15ft. beam, with a mast measuring 60ft. from deck to cap, from which if 9ft. is subtracted for masthead, and 4ft. more allowed for the angle made by the forestay, a spinnaker boom, to swing over clear, cannot exceed 43ft. (as the goose-neck is 3ft. from deck), which of course is much too little to balance the mainboom and sail. It is proposed to have a boom of 42ft., and another smaller one of 21ft. made a little heavier than the long one, and fitted with two irons 7ft. apart; the longer one to be made in the usual manner, with bolts in both ends, for the goose-neck; but the sheaves in the ends to be, one vertical, and the other horizontal. It will then make a very snug storm boom for the balloon jib when shipped singly, whilst the smaller one, by leading a tack rope (or outhaul) through the block on the outer iron will do very well for the staysail. See Fig. 19: in case No. 1, the boom is on end and ready for letting fall to starboard; and in Ho. 2 dipped and falling to port. A A (No. 1) represents the 42ft. boom, and B B the 21-footer; the dotted line b b the arc the boom would travel if not let run down; and the dotted line c c the actual line it travels when housed. C in the small diagram represents the outer iron or cap on the end of the small

boom (which can be made square or round; in the diagram it is made square, to prevent twisting), and a a bolt to which the standing part of the heel rope is made fast by clip hooks; the rope passes through the horizontal sheave at h, and back to the block on the cap at/. The fall can be belayed to a cleat on the small boom, or would greatly ease the strain on the gooseneck if made fast on the rail or to the rigging. When gybing it would only be necessary to top the boom by the lift, let go the heel rope, and let it run down; then swing over, lower away, and haul out the boom when squared. It would be better to hook on the Burton purchase to the cap at e, both as an extra support and to make sure of the boom whilst swinging. This plan would not only obviate the danger and trouble of dipping the boom, but give a 57ft. spar, besides giving greater strength, the boom being double where the most strain comes; and the extra weight is a positive advantage, as helping to balance the main boom. Of course this plan would allow of almost any length of spars, as a 40ft. lower boom would give a 74ft. spar, and still leave 8ft. between the irons; and in these days of excessive spars and canvas no doubt it would be attempted to balance a ringtail, but the lengths given seem a good comparative length for any class.
A more simple plan for " telescoping " a spinnaker boom is shown by
Fig. 20, a is the inner part of the boom; c is a brass cylinder with an
angular slot in it at 8. This cylinder is fixed tightly to the outer part of the boom by the screw bolts i i. The two parts of the boom meet inside the cylinder at the ticked line t. When the two parts "of the boom are to be used together, the ring m is put on the cylinder. The inboard part of the boom is then put into the cylinder, and the whole is firmly screwed up by the thumb-screw x. Both parts of the boom have their ends " socketed " so as to take a goose-neck, and thus either part can be used alone.
Was this article helpful?
Recommended Programs

Myboatplans 518 Boat Plans
Related Posts
- Standing Rigging - Boat Sailing Guide
- Plan Drawing Fregatt - Rigging
- How Are Catamaran Masts Fixed Down
- Rigging a singlehanded dinghy
- Rigging a twohanded dinghy
- Rig Construction - Ship Design
Readers' Questions
What is yacht running rigging?
Yacht running rigging is the ropes and cables used to control the movement of the sails and spars of a sailing yacht. It generally consists of halyards, sheets, guys, and sometimes vangs, used to raise, lower, and angle the sails.

Please verify you are a human
Access to this page has been denied because we believe you are using automation tools to browse the website.
This may happen as a result of the following:
- Javascript is disabled or blocked by an extension (ad blockers for example)
- Your browser does not support cookies
Please make sure that Javascript and cookies are enabled on your browser and that you are not blocking them from loading.
Reference ID: af93ec3d-763d-11ef-9d07-2a63fa623612
Powered by PerimeterX , Inc.

Whats the Difference between Standing Rigging and Running Rigging?
Running rigging refers to the movable lines and ropes used to control the position and shape of the sails on a sailboat. Standing rigging, on the other hand, refers to the fixed wires and cables that support the mast and keep it upright.
As the sun rises on another day, we find ourselves immersed in a world where the sails of sailboats dance upon the seas, their intricate rigging patterns a testament to the artistry and engineering of seafaring. From the towering masts of schooners to the sleek lines of modern racing yachts, sailboat rigging represents a crucial element in the composition of these majestic vessels, an amalgamation of form and function that is as beautiful as it is essential.
With its intricacies and complexities, sailboat rigging is a subject that has captivated the hearts and minds of sailors and enthusiasts alike, drawing them into a world of knots, splices, and shrouds that is at once ancient and modern, traditional and innovative. So join us as we explore the types of sailboat rigging that exist, and discover the joys and challenges of this fascinating and endlessly rewarding pursuit.
Standing Rigging
Standing rigging is the system of cables, rods, and wires that support the mast of a sailboat and keep it upright. It is designed to be strong and sturdy, providing a stable base for the sails to be raised and lowered. In contrast, running rigging is the system of ropes and lines that control the sails and other movable parts of the boat.
Standing rigging represents one of the core components of a sailboat ‘s design, providing the structural support necessary to keep the mast in place and ensure that the sails can be raised and lowered with ease. Made up of a variety of materials and components, standing rigging is a complex and sophisticated system that requires careful planning and maintenance to ensure optimal performance. Here are some of the types of standing rigging you might encounter:
- Wire Rigging Perhaps the most common type of standing rigging, wire rigging is made up of stainless steel or other metals that are twisted together to create cables of varying thickness. Wire rigging is relatively inexpensive and easy to maintain, but it can be prone to corrosion over time.
- Rod Rigging A popular option for high-performance sailboats, rod rigging is made up of thin, strong rods that are tensioned to provide support to the mast. Though relatively expensive, rod rigging is known for its durability and resistance to corrosion.
- Synthetic Rigging A newer development in the world of sailboat rigging, synthetic rigging uses high-tech fibers such as Dyneema or Spectra to create standing rigging that is strong, lightweight, and resistant to UV radiation and other environmental factors. Though still relatively expensive, synthetic rigging is gaining popularity due to its many advantages.
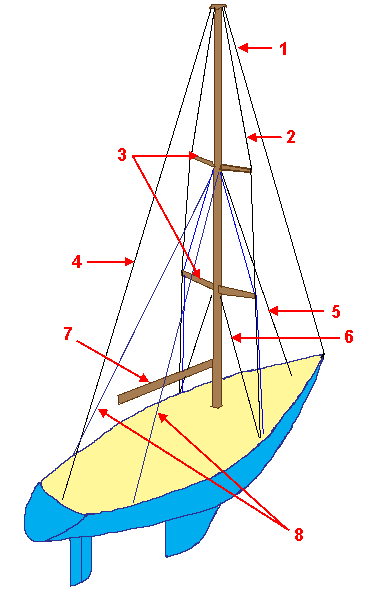
- (1) – Forestay The forestay is a wire or cable that runs from the top of the mast to the bow of the boat. It supports the mast from the front and helps to keep it from falling forward.
- (2) – Shrouds Shrouds are the wires or cables that run from the top of the mast to the sides of the boat. They provide lateral support to the mast and help to keep it upright.
- (3) – Spreaders Spreaders are the horizontal bars that extend from the mast and hold the shrouds away from the mast. They help to distribute the load from the sails and prevent the mast from collapsing.
- (4) – Backstay The backstay is a wire or cable that runs from the top of the mast to the stern of the boat. It supports the mast from the rear and helps to keep it from falling backwards.
- (5) – Inner forestay The inner forestay is a wire or cable that runs from the mast to the bow of the boat, inside the forestay. It provides additional support to the mast and is often used for heavier sails.
- (6) – Sidestay The sidestay is a wire or cable that runs from the mast to the side of the boat. It provides additional lateral support to the mast and helps to prevent it from swaying.
Running Rigging
Running rigging is the system of ropes and lines that control the sails, spars, and other movable parts of a sailboat. It is designed to be adjustable, allowing sailors to trim the sails to match the wind conditions and course of the boat. In contrast, standing rigging is the system of cables and wires that support the mast and keep it upright.
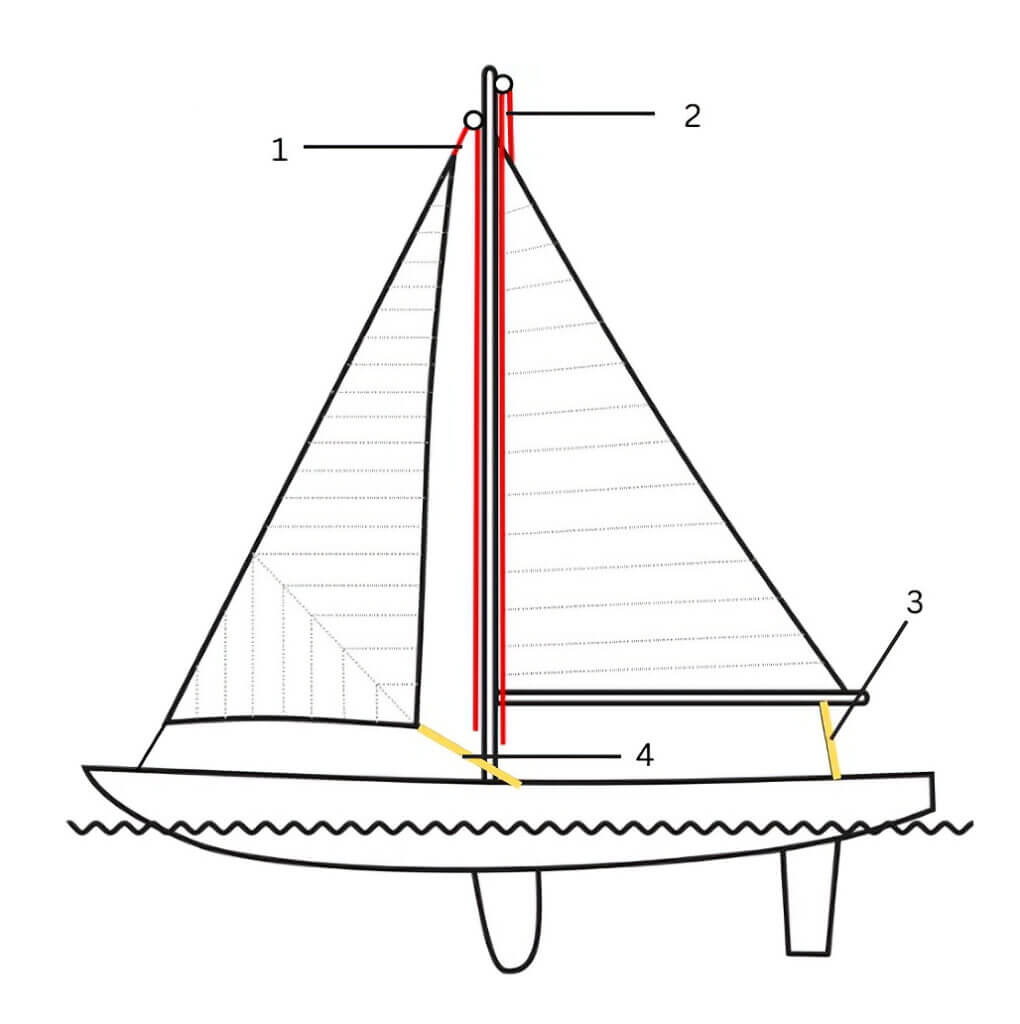
Running rigging is the unsung hero of sailboat design, providing the control and adjustability necessary to keep a boat moving smoothly through the water. Made up of a complex system of ropes, lines, and pulleys, running rigging is a crucial element in the art of sailing, allowing sailors to trim their sails to match the wind conditions and steer their boats with precision. Here are some of the key components of running rigging:
- Halyards These are the ropes that are used to raise and lower the sails. Depending on the size and type of boat, halyards may be made from synthetic fibers or more traditional materials such as hemp or nylon. (1) – Jib Halyard (2) – Main Halyard
- Sheets Sheets are the ropes that control the position of the sails relative to the wind. They are typically made from braided synthetic fibers or other high-strength materials and are adjusted using winches or cleats. (3) – Main Sheet (4) – Jib Sheet
- Blocks and Pulleys These small but essential components allow the ropes of the running rigging to move freely, reducing friction and making it easier to adjust the sails. They are often made from lightweight, high-strength materials such as aluminum or carbon fiber.
- Cleats Cleats are the small, wedge-shaped devices that are used to secure the running rigging in place. They are typically made from metal or synthetic materials and are designed to hold the ropes securely while still allowing for quick adjustments.
What are the signs of wear and tear in standing rigging?
Signs of wear and tear in standing rigging can include visible corrosion or rust on wire or rod rigging, fraying or unraveling of synthetic rigging, loose or damaged fittings, and any noticeable deformation or bending of the rigging components.
How often should I inspect and replace standing rigging?
The frequency of inspection and replacement for standing rigging depends on various factors, including the type of rigging material, the age of the rigging, and the manufacturer recommendations. As a general guideline, it is recommended to have a professional rigging inspection at least every 2-3 years.
Are there any regulations or standards for standing rigging?
Yes, there are industry standards and regulations for standing rigging. One widely recognized standard is the International Organization for Standardization (ISO) 12215-9, which provides guidelines for the design, construction, and testing of standing rigging on small craft. Additionally, various national and international sailing associations, such as the American Boat and Yacht Council (ABYC) and the International Sailing Federation (ISAF), offer guidelines and recommendations for rigging standards.
What are the common causes of failure in standing rigging?
Common causes of failure in standing rigging can include fatigue from constant stress and loading, corrosion of metal rigging components, inadequate tensioning or adjustments, improper installation or maintenance, and damage from accidental impacts or mishandling.
How do I properly maintain and clean running rigging?
Proper maintenance and cleaning of running rigging involve regular inspection, washing, and lubrication. Inspect the ropes and lines for signs of wear, fraying, or damage, and replace any worn-out or damaged components. To clean synthetic ropes, rinse them with fresh water to remove salt and dirt, and use a mild soap if necessary. Avoid using harsh chemicals or bleach. Lubrication is essential for smooth operation, and you can apply a silicone-based or dry lubricant to the pulleys and blocks, following manufacturer recommendations.
Similar Posts

Basic Sailing Terminology: Sailboat Parts Explained
Sailing is a timeless activity that has captivated the hearts of adventurous souls for centuries. But, let’s face it, for beginners, sailing can be as intimidating as trying to navigate through a dark, labyrinthine maze with a blindfold on. The vast array of sailing terminology, sailboat parts and jargon can seem like a foreign language…

What is a Ketch Sailboat?
Ketch boats are frequently seen in certain regions and offer various advantages in terms of handling. However, what is a ketch and how does it stand out? A ketch is a sailboat with two masts. The mainmast is shorter than the mast on a sloop, and the mizzenmast aft is shorter than the mainmast. Ketches…

Advantages of Catamaran Sailboat Charter
A catamaran sailboat charter is an exciting way to explore the beauty of the sea. Whether you are an experienced sailor or a first-timer, booking a catamaran sailboat charter has a lot of advantages that you can enjoy. In this article, we will discuss the advantages of booking a catamaran sailboat charter, so that you…

Mainsail Furling Systems – Which one is right for you?
With the variety of options of mainsail furling systems available, including slab, in-boom, and in-mast systems, it can be challenging to determine which one best suits your needs. In this comprehensive guide, we will explore the pros and cons of each system, enabling you to make an informed decision that aligns with your sailing requirements….

What is a Keel?: The Backbone of a Ship
As ships sail through tumultuous seas, their stability and maneuverability are tested to the fullest extent. The intricate design and engineering that go into a ship’s construction ensure that it can withstand the forces of nature and navigate through any challenging conditions. One of the most critical components of a ship’s design is the keel,…
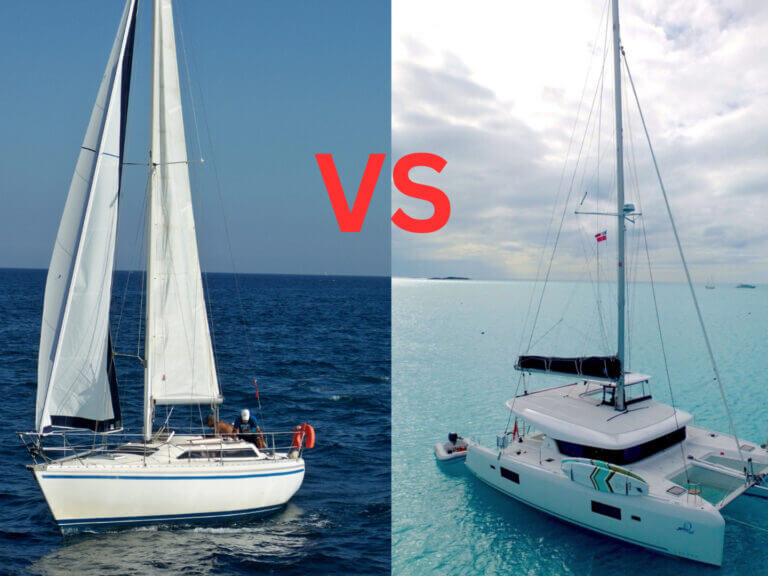
Monohulls vs. Catamarans: Which One is Best for You?
If you’re considering purchasing a sailboat, you might be wondering which type of vessel is best suited for your seafaring adventures. Fear not, for we’re here to help you weigh the differences between monohulls vs. catamarans to make an informed decision. Now, before we dive into the nitty-gritty details of hull design, sail handling, and…
Parts of a Sailboat Rigging: A Comprehensive Guide
by Emma Sullivan | Aug 6, 2023 | Sailboat Maintenance

Short answer: Parts of a Sailboat Rigging
The sailboat rigging consists of various components essential for controlling and supporting the sails. Key parts include the mast, boom, shrouds, forestay, backstay, halyards, and sheets.
Understanding the Basics: A Comprehensive Overview of the Parts of a Sailboat Rigging
Title: Understanding the Basics: A Comprehensive Overview of the Parts of a Sailboat Rigging
Introduction: Sailboats have been a symbol of freedom and adventure for centuries. Whether you are an avid sailor or an aspiring skipper, understanding the various components that make up a sailboat rigging is essential. In this insightful guide, we will dive into the world of sailboat rigging, unraveling its intricacies while shedding light on its importance and functionality. So tighten your mainsails and let’s set sail on this knowledge-packed journey!
1. Mast: The mast is the vertical spar that supports the sails . It provides structural integrity to the entire rigging system and enables harnessing wind power effectively. Constructed from materials such as aluminum or carbon fiber, modern masts are designed to be lightweight yet robust enough to withstand varying weather conditions .
2. Standing Rigging: The standing rigging refers to all fixed parts that support the mast. This includes stays (fore, back, and jumper) which run between the masthead and various points on the hull or deck, like chainplates or tangs. Shrouds (cap shrouds, intermediate shrouds) help counteract lateral forces by providing lateral support to prevent excessive sideward movement of the mast.
3. Running Rigging: Unlike standing rigging, running rigging comprises lines that control sails’ deployment and trim dynamically during sailing maneuvers . The halyard raises or lowers a sail along its respective track within the mast groove while keeping it securely fastened in place when needed.
4. Sails: Of course, we can’t discuss sailboat rigging without mentioning sails themselves! They are like wings for your boat – converting wind energy into forward motion efficiently . Main sails typically attach through slides onto a mast track using luff cars for easy hoisting and lowering during different conditions.
5. Boom: The boom plays a crucial role in sail control , as it connects the aft end of the mainsail to the mast. By controlling the angle of the boom, sailors can adjust the shape and trim of the main sail for optimum performance against varying wind conditions.
6. Spreader: Spreader arms are horizontal poles extending from some point up the mast’s length. They serve two purposes: keeping shrouds apart to improve sail shape and reducing compressive loads on the rigging by forcing them away from each other.
7. Turnbuckles: Turnbuckles are adjustable devices used to tension standing rigging elements such as shrouds and stays. These fittings allow sailors to fine-tune rigging tensions while maximizing stability and overall performance based on prevailing weather conditions.
8. Winches: Winches are mechanical devices primarily used for easing or trimming running rigging lines under high loads. With a simple rotation, winches convert human effort into mechanical advantage, allowing efficient handling of lines for adjusting sails in different situations.
Conclusion: Understanding your sailboat rigging is not just essential for safe sailing but also for harnessing its maximum potential during every voyage. From deciphering various components like masts, standing and running rigging, booms, spreaders, turnbuckles, and winches – each element plays a crucial role in ensuring a smooth sailing experience. So next time you find yourself out on open waters, take a moment to appreciate these intricate systems that keep you powered by nothing but wind!
Step by Step Guide: How to Properly Assemble and Install the Various Parts of a Sailboat Rigging
Welcome fellow sailors and enthusiasts! Today, we are diving into the intricate world of sailboat rigging. Whether you are an experienced sailor or a newcomer to the sailing community, understanding how to properly assemble and install the various parts of a sailboat rig is essential for smooth and safe sailing. So, grab your tools and let’s get started on this step-by-step guide !
Step 1: Gather Your Tools and Materials Before embarking on this rigging journey, it’s crucial to have all your tools and materials ready. Here is a list of essentials you’ll need:
– Stainless steel wire rigging – Turnbuckles – Fittings and hardware such as clevis pins, shackles, and thimbles – Measuring tape or ruler – Wire cutters – Crimping tool or swaging machine (depending on your preference) – Electric drill (if required) – Lubricant or anti-seize compound
Make sure you have everything organized before starting. A well-prepared sailor is a successful one!
Step 2: Inspect Existing Rigging (If Applicable) If you own a used boat or are replacing old rigging, take some time to inspect the current setup. Look out for any signs of wear, frayed wires, or damaged fittings. It’s crucial to address these issues before proceeding with installation as they can compromise safety at sea.
Step 3: Measure Twice; Cut Once! Now that everything is set up let’s proceed by measuring the length needed for each piece of wire rigging carefully. Tinier inaccuracies in measurement during this step can lead to major inconveniences later.
Ensure you give yourself ample space for adjusting tension using turnbuckles. Pro-tip: It’s better to cut the wire slightly longer than needed rather than cutting it too short!
Step 4: Attach Fittings – The Devil Lies in Details Once you have measured and cut the rigging wire, let’s start attaching the fittings. This is where precision comes into play. Begin with inserting thimbles onto each end of the wires to avoid kinks or fraying. Next, connect the turnbuckles and fittings according to your sailboat’s specific rigging plan.
Step 5: Tension Matters Now that you have installed all the necessary fittings, it’s time to tension the rigging. This step requires a bit of finesse as over-tightening can damage equipment, while under-tightening can compromise performance.
Using a tension gauge, ensure that you achieve optimal tension on all parts of your sailboat’s rigging. It might take some trial and error, but finding that sweet spot is worth it!
Step 6: Inspect and Lubricate Before setting sail , always double-check everything! Look for any loose fittings or signs of wear once again. You wouldn’t want to go through these steps all over again out in the middle of nowhere!
Additionally, apply lubricant or anti-seize compound to prevent corrosion and ensure smooth operation of turnbuckles and other moving parts.
And there you have it – a professionally and properly assembled sailboat rigging! Sit back for a minute or two to appreciate your workmanship before feeling that excitement rush through as you’ll soon set sail smoothly onto those horizon-stretching waters.
Remember, practice makes perfect when it comes to mastering this skill. Over time, you’ll develop your own techniques and become a maestro at sailboat rigging assembly. Happy sailing!
Top Frequently Asked Questions about Sailboat Rigging Components Answered
Are you new to sailing or considering purchasing a sailboat? No matter your experience level, understanding the rigging components of a sailboat is crucial for safe and successful navigation on the water. In this blog post, we aim to answer some of the top frequently asked questions about sailboat rigging components. So, let’s dive in!
1. What are sailboat rigging components? Sailboat rigging components refer to the various parts and systems that help support and control the sails on a sailboat. These components include standing rigging (the fixed parts) and running rigging (lines that can be adjusted). Some common examples of rigging components are the mast, boom, shrouds, stays, halyards, sheets, and blocks.
2. What is the purpose of each rigging component? Each component serves a specific purpose in sailing . The mast supports the sails and provides leverage for controlling their shape. The boom holds down the bottom of the mainsail and allows adjustment for different points of sail . Shrouds provide lateral support to prevent excessive side-to-side movement of the mast. Stays offer fore-and-aft support to keep the mast from leaning too far forward or backward. Halyards raise and lower sails while sheets control their angle in relation to wind direction.
3. How often should I inspect my sailboat’s rigging ? Regular inspection is crucial for ensuring your safety on the water . We recommend conducting visual inspections before every sailing trip and more thorough inspections at least once a year or per manufacturer recommendations. Look out for any signs of wear, corrosion, loose fittings, or frayed lines that may indicate potential issues.
4. Can I replace my own rigging components? While minor repairs or adjustments can typically be done by boat owners with some knowledge and experience, replacing major rigging components should ideally be done by professionals who specialize in sailboat rigging services. They have the expertise and equipment necessary to properly install and tension components, ensuring your safety.
5. How long do sailboat rigging components typically last? The lifespan of rigging components depends on various factors such as usage, maintenance, and exposure to environmental conditions. Stainless steel stays can last for 10-15 years or longer with regular inspections and maintenance, while synthetic running rigging (such as ropes made from high-performance fibers) may have a shorter lifespan of 3-5 years.
6. Are there any safety tips related to sailboat rigging? Absolutely! Always wear appropriate personal protective equipment when working with or near rigging components. Take care not to overload or overstress the rig by correctly tensioning lines within manufacturer specifications . Avoid standing under or in close proximity to the mast while raising or lowering it, as it can be dangerous if it accidentally drops.
7. What are some common signs of rigging failure? Rigging failures can be catastrophic, so being able to identify potential issues is vital. Look out for visible cracks, rust, elongation, broken strands on wires, loose fittings, excessive wear on ropes, or unusual noises while sailing. Any of these signs should prompt an immediate inspection and possible replacement of affected components.
In conclusion, understanding sailboat rigging components is crucial for any sailor looking to navigate safely on the water. By familiarizing yourself with these frequently asked questions and following proper inspection and maintenance practices, you’ll enjoy a smooth sailing experience while prioritizing your safety at all times!
Exploring the Essential Components: An In-Depth Look at Key Parts of a Sailboat Rigging
Sailing is a thrilling and age-old activity that has fascinated adventurers and seafarers for centuries. At the heart of every sailing vessel lies its rigging, which is a complex system of ropes, wires, and equipment that hold the sails in place and allows for precise control over the boat’s movement. In this blog post, we will take an in-depth look at the key components of a sailboat rigging to understand their importance and how they contribute to the overall sailing experience.
Mast: The backbone of any sailboat rigging is its mast. This tall vertical structure supports the sails and provides stability to the vessel . Made from materials such as aluminum or carbon fiber, masts are designed to withstand strong winds and carry considerable loads. They come in various shapes and sizes depending on the type of boat and intended use.
Boom: Attached horizontally towards the bottom of the mast, the boom serves as a critical component in controlling the position of the mainsail – typically the largest sail on board. Acting as an extension of the mast, it allows for adjustments in sail trim by pivoting up or down.
Shrouds: These sturdy wire cables are attached to either side of the mast at multiple levels, forming a crucial part of sailboat rigging’s structural integrity. Shrouds keep the mast upright by counteracting lateral forces created by wind pressure on sails . Adjustable tensioning systems enable sailors to fine-tune shroud tension according to prevailing conditions.
Stay: Similar to shrouds but located further forward on most boats, stays provide additional support for maintaining mast stability. Fore-stay runs from top-to-bow while back-stays run from top-to-aft; together they prevent excessive forward or aft bending movements during intense wind pressures.
Turnbuckles: Within sailboat rigging systems lie turnbuckles – mechanical devices used for adjusting tension in wires or ropes like shrouds or stays. These clever devices simplify the task of tightening or loosening rigging components, enabling sailors to optimize sail shape and boat performance with ease.
Halyards: Essential for hoisting sails up and down, halyards are ropes used to control the vertical movement of the sails . They are typically operated through winches, which increase mechanical advantage and make raising and lowering large sails manageable.
Blocks: Also known as pulleys, these simple yet crucial devices help redirect the path of ropes within a sailboat rigging system. Blocks increase mechanical advantage by changing the direction of applied force, making it easier for sailors to control different aspects such as sail trim or adjusting tension.
Running Rigging vs Standing Rigging: Sailboat rigging can be classified into two main categories – running rigging and standing rigging. Running rigging refers to all movable lines and ropes that control sail position, while standing rigging encompasses all stationary components that give structure to the mast. Both elements work in harmony to ensure efficient maneuverability and safety at sea .
Understanding these key components within a sailboat’s rigging is essential for any aspiring sailor or seasoned mariner alike. It not only allows them to appreciate how these intricately designed systems function together but also helps enhance their sailing skills by leveraging each component’s unique role.
So next time you set foot on a sailboat or watch one glide gracefully across the water, take a moment to admire the finely tuned rigging – a mesmerizing web of interconnected parts that enable humans to harness the power of wind and embark on unforgettable nautical adventures.
The Crucial Role of Each Part: Unveiling the Functionality and Importance of Sailboat Rigging Components
Sailboat rigging components may seem simple and insignificant at first glance, but anyone who has sailed knows just how crucial each part is to the overall functionality and performance of a sailboat. From the mast to the shrouds, every component plays a vital role in ensuring safe navigation, efficient sailing, and maximum performance on the water.
One of the most essential parts of any sailboat rigging system is the mast. Serving as the backbone of the entire structure, the mast provides vertical stability and supports various sails that catch the wind . The mast’s height and shape significantly impact a boat’s performance, affecting not only its speed but also its ability to handle different wind conditions. A sturdy mast ensures that forces are properly distributed throughout the rigging system, preventing excessive strain or potential failure.
Connected to both sides of the mast are what are known as shrouds. These cables or wires act as primary support structures for restraining lateral movement and maintaining balance in heavy winds. Shrouds come in different sizes and tensions depending on factors such as sail size and boat length. Proper tensioning of shrouds is crucial for maintaining structural integrity and minimizing flexing under intense force.
Another integral part is the forestay – a cable or wire running from near or at the top of the mast down to the bow area of a sailboat . The forestay supports forward strength and controls stay sag- an essential factor for optimizing aerodynamics by shaping how sails interact with wind. It helps maintain proper sail geometry while limiting unnecessary heel (leaning) during maneuvers or gusts.
The backstay is another component critical for stability and control. Running from either side of the stern up to near or at the top of the mast, it helps counterbalance fore-aft bending forces created by wind pressure against a boat’s sails pushing it forward. By adjusting backstay tension, sailors can fine-tune their boat’s responsiveness to changes in wind speed or balance.
The boom, a horizontal spar attached to the mast, plays a crucial role in controlling the angle and shape of the mainsail. It acts as a pivot point for adjusting sail trim, allowing sailors to maximize lift and minimize drag based on wind conditions. With its connection to the gooseneck at the foot of the mast, it enables easy raising and lowering of the mainsail for quick adjustments or docking maneuvers .
Moreover, various blocks and pulleys are scattered throughout a sailboat’s rigging system playing essential roles in creating mechanical advantages. These components reduce friction and redirect forces generated by sails and lines during sailing operations, making it easier for sailors to handle heavy loads while preserving their energy. Choosing high-quality blocks with low-friction bearings is crucial for efficient sail handling while maintaining control.
Understanding how each part functions individually is significant; but more importantly, appreciating how they work in harmony is where true seamanship resides. Rigging components must be designed and maintained carefully to ensure safety, performance, and optimal functionality on any sailing adventure.
In conclusion, sailboat rigging components may appear simple to some extent but hold tremendous importance in enhancing a boat’s capabilities on water. From providing vertical stability with masts and dampening lateral movement with shrouds to shaping sails’ interaction with wind using forestays and backstays – every component has a crucial role to play. Understanding how these parts function individually and collectively helps sailors navigate safely while maximizing performance out on the open sea
Troubleshooting Tips: Common Issues and Solutions related to different parts of a sailboat rigging
Introduction: The rigging of a sailboat is an essential component that allows for safe navigation and optimal performance on the water. However, like any mechanical system, it can experience issues from time to time. In this blog post, we will provide detailed professional troubleshooting tips for common problems related to various parts of a sailboat rigging. Whether you’re an experienced sailor or just starting out, these solutions will help keep your rigging in top shape and ensure smooth sailing on every adventure.
1. Mast and Standing Rigging: One common issue sailors face is the presence of squeaking noises coming from the mast or standing rigging while underway. This can be quite bothersome and distracting during a peaceful sail. To resolve this problem, start by checking the connections between different components of the rigging and tighten any loose fittings appropriately. Additionally, using lubricants specifically designed for marine environments can significantly reduce friction between movable parts, eliminating annoying creaks and groans as you ride the waves.
2. Shrouds and Forestay: Another issue frequently encountered involves misaligned shrouds or forestay tension that affects the overall stability of the mast. If you notice your mast leaning slightly to one side or backward, it’s likely due to incorrectly adjusted shrouds or an improperly tensioned forestay. To rectify this, use a tension gauge to ensure consistent tension across all shrouds while avoiding excessive strain on either side of the mast base. By maintaining proper alignment and equal tension distribution, your rigging will provide maximum support when experiencing strong winds or rough conditions.
3. Running Rigging (Lines): Running rigging encompasses all lines used for controlling sails such as halyards, sheets, and control lines – crucial elements for proper sail handling. A typical problem associated with running rigging is line chafing caused by repeated friction against sharp edges or abrasive surfaces onboard. Inspect your lines regularly for signs of wear, paying close attention to areas exposed to constant rubbing. To prevent chafing, secure protective coverings or install specialized guards where necessary. Regularly washing and lubricating your lines will also extend their lifespan and ensure smooth operation.
4. Block and Tackle Systems: Block and tackle systems play a vital role in distributing loads and facilitating the movement of sails, particularly in larger sailboats. A common issue arises when blocks become jammed or fail to rotate freely due to debris buildup or lack of proper maintenance. To address this problem, inspect all blocks systematically, disassembling them if required, and clean out any accumulated dirt or salt crystals thoroughly. After cleaning, applying a liberal amount of marine-grade grease will promote smooth rotation and reduce the likelihood of future blockages.
Conclusion: Effective troubleshooting is essential for maintaining a sailboat rigging system that performs optimally and ensures a safe experience on the water. By following these detailed professional tips, you can address common issues associated with different parts of your sailboat rigging promptly and efficiently. Remember to conduct regular inspections, prioritize preventive maintenance, and seek professional assistance whenever needed. With a well-maintained rigging system at your disposal, you can embark on each sailing journey confidently, knowing that you’re prepared to overcome any challenges that may arise along the way.
Recent Posts

- Sailboat Gear and Equipment
- Sailboat Lifestyle
- Sailboat Maintenance
- Sailboat Racing
- Sailboat Tips and Tricks
- Sailboat Types
- Sailing Adventures
- Sailing Destinations
- Sailing Safety
- Sailing Techniques
Better Sailing

What is Sailboat Rigging?
The domain of rigging is an essential matter for the safety and good performance of your sailboat. Nowadays, the type of rigging is still evolving. Generally, rigging is depending on the type of sail used or the number of masts. As a basic rule, the replacement of the standing rig should be done every 10 years, except for multihulls or regattas, and rod or composite fiber rigging. A good set of rigging is of great importance in order to ensure navigation without causing any damage. A useful tip is to perform often thorough checks of the state of the rigging of your sailboat. Like this, you will prevent any possible damages from happening. So, let’s examine what exactly is sailboat rigging.
Standing and Running Rigging
Standing rigging supports your sailboat’s mast. The standing rigging consists of all the stainless steel wires that are used to support the mast. Moreover, standing rigging includes the rods, wires, and fixed lines that support the masts or bowsprit on a sailing vessel. In addition, all these reinforce the spars against wind loads transferred from the sails. On the other hand, running rigging is the rigging for controlling and shaping the sails on a sailboat. Running rigging consists of the main and jib sheet, the boom vang, the downhaul, and the jib halyard.
The subdivision of running rigging concerns the jeers, lifts, and halyards (halyards). This supporting equipment raises or lowers the sails and also controls the lower corners of the sails, i.e. the tacks and sheets. Over the centuries and up until nowadays, the history of sailboats rigging is still developing. What we’ve learned by now is that the combination of square and fore-and-aft sails in a full-rigged ship creates a highly complex, and mutually reliant set of components.
Wire Rigging
Wire rigging is the most common form of standing rigging on sailboats today. Furthermore, the style of the wire used is made of stainless steel, which is also a common wire style. What is advantageous with wire is that it’s quite affordable, especially when using swage fittings. The wire has also a long life expectancy, about 10 to 20 years, depending on use and the region you’re sailing to. However, wire rigging is more elastic than rod and synthetic rigging, thus it offers the lowest performance.
Rod Rigging
The rod rigging composition is of high-quality materials that provide low stretching. Moreover, it has a very long lifespan and great breaking strength, much more than that of its wire counterpart. Its life expectancy is attributed to the design, which is a mono strand, as well as to its composition that makes it very corrosion resistant.
Synthetic Rigging
Synthetic rigging is a new type of rigging and just like a rod, has minimum breaking strength. Nowadays, synthetic rigging offers low stretch performance features (that may vary depending on construction type), which are quite good for sailboats, among others. However, synthetic rigging will not last as long as the metal components. Most of the time, metal wire and rod are far better than synthetic rigging.
Based on the two rig types which are square-rigged and fore-and-aft, let’s divide the fore-and-aft rigs into three groups:
- Lateen Rig has a three-sided mainsail on a long yard.
- Bermuda rig which has a three-sided mainsail.
- Gaff rig is the head of the mainsail and has a four-sided mainsail.
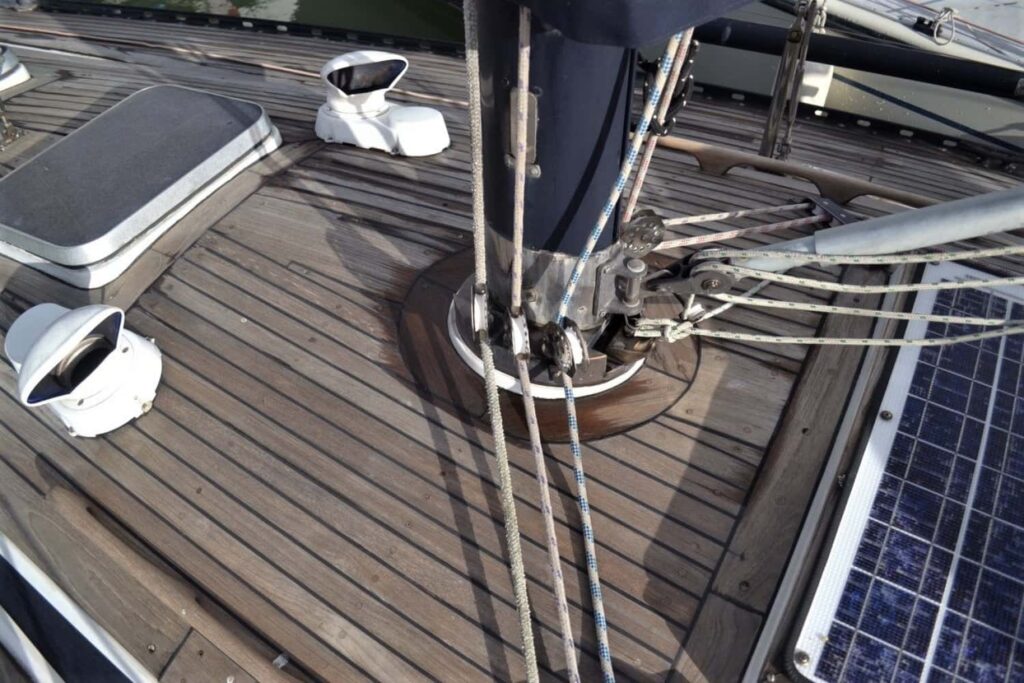
Parts of a Sailboat Rigging and Terminology
Cruising sailboats will usually have their mast supported by 1 x 19 stainless steel wire. However, there are some racing sailboats that may choose rod rigging. Why? That’s because rod rigging has a stretch coefficient that is some 20% less than wire. The downside is that it’s more difficult to install and adjust, as well as less flexible with a shorter life span. So, let’s move on and see the parts of the sailboat’s rigging and their terminology:
- Forestay and Backstay : Forestay and backstay support the mast fore and aft. The forestay keeps the mast from falling backward. It attaches at the top of the mast. The backstay is important for the sail’s control because it directly affects the headsail and mainsail.
- Cap Shrouds and Lower Shrouds : These parts hold the mast steady athwartship. The shrouds are attached to the masthead and via chainplates to the hull. Moreover, forward and aft lower shrouds provide further support. The lower shrouds are always connected to the mast, just under the first spreader, and at the other end to the hull.
- Spreaders : In general, spreaders keep the shrouds away from the mast. What is of high importance, in terms of stability, is their length and fore-and-aft angle. The rigs of cruising boats may have up to three pairs of spreaders, depending on a number of factors such as the sailboat’s size and type. Keep in mind that the more spreaders a sailboat has then the lighter the mast section can be. Last but not least, the spreaders must be robust in order to withstand the compression loads of the shrouds.
- Masts and Booms : Masts are tall spars that carry the sails, navigate the sailboat, and control its position. Sailboat booms are horizontal spars to which the foot of a sail is bent. The booms attach to the lower part of the mast. There are some sailboats with unstayed masts, like the junk rig and catboat rigs. They have no standing rigging at all, and neither stays to support them. For example, a Bermuda rig has a single mast and just one headsail, thus a relatively simple rigging layout. On the other hand, schooners or ketches have a really complex rigging, i.e. with multi-spreader rigs. Apparently, the mast on a sailboat is an important component.
- Chainplates, Toggles, and Turnbuckles : These important components of sailboat rigging attach the shrouds to the hull. The chainplate is a metal plate that fastens to a strong point in the hull. Toggles are comprised of stainless steel fittings that absorb non-linear loads, located between the shrouds and the chainplate. Turnbuckles (or rigging screws) are also stainless steel materials that allow the shroud tension to adjust better.
- Parts of Running Rigging : As mentioned above, running rigging has to do about shaping, supporting, and stabilizing the sails on a sailing boat. Therefore, the necessary materials for running rigging are numerous and need further explanation. Some of these materials are: The topping lifts, the halyards, the outhauls and downhauls, the boom vangs, the sheets, and more.
Sailboat Rigging – Summary
So, what is sailboat rigging? Sailboat rigging concerns the wires, lines, and ropes that hold the rig and control the sails. To be more accurate, this means the tensioned stays and shrouds that support the mast. Rigging has to do about the booms, masts, yards, sails, stays, and cordage. Same way with cars, sailboats also have an engine, but in the form of sails. This is the standing and running rigging. When we refer to standing rigging this means that the stays and shrouds are supported by the mast. On the other hand, running rigging refers to rope halyards, sheets, and other control lines. Depending on the type of your sailboat, this sail-engine might be old, new, or maybe somewhere in between.
Peter is the editor of Better Sailing. He has sailed for countless hours and has maintained his own boats and sailboats for years. After years of trial and error, he decided to start this website to share the knowledge.
Related Posts


Sailing with Friends: Tie Knots, Navigate the Seas and Create Unforgettable Memories

Atlantic vs Pacific: Which is More Dangerous for Sailing?

Lagoon Catamaran Review: Are Lagoon Catamarans Good?
Best Inboard Boat Engine Brands
- Buyer's Guide
- Destinations
- Maintenance
- Sailing Info
Hit enter to search or ESC to close.
- BOAT OF THE YEAR
- Newsletters
- Sailboat Reviews
- Boating Safety
- Sails and Rigging
- Maintenance
- Sailing Totem
- Sailor & Galley
- Living Aboard
- Destinations
- Gear & Electronics
- Charter Resources
- Ultimate Boating Giveaway

Running Rigging for Cruising Sailors
- By Bruce Bingham
- Updated: October 15, 2020
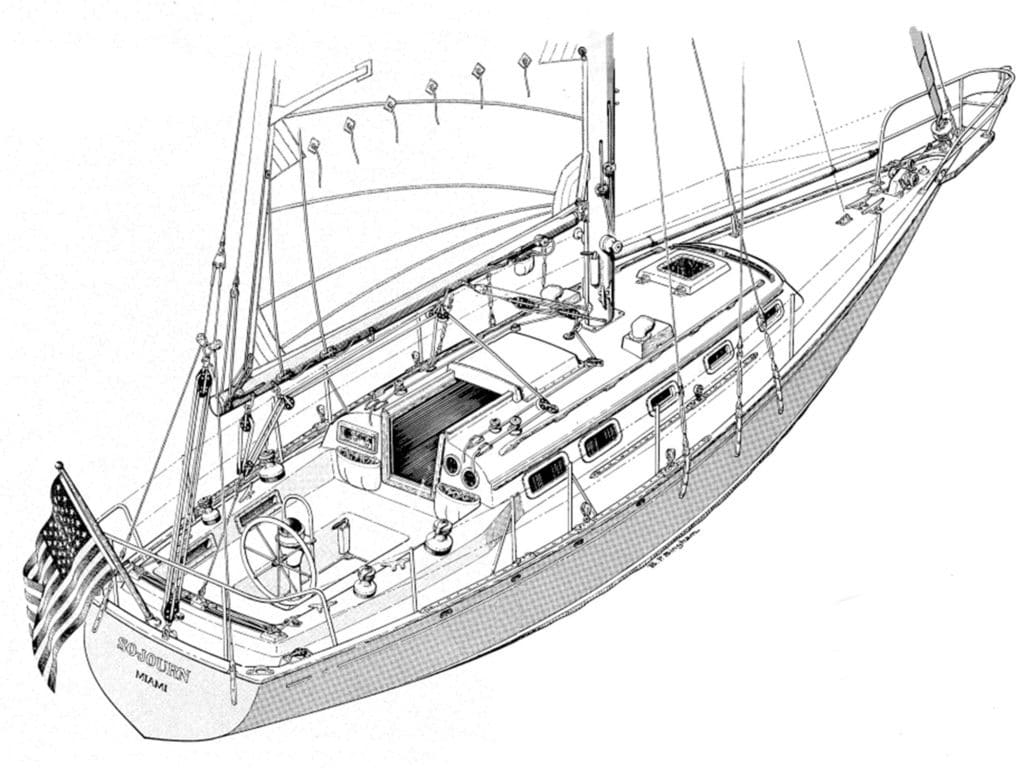
During my 75 years of sailing, I’ve become aware of the chasm between cruisers and racers. But I’ve never understood it because I have always been both. Even when I cruise, I’m racing—against changing weather, the need to get home in time for dinner, whatever. What that really means is that I’m determined to get the most speed out of my boat at all times. And to do so means having excellent running-rigging systems.
There are three issues in play when deciding on whether to install or upgrade your running rigging. First, do you want to increase your ease and convenience when adjusting sail trim? Second, are you willing to add lengths of line (as well as lengths of time) to make sail-trim adjustments? And last, how much investment are you willing to make to reach your sail-handling (i.e., running-rigging) goals?
I can scratch only the surface of this complicated topic and not present a comprehensive guide to all systems and conditions. Hopefully I’ll encourage you to think of how you might be able to improve your systems to make your sailing better and more satisfying.
Let’s begin by looking at sail-trim adjustments, which encompasses many items: sail curve (or draft, also called cord), luff tension, foot tension, sail twist from head to foot, and attack angle (the angle of wind as it approaches the sail’s leading edge, or luff).
On racing boats, all of the power required to make these adjustments is enhanced with more-powerful winches, larger crews, expensive low-friction blocks, and extremely strong and flexible lines. All of the running-rigging systems on racing boats are also appropriate for cruising boats, but cost often plays a deciding factor when making hardware and arrangement choices.
Increasing the power of running-rigging systems will always cost more, but it will also result in ease of handling and efficiency of controlling mainsail and headsail trim. Let’s move on, focusing first on the main.
Main Outhaul
Mainsail draft (depth of the sail’s curve) is controlled primarily by the outhaul but also may be supplemented by halyard tension and mast bend. So, let’s concentrate on the outhaul if for no other reason than its ease of use, as long as it is easily adjustable and also conveniently reachable. Unfortunately, most outhauls that I see on cruising boats are not adjustable and are usually a bundle of knots, difficult to reach when under sail, and almost impossible to untie without a marlinspike or fid. So let’s fix this first.
The mainsail outhaul on my Cape Dory 28 Nikki ’s boom end is a 2-to-1 tackle with its hauling end attached to another 2-to-1 tackle, also called a cascade or Burton. In light air, when sailing to weather, the draft of the main can be flattened by taking in on the 2-to-1 part of the tackle. In strong breezes, flattening the mainsail’s draft is easily done by hauling in on the Burton only, a total power ratio of 4-to-1. Both of the outhaul tackles have their own clam cleats mounted on the side of the boom.
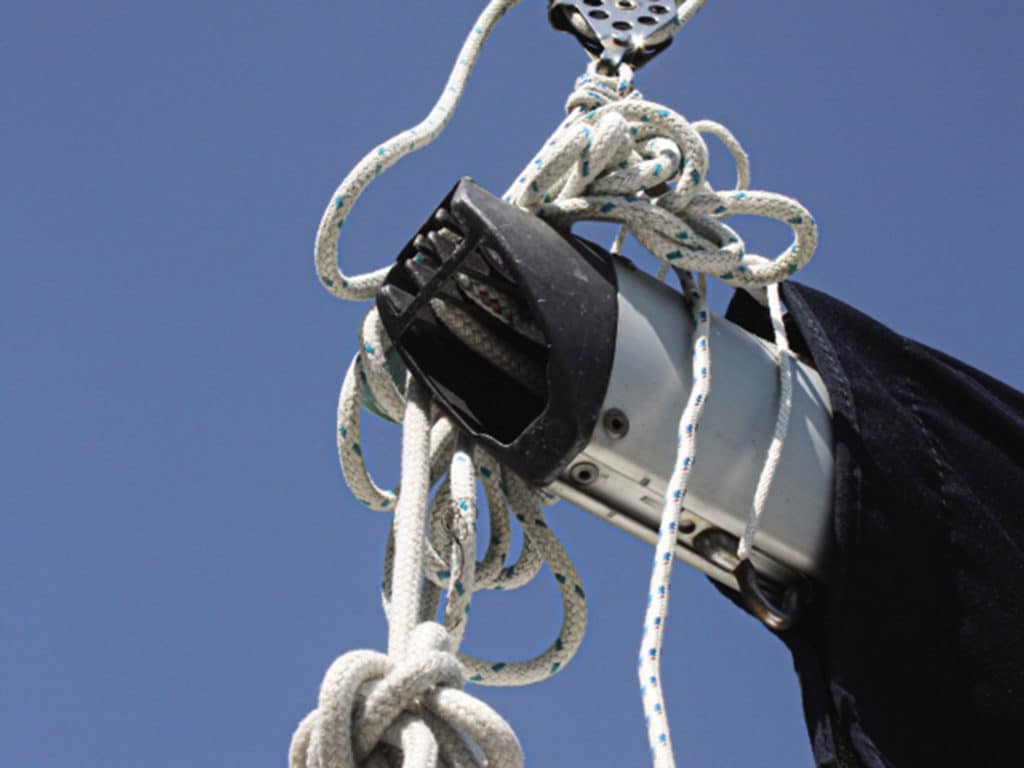
I don’t recommend mast bending to most cruisers because its proper application depends largely on the boat owner’s knowledge of the nature and dimensions of the curve built into the sail by the sailmaker. In a nutshell, though, when sailing to weather, mast bend will flatten the luff of the sail. When sailing off the wind or in light air, a straight mast will increase the curve or draft of the sail for better drive.
If your halyards are only general-purpose Dacron line (like those used for dock lines and sheets), as you tighten them, they will stretch and have little to no effect on sail shape with increased wind. Keep in mind that as windspeed increases, the draft of your sails will also increase, causing a greater heeling moment. The increased draft will also cause the sail luff to become fuller and reduce the ability to point upwind.
I really like limited-stretch and no-stretch halyards. They help reduce the sail draft near the luff from increasing when the wind builds. Limited-stretch halyards won’t stretch markedly when tightened in order to flatten the sail luffs. No-stretch or limited-stretch halyards might sound racy and will cost more, but the payoff is better performance, especially in strong winds. Good halyards are an easy fix that pay big dividends.
Cunninghams and Downhauls
Cunninghams and downhauls are essentially the same thing: Their function is to provide tension adjustment to the lower portion of the luff of a sail. A Cunningham, however, is more associated with the mainsail; downhauls are generally used with a headsail or staysail.
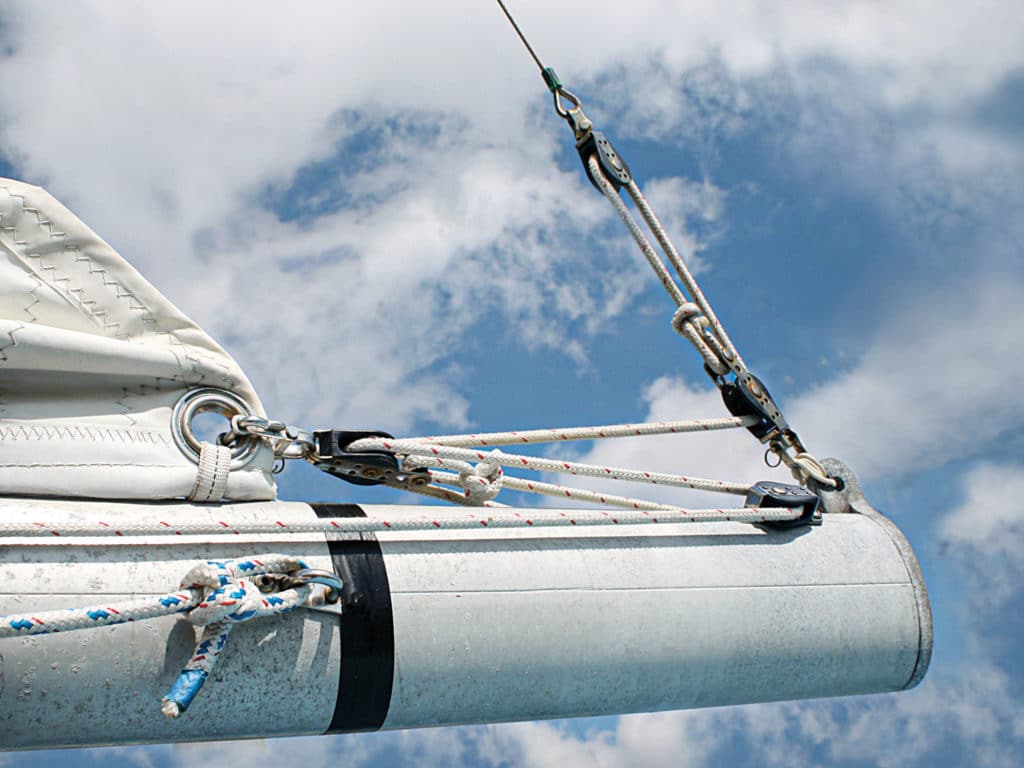
The purpose of Cunninghams and downhauls is to provide a rapid and convenient method of changing and distributing the tightness of a sail luff from tack to head, primarily on sails whose luff is in a mast slot, aluminum furling extrusion or attached to a stay with piston hanks; all of which cause friction that resists the luff from equalizing its load along its length. Since the halyard pulls upward from the top and the Cunningham pulls downward from slightly above the tack, the load in both directions equalizes the tension of the sail’s luff.
When you hoist a mainsail, there will often be about twice the tension on the luff above the spreaders than between the spreaders and the gooseneck. The load on the Cunningham is used to increase the lower luff tension. So, instead of cranking the halyard so tight that the winch is nearly torn off the mast or cabin top, raise the sail only until you begin to feel the luff load up, then tighten up the Cunningham until it feels about the same as the halyard. That’s the way your mainsail was designed and made, with about equal tension along the full length of the luff.
The cordage used as a downhaul or tack attachment for staysails and headsails, including those with roller-furling systems, should be set up as tackles that are adjustable under sail. The cord should be long enough to set up a 4-to-1 tackle, and cleated or tied so that rapid luff tension can be adjusted without a hassle, whether slacking off in light air or tightening in a heavier breeze.
Gaining Mechanical Advantage
When I bought my schooner, At Last , back in the mid-’70s, she had lots of line and blocks but not a single winch. I think that most of her previous sailing had been done by a crew of six or a smaller crew made up of 300-pound gorillas. At that time, I weighed only 135 pounds, and my partner, Katy, was about 15 pounds lighter. Neither of us were what you would call “husky.”
Sailing At Last in light air was not difficult, but when it blew over 8 knots, every evolution became quite physical. We learned the first rule of manpower pretty quickly: The more line we pulled to achieve any sail adjustment (main or foresail sheet trimming, gaff hoisting, etc.), the more power was developed and less personal exertion was required.
Yes, eventually we did install sheet winches for each of the headsail sheets, but not for the main or foresail halyards or sheets, outhauls, vangs or topping lifts. For those, we added blocks and line to each system. It was like multiplying our crew. Every sail-trim maneuver became markedly easier—but slower. So, if we at least doubled the line length by adding sheaves, we also multiplied the power by the same ratio (not deducting for friction) and reduced the hauling load by the same ratio.
The rule of tackles is straightforward: The number of moving parts equals the mechanical advantage (power ratio). Google “block and tackle mechanical advantages,” and you will find excellent graphic diagrams with their power ratios.

Leading Systems to the Cockpit
More and more boat owners want every sail-control line led to the cockpit. This invariably requires at least three additional blocks or sheaves to be added to most running-rigging systems, thus increasing friction as well as adding lots of line (I call it “spaghetti”) in or near the cockpit. In the case of reefing, leading all lines to the cockpit actually makes most reefing much more difficult and inefficient.
In 2009, my 28-foot Nikki won the Florida West Coast Boat of the Year award in a long series of races over several months’ time. Most wins occurred in extremely high winds because we had practiced reefing in under 45 seconds. That had become possible largely because of deftly efficient tackles, all kept within a single person’s reach. Only the main sheet went to the cockpit and was usually handled by the helmsman.
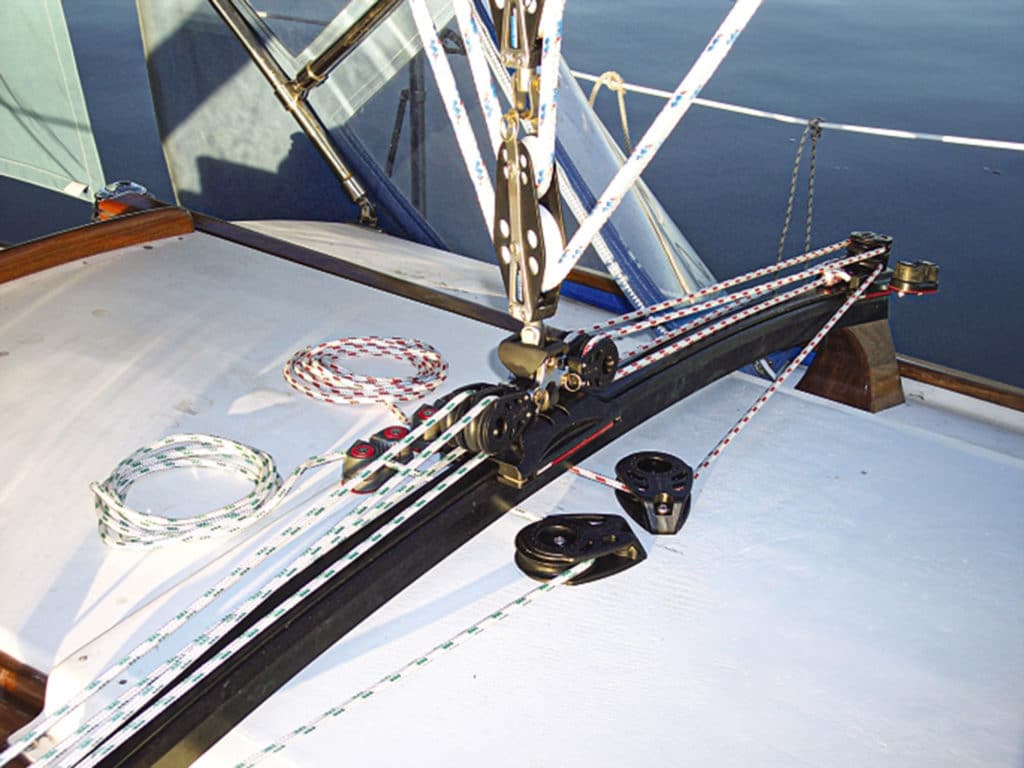
Mainsheets and Travelers
Thirty years ago, virtually all mainsheets were attached to the aft end of the boom and to a multisheave block on a short and mostly inefficient traveler at the stern of the boat. Because of the position of the traveler, its angle of effectiveness was fairly narrow, so when far off the wind (beam and broad reaches and running), the amount of downforce on the boom became little to negligible, rendering the traveler useless.
A double-legged mainsheet never accomplished its intended goal of acting like a traveler. Such a mainsheet always vectors the load to the longitudinal center of the boat on all points of sail regardless how far apart the lower blocks are spread. It was the racers who came up with the idea of moving the mainsheet to the approximate middle of the boom and down to a longer track and adjustable car (the traveler), usually just forward of the main companionway hatch on the cabin top. With this arrangement, the mainsheet becomes the major controller of both boom angle as well as mainsail twist by its increased downforce on the boom and sail.
The traveler car should be controlled by a port and starboard tackle of at least 3-to-1 advantage for boats up to 24 feet, 4-to-1 for boats up to 30 feet, and 5- to 6-to-1 for boats up to 34 feet and beyond. I also recommend the use of cam or clam cleats for all traveler control lines.
Racing sailors also came up with the idea of a boom vang attached to the forward portion of the boom at the upper end, and to a bale at the base of the mast at the lower end. This is what you usually see on most sailboats today. That simple arrangement was a giant leap forward in the area of mainsail-twist control. But almost indiscernible additional improvement seemed to occur. Nowadays, most boom vangs aren’t all that efficient and ought to be brought into this century.
The first improvement should be to pull downward on the boom vang line in order to pull down the boom. However, I rarely see a vang rigged this way, which means it loses about half of its power advantage. Most vangs I see are pulled upward or aft to exert a download on the boom, thus losing more power.
A really practical boom vang should have at least a snap shackle on the lower block so it can be quickly detached from the mast base and moved to a car on the genoa track or a hole in a perforated aluminum toe rail. This will allow the boom vang to exert much more of a vertical download. The more vertical the vang, the more downforce on the boom. Another benefit to the detachable boom vang is that the lower block can be brought forward of the mast and attached to a stout deck-pad eye or perforated toe rail so the boom vang can also act as a preventer when sailing downwind.
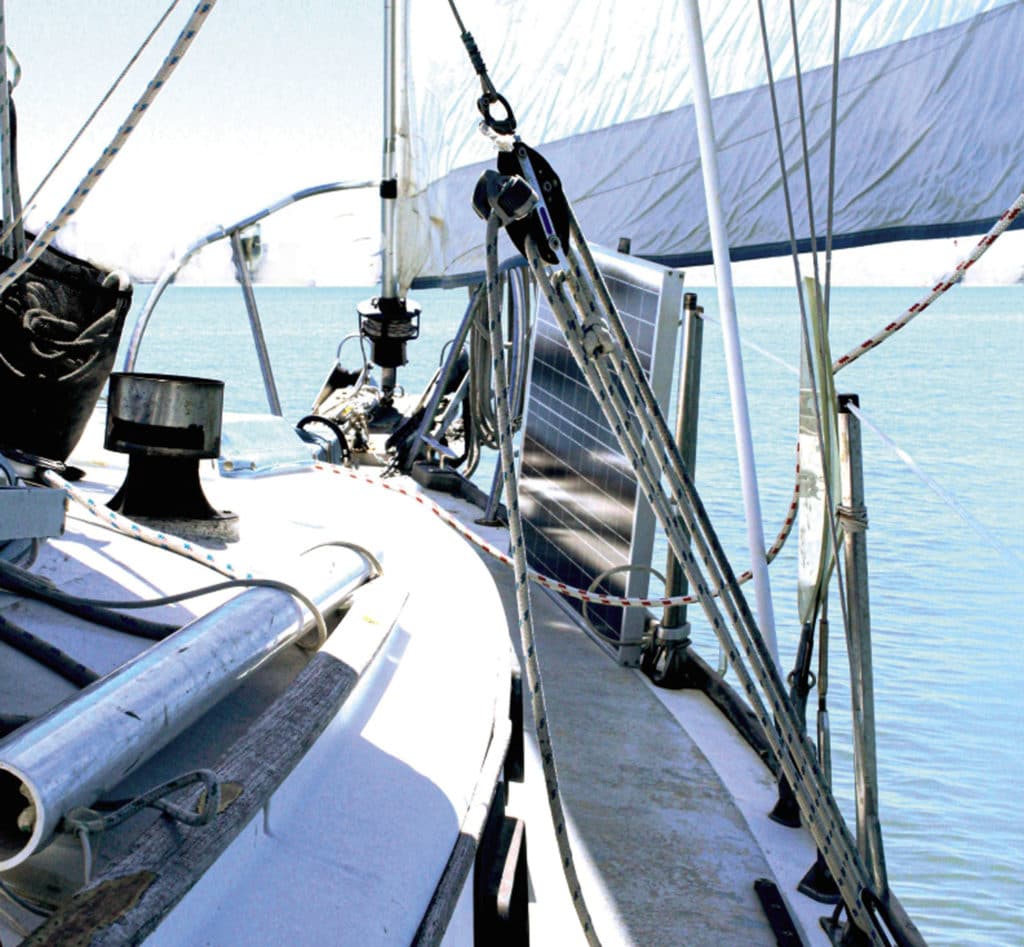
Doubling the power of the boom vang can be accomplished simply and easily with a small investment by adding a 2-by-1 cascade (also, again, called a Burton), which is a single 7-by-7-foot or 7-by-37-foot stainless cable run though a wire block on the boom with one end shackled to the vang bale at the mast base. The other end of the wire is fashioned with an eye to which the upper end of the vang tackle is attached. So if your vang tackle is 5-to-1 and the cascade is 2-to-1, your vang will become 10-to-1. Then by moving the lower end of the vang from the mast to the toe-rail eye, a dedicated deck-pad eye or a genoa-track car, you have doubled it again, all for about $40.
The vang that I have described is most efficient when sailing long distances without jibing or tacking, but if you’re simply afternoon daysailing around the bay, the vang would be more conveniently left attached to the bale at the mast base.
I have never seen a rigid boom vang that was routinely adjusted while under sail; they’re really only a boom support system while under power or tied up to a dock.
Main Boom Topping Lift
I put the topping lift in the same underused category with the main outhaul; too often it’s a bundle of knots at the end of the boom that have not been adjusted or adjustable in decades.
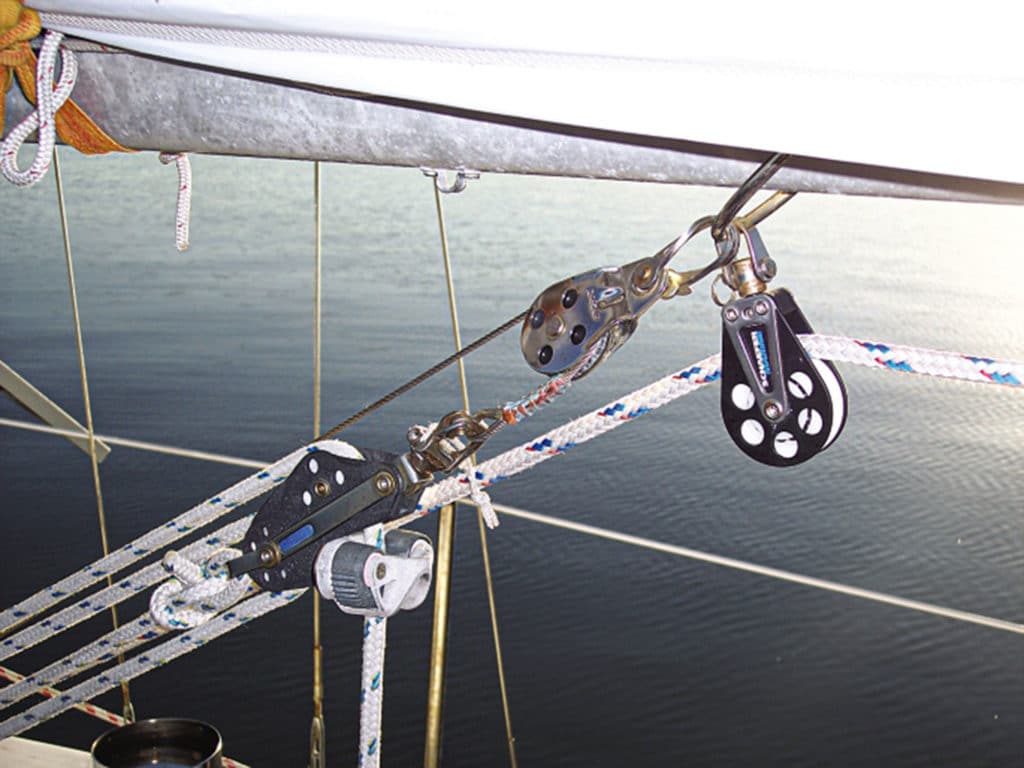
A proper topping lift is meant to raise and store the boom off the Bimini when not in use. When under sail, however, its purpose is to adjust the weight of the boom so it changes the sail twist in various wind conditions and points of sail. It works in the opposite direction of a boom vang; it pulls the boom upward while the vang pulls downward. Upward increases sail twist, and downward reduces it.
A topping lift should also be used to take the weight of the boom off the mains’l leech when putting in a reef, then tightened again while shaking out the reef. The topping lift should be adjustable on any point of sail, which translates into “reachable.” Also, lifting your outboard from your dinghy becomes a simple matter by using your boom vang tackle attached to the end of the boom, and “topping” the boom with the topping lift so the outboard can clear the aft pulpit and lifelines.
Backstay Adjusters
These are used to apply tension to the backstay, which is transferred to the headstay for the purpose of flattening the luff of the headsail…or slacking the backstay, thus also easing the headstay to add more draft to the jib or genoa, as would be desirable when off the wind. When closehauled and/or sailing in a stiff breeze, a flattened headsail is preferred to lessen the boat’s heeling moment and to allow the boat to point up a little closer to the wind. With a backstay adjuster, this can be done in a few seconds with an adequate tackle arrangement.
Adjusting a headstay is usually impossible while under sail with the headsail sheeted in tightly. There are special turnbuckles and hydraulic backstay adjusters that can be used while under sail, but they are not as rapid as the appropriate backstay tackle systems. When tightening the backstay, the mast is also slightly bent to help flatten the draft and remove the “cup” from the luff of the mainsail at the same time as the headsail. So double benefits are derived from one simple adjustment.
Making your boat perform better does not have to be, nor should it be, a lot of work. In reality, effective running-rigging systems will make sailing a lot less strenuous, as well as more enjoyable and rewarding. Your boat will look better and perform better, and teach you a lot about getting the most out of the wind while adding joy to your afternoons under the clouds.
Don’t avoid the possibilities. Embrace them.
Boat designer, builder, writer, illustrator and longtime CW contributor Bruce Bingham lives aboard his Cape Dory 28, Nikki , on Florida’s Gulf coast.
- More: deck hardware , How To , lines , print oct 2020 , rigging
- More How To

Grease the Wheels of Your Boat: A Guide to Proper Lubrication

A Bowsprit Reborn: A DIY Renovation Story

Rigging Redo: Our Switch to Synthetic

Top Tools for Sailboat Cruising: Must-Have Gear for 2024

Catalina Introduces the 6 Series

At Your Service

Galápagos: A Paradise Worth the Paperwork

Around Alone
- Digital Edition
- Customer Service
- Privacy Policy
- Terms of Use
- Email Newsletters
- Cruising World
- Sailing World
- Salt Water Sportsman
- Sport Fishing
- Wakeboarding
- AROUND THE SAILING WORLD
- BOAT OF THE YEAR
- Email Newsletters
- America’s Cup
- St. Petersburg
- Caribbean Championship
- Boating Safety
- Ultimate Boating Giveaway

Simple Ways to Optimize Running Rigging
- By Erik Shampain
- December 6, 2022
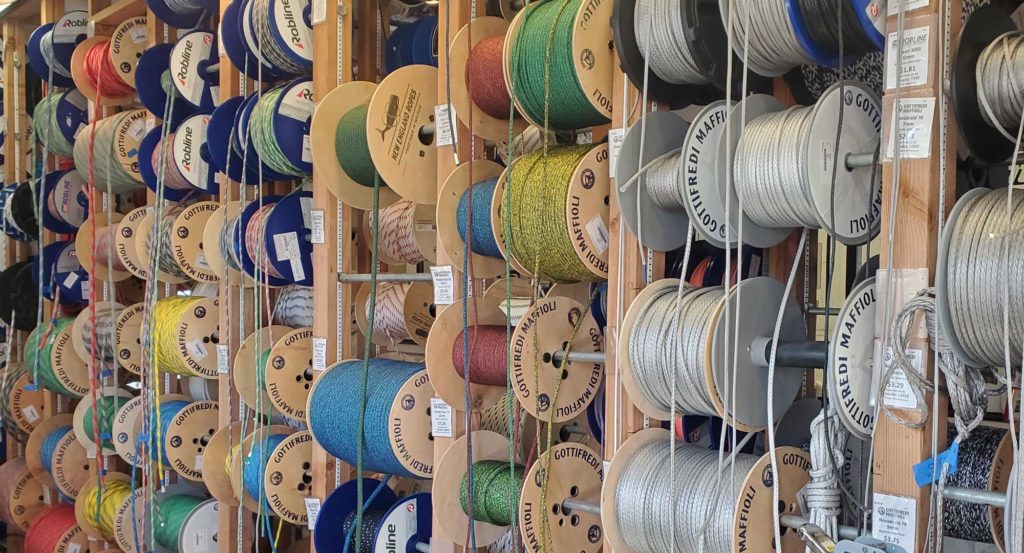
It’s easy to underestimate the benefits of good running rigging. There are many rope products on the market, and there is a time and a place for most of them. Let’s take a look at lines that need the most attention and why, as well as basic rules for using low-stretch line, using lightweight or tapered line where most beneficial and using rope that is easy to work with.
Let’s start up front with the headsail halyard. Luff tension greatly affects shape and thus performance of the jib or genoa, so having a halyard that is as low-stretch as possible is paramount. Saving a little weight aloft is also key, so find a lightweight rope as well. It’s a little against the norm, but for club racing boats that aren’t tapering their halyards, I really like some of the Vectran-cored ropes. Products like Samson’s Validator and New England Ropes V-100 are easy on the hands and easy to splice. For a little more grand-prixed tapered halyard, talk to our local rigger about using a DUX core, or other heat-set Dyneema, with a Technora-based cover. Lately, I’ve been using a lot of Marlow’s D12 MAX 78 and 99. Tapering the halyard saves weight aloft as well. I like soft shackles for jib halyards. There, weight savings aloft generally outweighs the little extra time a bowman needs to attach the sail. This is especially true in sprit boats where the jib is rarely removed from the headstay.
Pro Tip: When not racing, use a halyard leader to pull the halyards to the top of the mast, getting the tapered section out of the sun. For extra protection, put all the halyard tails into an old duffle bag at the base of the mast when not in use.
For jib sheets, I follow the same low-stretch rule as the jib halyard. I don’t want the jib sheet to stretch at all when a puff hits. On boats with overlapping genoas, I don’t generally recommend tapering the line because by the time the genoa is trimmed all the way in, the clew is really close to the block. On boats with non-overlapping jibs, tapering is an easy way to save a little weigh. Plus, the smaller core size runs through across the boat more easily in tacks. I’ve been using soft shackles on the jib or genoa sheets for a while now, mostly because they don’t beat the mast up during tacks. There also a bit “softer” when they hit you.
What about jib lead adjusters? There are a couple of approaches here. Some believe a little stretch is okay, as it allows the lead to rock aft a couple of millimeters in puffs, which twists the top of the jib off slightly. This can be fast as it helps the boat transition through puffs and lulls. I am a fan of this as long as it isn’t too stretchy. I use low-stretch Dyneema for the gross part of the purchase and then a friendlier-on-the-hands rope for the fine tune side, the part that is being handled. Samson Warpspeed or New England Enduro Braid work well.
Spinnaker sheets are a fun one. They should be relatively low-stretch but not necessarily the lowest stretch. I’ve found that near-zero stretch lines can wreak havoc on people and hardware when flogging or when the chute is collapsing. They have to be easy on the hands, as they are the most moved sheets on the boat, and they should be tapered as far as you can get away with. Tapering saves weigh, which is very important in keeping the spinnaker clew lifting up, especially in light air when sails want to droop. Again, Samson Warpseed and New England Enduro braid are good. For boats with grinders or even small boats with no winches, a cover that is a little grippier or stronger is good. Most Technora-based covers work well for this purpose.
Pro Tip No. 2: On boats with asymmetric spinnakers I like to connect the ‘Y’ sheet with a soft shackle that also goes to the spinnaker. This saves weight. I sew a Velcro strip around one part of the shackle (see picture) so that the soft shackle stays with the ‘Y’ sheet when open. This is beneficial when you have to quickly disconnect or re-run a sheet, replace one sheet, or even quickly replace a soft shackle. On most boats I will keep one spare spinnaker sheet with soft shackle down below as a spare side, changing sheet, or code zero sheet. On boats with a symmetric spinnaker, we’ll splice the spinnaker sheet to the afterguy shackle to save weight in the clew.
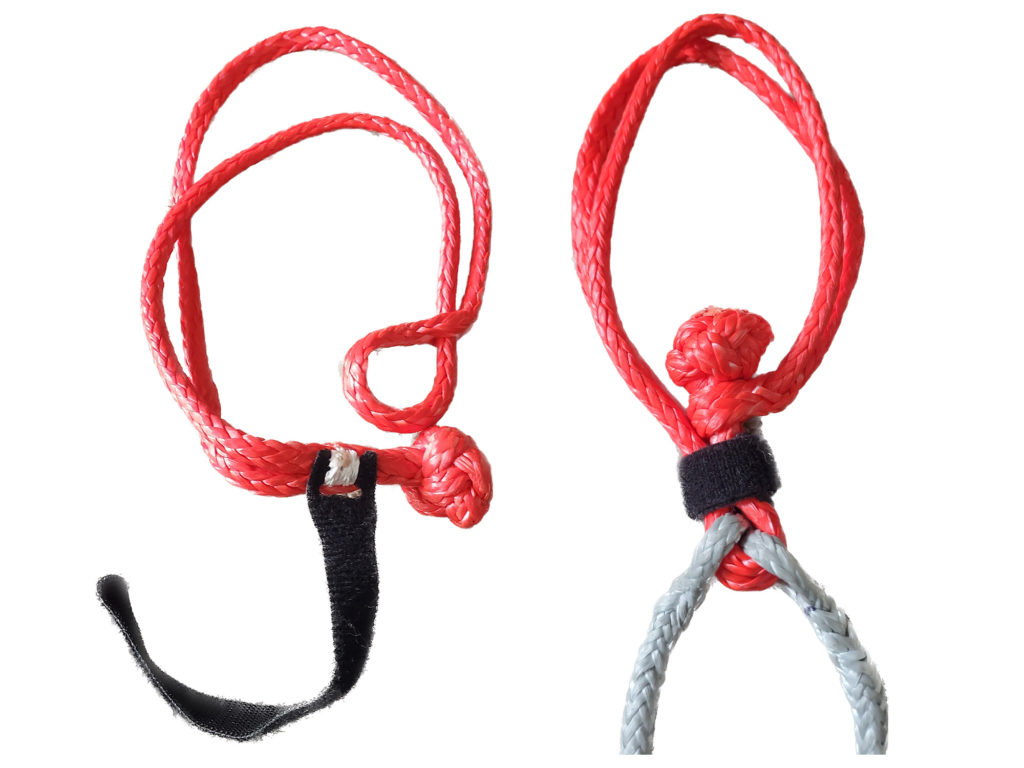
The spinnaker halyard has a couple of more options. For halyards supporting code zeros, zero stretch is important. The same principals we used when talking about the jib halyard apply here. For boats without code zeros, I like a little softer halyard with a touch of give. Those tend to run though sheaves better without kinking. Enduro and Warpseed are good for these applications. Most bowmen prefer a shackle that is quick and easy to open. Since a happy bowman is a good thing, I will generally use an appropriately sized Tylaska shackle or dogbone style shackle for those halyards
For symmetric spinnaker boats, the afterguy must be very low stretch line. I go back to products like covered Vectran for club-level sheets. I also find that afterguys generally last longer if I don’t taper them. When the pole is squared back, the afterguys often run pretty hard across the lifelines, producing a fair amount of chafe. Covered lines help minimize that.
For tack lines on asymmetric boats, I like matching spinnaker halyard material on club-level boats and using low-stretch heat-set Dyneema cores with a chafe resistant cover for grand prix and sportboats.
Like the headsail halyard, a near-zero stretch main halyard is also important. For me the same line applications apply. Keep the mainsail head at full hoist at all costs. I will often match the material I use for main and jib halyards.
It is most important that the main sheet sit in the winch jaws well and tail perfectly. This is a strict combination of sizing and pliability. I’ve found that the New England Ropes Enduro braid and the Samson Warpspeed II work well for club-level boats with and without winches. For a slightly longer lasting product with some chafe resistance, try any manufacturer’s Technora-based covered line.
The most under-appreciated and least thought about rope on a boat always seems to be the outhaul. The last thing you want when the wind comes up is for your mainsail to get fuller. Spend some time here and use very low-stretch rope. Most heat-set Dyneemas will work great for the gross tune side of the purchase.
Pro Tip No. 3: Minimizing the last purchase of an outhaul greatly increases the ease with which it can be pulled on or eased out. For example, you could have a 6-to-1 to one pulling a 2-to-1, pulling a 2-to-1 and then to the sail for a 24-to-1. Or, better yet, you could have a 4-to-1 pulling a 3-to-1, pulling a 2-to-1 for a 24-to-1 as well. The latter example will work better. Trust me. I’m a doctor . . . sort of. We built an outhaul like this on a SC50. I can pull it on upwind in heavy air with little problem. On the flip side, in light air downwind, it eases just as well. In fact, if memory serves me right, we did a 3-to-1 in the end rather than the 4-to-1 for a total of 18-to-1 and it worked well.
Runners and backstays should have extremely low stretch. A pumping mast and sagging forestay in breeze isn’t fast. Runner tails, like the mainsheet, should perfectly fit the winch and tail easily without kinking.
With so many options readily on the market now, it can be very confusing. I always recommend contacting your local rigger if you have any questions at all about what rope is right for you. They’ll get you pulling in the right direction.
- More: cordage , running rigging , sailboat gear
Comfort Rules with Mustang’s Minimalist Buoyancy Aid

Smart Polars Are Here

Reproofing May Be Required

Wingfoiling Gear: A Beginner’s Guide

Mistakes And Misfires On the Final Day of Cup’s Preliminary Regatta

Emirates Team New Zealand Remain the Bullies of Barcelona

Start-Box Sparring in Barcelona on Day 2 of Preliminary Regatta

Real-time Wind Overlay Feature Added to Cup Broadcast

- Digital Edition
- Customer Service
- Privacy Policy
- Terms of Use
- Cruising World
- Sailing World
- Salt Water Sportsman
- Sport Fishing
- Wakeboarding
Sailboat Parts Explained: Illustrated Guide (with Diagrams)
When you first get into sailing, there are a lot of sailboat parts to learn. Scouting for a good guide to all the parts, I couldn't find any, so I wrote one myself.
Below, I'll go over each different sailboat part. And I mean each and every one of them. I'll walk you through them one by one, and explain each part's function. I've also made sure to add good illustrations and clear diagrams.
This article is a great reference for beginners and experienced sailors alike. It's a great starting point, but also a great reference manual. Let's kick off with a quick general overview of the different sailboat parts.
General Overview
The different segments
You can divide up a sailboat in four general segments. These segments are arbitrary (I made them up) but it will help us to understand the parts more quickly. Some are super straightforward and some have a bit more ninja names.
Something like that. You can see the different segments highlighted in this diagram below:
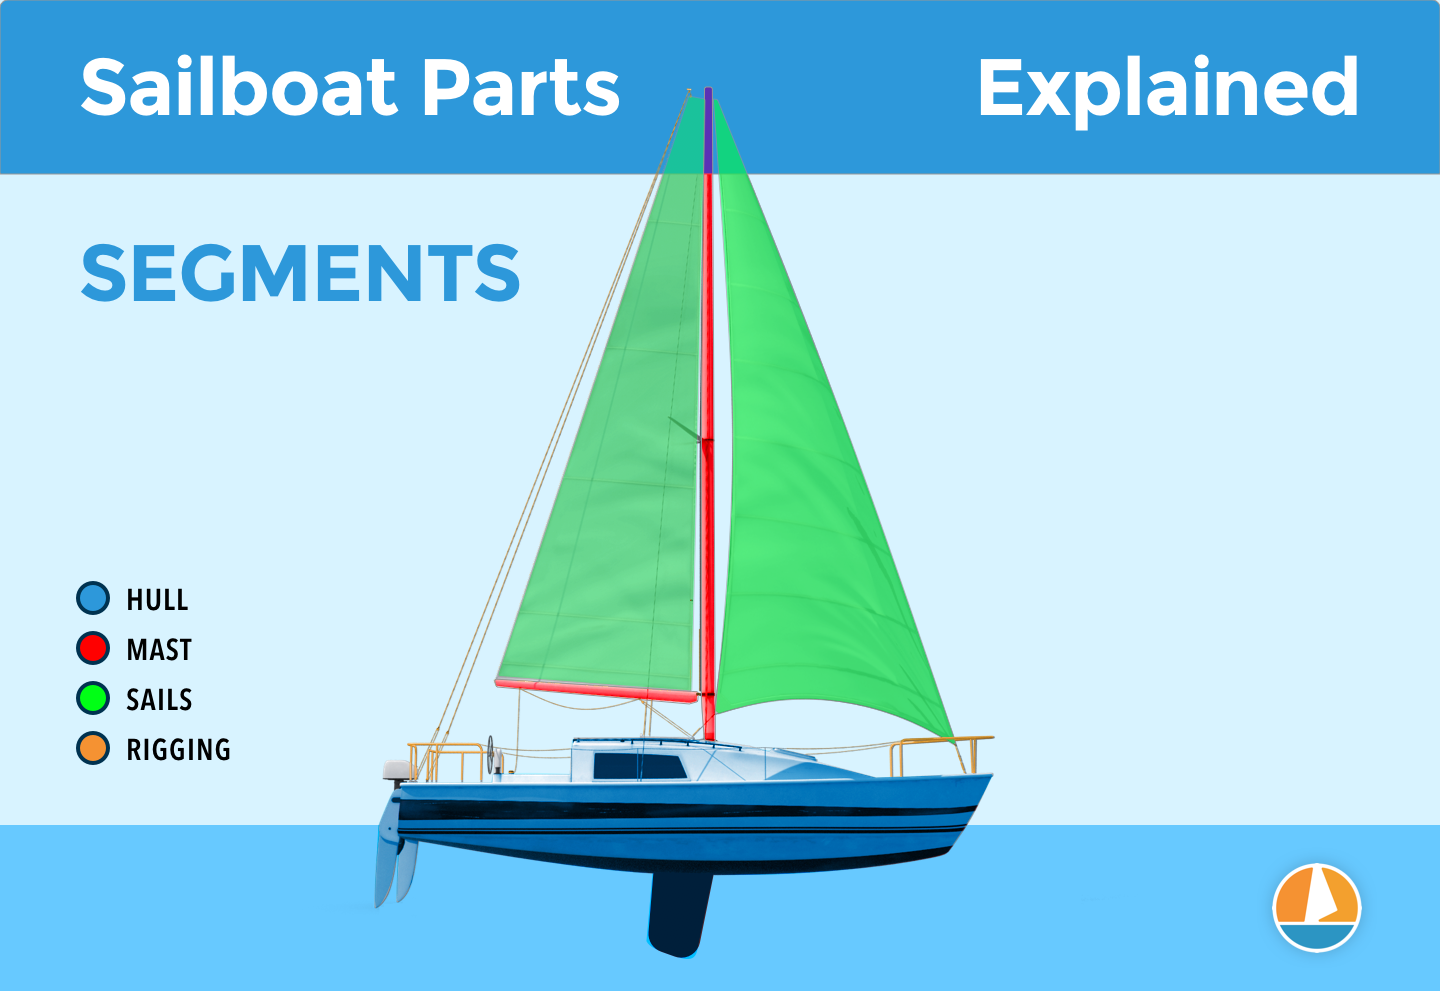
The hull is what most people would consider 'the boat'. It's the part that provides buoyancy and carries everything else: sails, masts, rigging, and so on. Without the hull, there would be no boat. The hull can be divided into different parts: deck, keel, cabin, waterline, bilge, bow, stern, rudder, and many more.
I'll show you those specific parts later on. First, let's move on to the mast.

Sailboats Explained
The mast is the long, standing pole holding the sails. It is typically placed just off-center of a sailboat (a little bit to the front) and gives the sailboat its characteristic shape. The mast is crucial for any sailboat: without a mast, any sailboat would become just a regular boat.
I think this segment speaks mostly for itself. Most modern sailboats you see will have two sails up, but they can carry a variety of other specialty sails. And there are all kinds of sail plans out there, which determine the amount and shape of sails that are used.
The Rigging
This is probably the most complex category of all of them.
Rigging is the means with which the sails are attached to the mast. The rigging consists of all kinds of lines, cables, spars, and hardware. It's the segment with the most different parts.
The most important parts
If you learn anything from this article, here are the most important parts of any sailboat. You will find all of these parts in some shape or form on almost any sailboat.
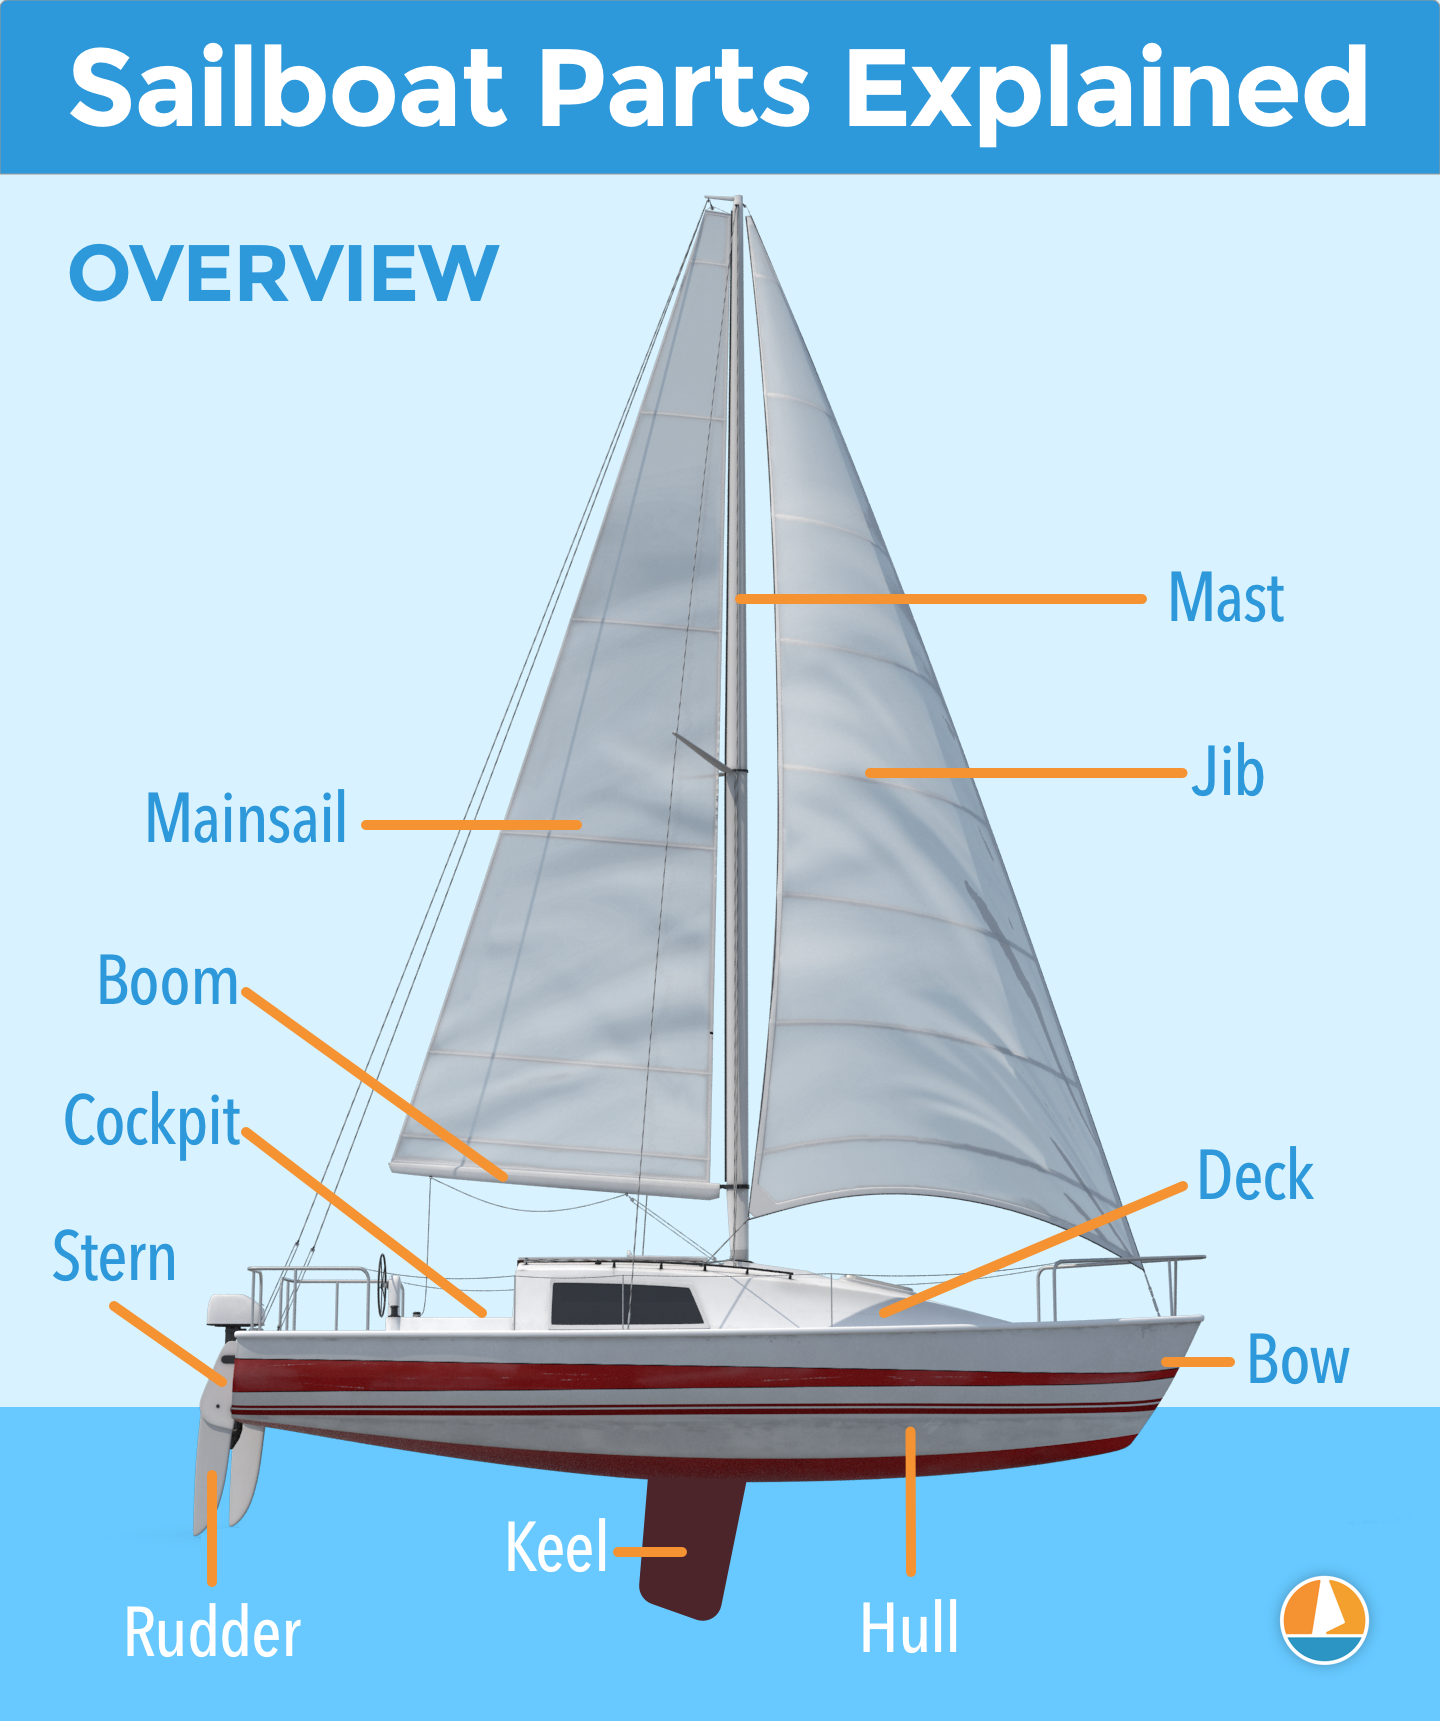
Okay, we now have a good starting point and a good basic understanding of the different sailboat parts. It's time for the good stuff. We're going to dive into each segment in detail.
Below, I'll go over them one by one, pointing out its different parts on a diagram, listing them with a brief explanation, and showing you examples as well.
After reading this article, you'll recognize every single sailboat part and know them by name. And if you forget one, you're free to look it up in this guide.
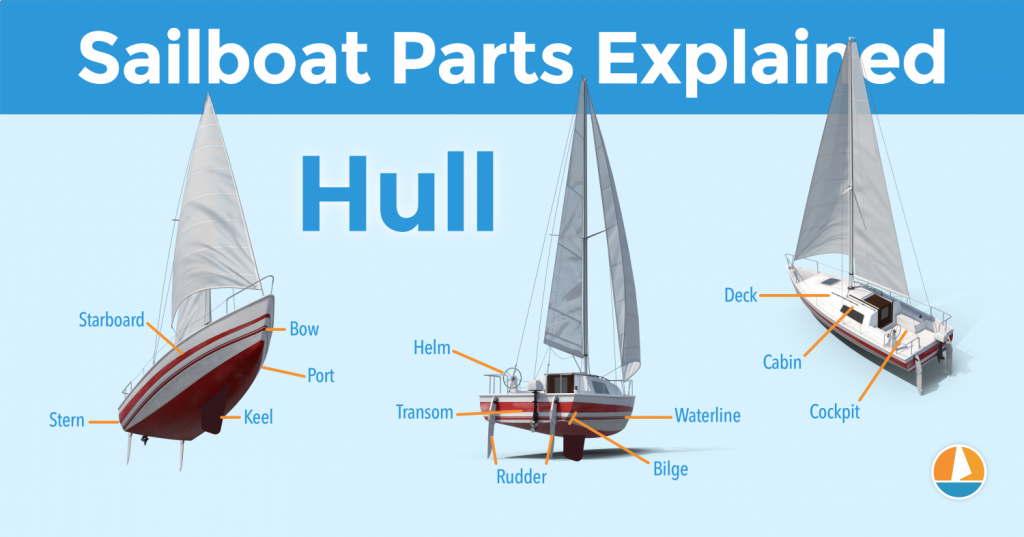
On this page:
The hull is the heart of the boat. It's what carries everything: the mast, the sails, the rigging, the passengers. The hull is what provides the sailboat with its buoyancy, allowing it to stay afloat.
Sailboats mostly use displacement hulls, which is a shape that displaces water when moving through it. They are generally very round and use buoyancy to support its own weight. These two characteristics make sure it is a smooth ride.
There are different hull shapes that work and handle differently. If you want to learn more about them, here's the Illustrated Guide to Boat Hull Types (with 11 Examples ). But for now, all we need to know is that the hull is the rounded, floating part of any sailboat.
Instead of simply calling the different sides of a hull front, back, left and right , we use different names in sailing. Let's take a look at them.
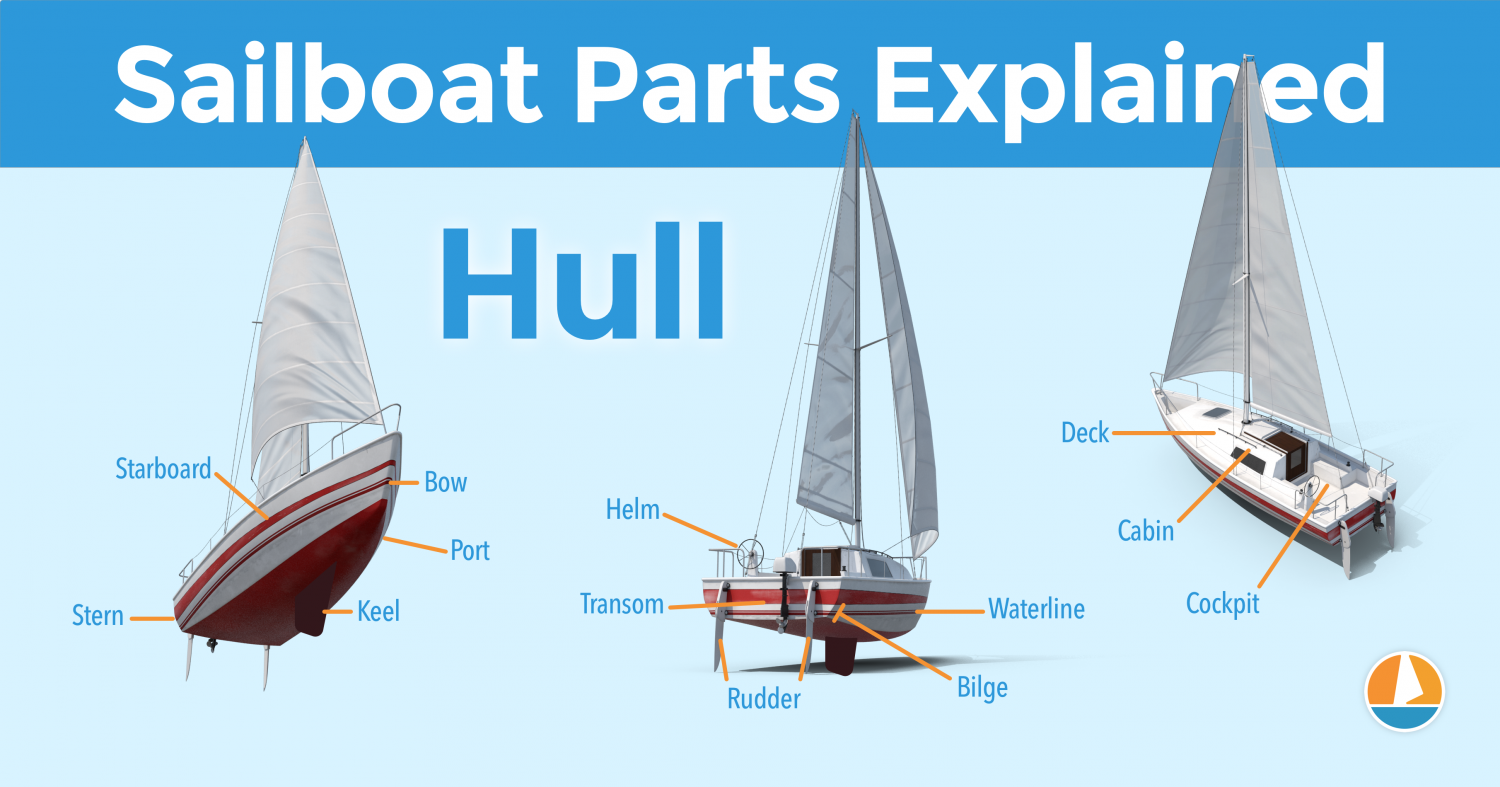
The bow is the front part of the hull. It's simply the nautical word for 'front'. It's the pointy bit that cuts through the water. The shape of the bow determines partially how the boat handles.
The stern is the back part of the hull. It's simply the nautical word for 'back'. The shape of the stern partially determines the stability and speed of the boat. With motorboats, the stern lies deep inside the water, and the hull is flatter aft. Aft also means back. This allows it to plane, increasing the hull speed. For sailboats, stability is much more important, so the hull is rounded throughout, increasing its buoyancy and hydrodynamic properties.
The transom is the backplate of the boat's hull. It's the most aft (rear) part of the boat.
Port is the left side of a sailboat.
Starboard is the right side of a sailboat
The bilges are the part where the bottom and the sides of the hull meet. On sailboats, these are typically very round, which helps with hydrodynamics. On powerboats, they tend to have an angle.
The waterline is the point where the boat's hull meets the water. Generally, boat owners paint the waterline and use antifouling paint below it, to protect it from marine growth.
The deck is the top part of the boat's hull. In a way, it's the cap of the boat, and it holds the deck hardware and rigging.
Displacement hulls are very round and smooth, which makes them very efficient and comfortable. But it also makes them very easy to capsize: think of a canoe, for example.
The keel is a large fin that offsets the tendency to capsize by providing counterbalance. Typically, the keel carries ballast in the tip, creating a counterweight to the wind's force on the sails.
The rudder is the horizontal plate at the back of the boat that is used to steer by setting a course and maintaining it. It is connected to the helm or tiller.
Tiller or Helm
- The helm is simply the nautical term for the wheel.
- The tiller is simply the nautical term for the steering stick.
The tiller or helm is attached to the rudder and is used to steer the boat. Most smaller sailboats (below 30') have a tiller, most larger sailboats use a helm. Large ocean-going vessels tend to have two helms.
The cockpit is the recessed part in the deck where the helmsman sits or stands. It tends to have some benches. It houses the outside navigation and systems interfaces, like the compass, chartplotter, and so on. It also houses the mainsheet traveler and winches for the jib. Most boats are set up so that the entire vessel can be operated from the cockpit (hence the name). More on those different parts later.
Most larger boats have some sort of roofed part, which is called the cabin. The cabin is used as a shelter, and on cruising sailboats you'll find the galley for cooking, a bed, bath room, and so on.
The mast is the pole on a sailboat that holds the sails. Sailboats can have one or multiple masts, depending on the mast configuration. Most sailboats have only one or two masts. Three masts or more is less common.
The boom is the horizontal pole on the mast, that holds the mainsail in place.
The sails seem simple, but actually consist of many moving parts. The parts I list below work for most modern sailboats - I mean 90% of them. However, there are all sorts of specialty sails that are not included here, to keep things concise.
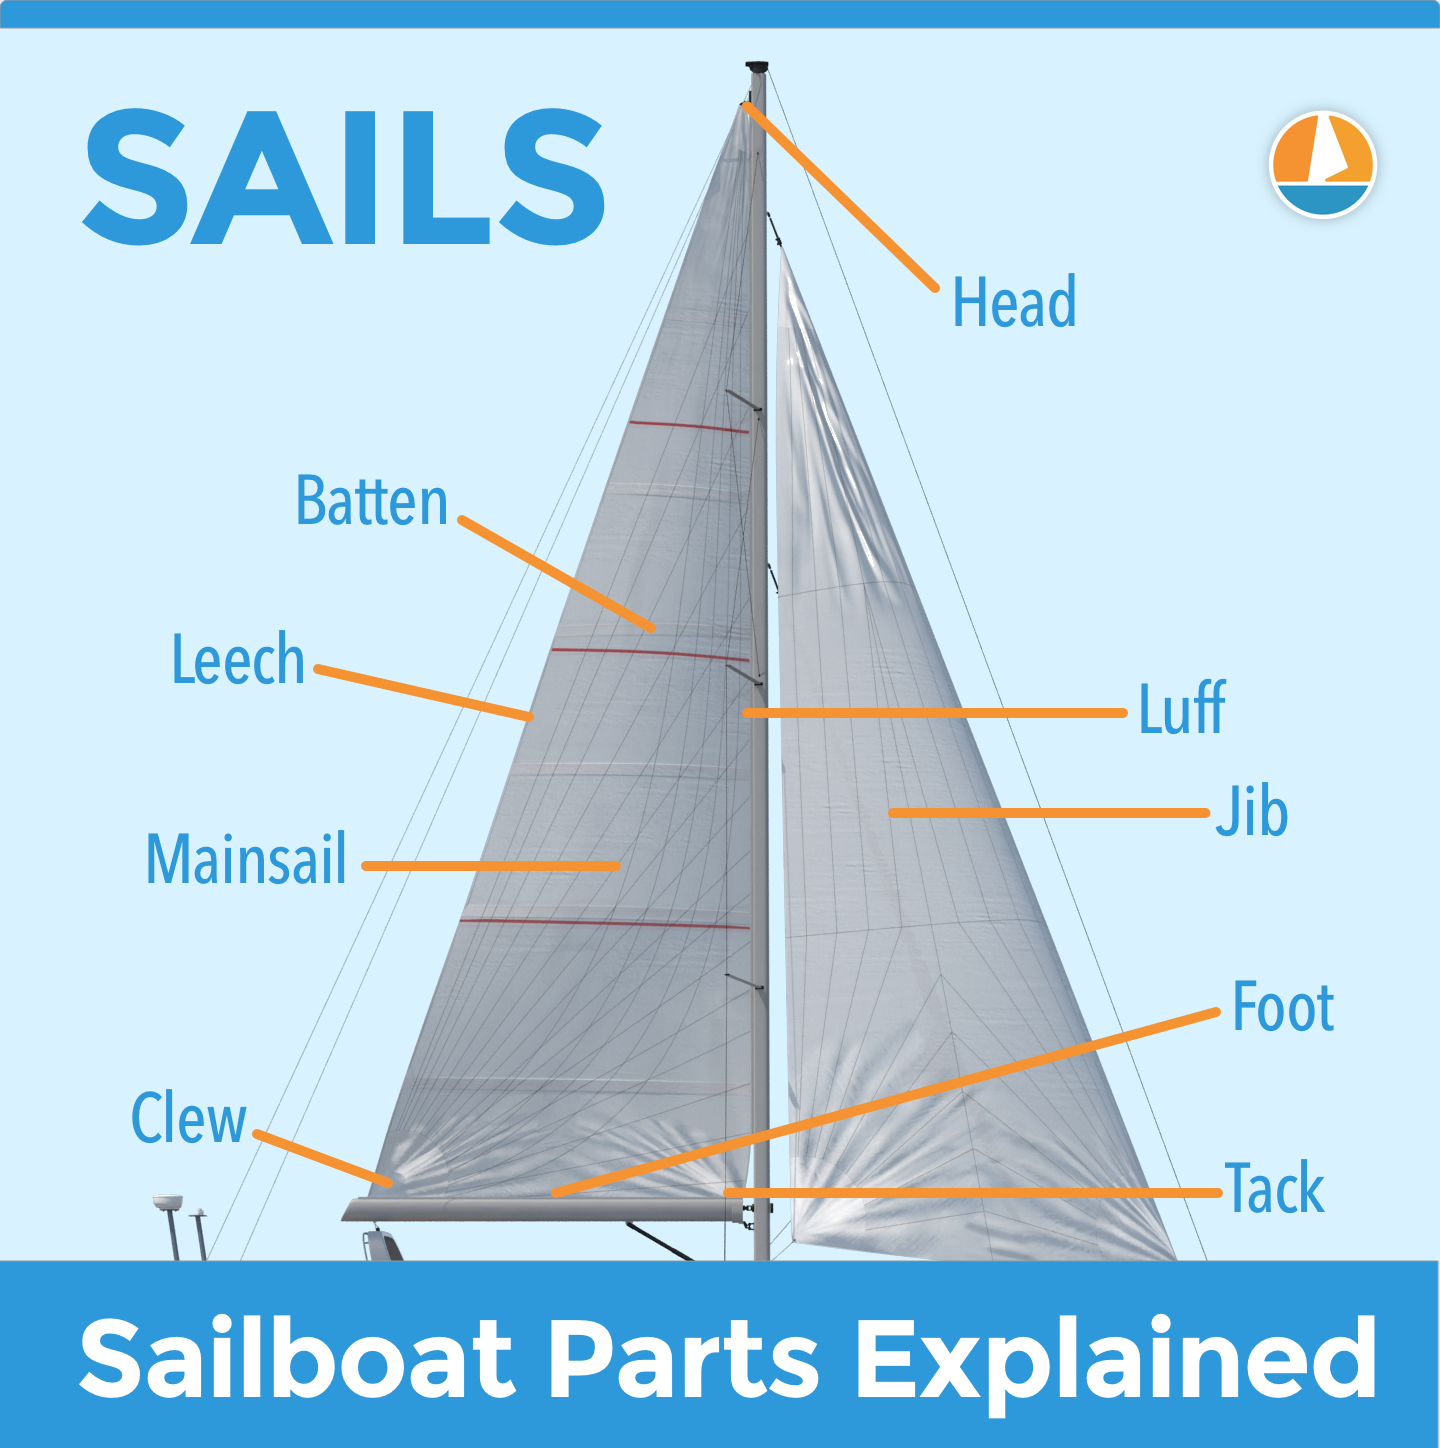
The mainsail is the largest sail on the largest mast. Most sailboats use a sloop rigging (just one mast with one bermuda mainsail). In that case, the main is easy to recognize. With other rig types, it gets more difficult, since there can be multiple tall masts and large sails.
If you want to take a look at the different sail plans and rig types that are out there, I suggest reading my previous guide on how to recognize any sailboat here (opens in new tab).
Sail sides:
- Leech - Leech is the name for the back side of the sail, running from the top to the bottom.
- Luff - Luff is the name for the front side of the sail, running from the top to the bottom.
- Foot - Foot is the name for the lower side of the sail, where it meets the boom.
Sail corners:
- Clew - The clew is the lower aft (back) corner of the mainsail, where the leech is connected to the foot. The clew is attached to the boom.
- Tack - The tack is the lower front corner of the mainsail
- Head - The head is the top corner of the mainsail
Battens are horizontal sail reinforcers that flatten and stiffen the sail.
Telltales are small strings that show you whether your sail trim is correct. You'll find telltales on both your jib and mainsail.
The jib is the standard sized headsail on a Bermuda Sloop rig (which is the sail plan most modern sailboats use).
As I mentioned: there are all kinds, types, and shapes of sails. For an overview of the most common sail types, check out my Guide on Sail Types here (with photos).
The rigging is what is used to attach your sails and mast to your boat. Rigging, in other words, mostly consists of all kinds of lines. Lines are just another word for ropes. Come to think of it, sailors really find all kinds of ways to complicate the word rope ...
Two types of rigging
There are two types of rigging: running and standing rigging. The difference between the two is very simple.
- The running rigging is the rigging on a sailboat that's used to operate the sails. For example, the halyard, which is used to lower and heave the mainsail.
- The standing rigging is the rigging that is used to support the mast and sail plan.
Standing Rigging
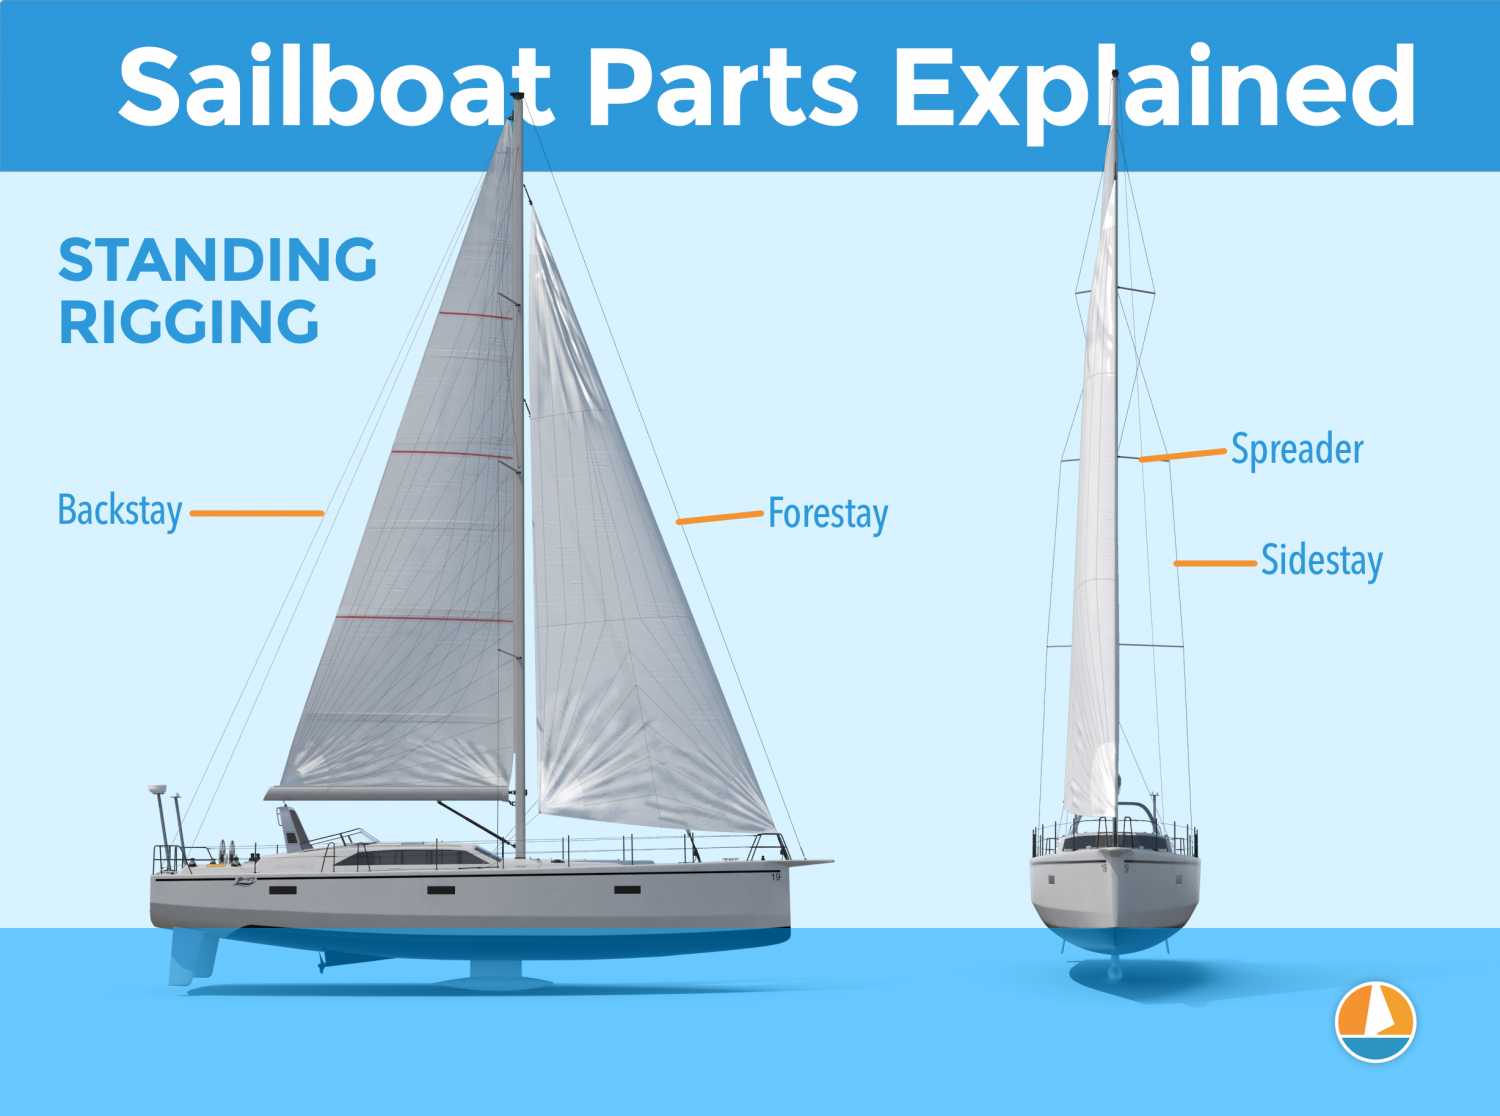
Here are the different parts that belong to the standing rigging:
- Forestay or Headstay - Line or cable that supports the mast and is attached to the bow of the boat. This is often a steel cable.
- Backstay - Line or cable that supports the mast and is attached to the stern of the boat. This is often a steel cable.
- Sidestay or Shroud - Line or cable that supports the mast from the sides of the boat. Most sailboats use at least two sidestays (one on each side).
- Spreader - The sidestays are spaced to steer clear from the mast using spreaders.
Running Rigging: different words for rope
Ropes play a big part in sailing, and especially in control over the sails. In sailboat jargon, we call ropes 'lines'. But there are some lines with a specific function that have a different name. I think this makes it easier to communicate with your crew: you don't have to define which line you mean. Instead, you simply shout 'mainsheet!'. Yeah, that works.
Running rigging consists of the lines, sheets, and hardware that are used to control, raise, lower, shape and manipulate the sails on a sailboat. Rigging varies for different rig types, but since most sailboats are use a sloop rig, nearly all sailboats use the following running rigging:
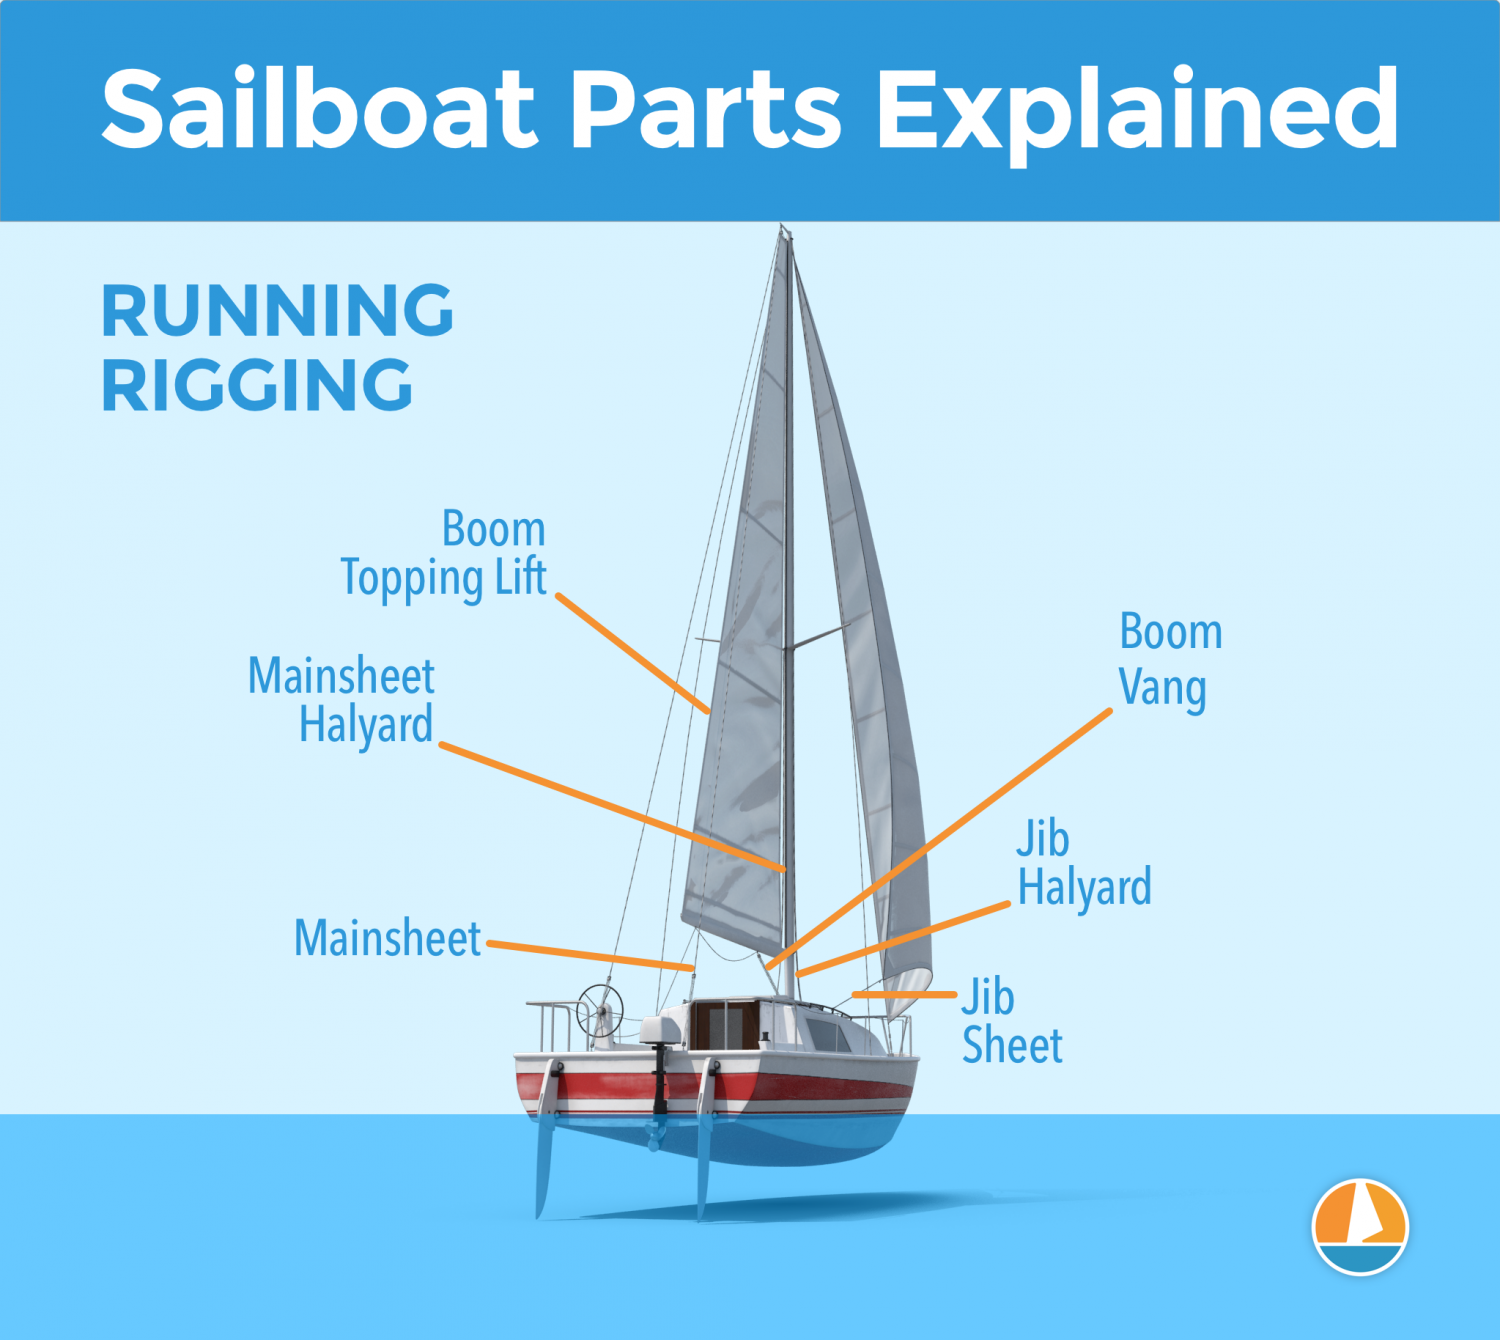
- Halyards -'Halyard' is simply the nautical name for lines or ropes that are used to raise and lower the mainsail. The halyard is attached to the top of the mainsail sheet, or the gaffer, which is a top spar that attaches to the mainsail. You'll find halyards on both the mainsail and jib.
- Sheets - 'Sheet' is simply the nautical term for lines or ropes that are used to set the angle of the sail.
- Mainsheet - The line, or sheet, that is used to set the angle of the mainsail. The mainsheet is attached to the Mainsheet traveler. More on that under hardware.
- Jib Sheet - The jib mostly comes with two sheets: one on each side of the mast. This prevents you from having to loosen your sheet, throwing it around the other side of the mast, and tightening it. The jib sheets are often controlled using winches (more on that under hardware).
- Cleats are small on-deck hooks that can be used to tie down sheets and lines after trimming them.
- Reefing lines - Lines that run through the mainsail, used to put a reef in the main.
- The Boom Topping Lift is a line that is attached to the aft (back) end of the boom and runs to the top of the mast. It supports the boom whenever you take down the mainsail.
- The Boom Vang is a line that places downward tension on the boom.
There are some more tensioning lines, but I'll leave them for now. I could probably do an entire guide on the different sheets on a sailboat. Who knows, perhaps I'll write it.
This is a new segment, that I didn't mention before. It's a bit of an odd duck, so I threw all sorts of stuff into this category. But they are just as important as all the other parts. Your hardware consists of cleats, winches, traveler and so on. If you don't know what all of this means, no worries: neither did I. Below, you'll find a complete overview of the different parts.
Deck Hardware
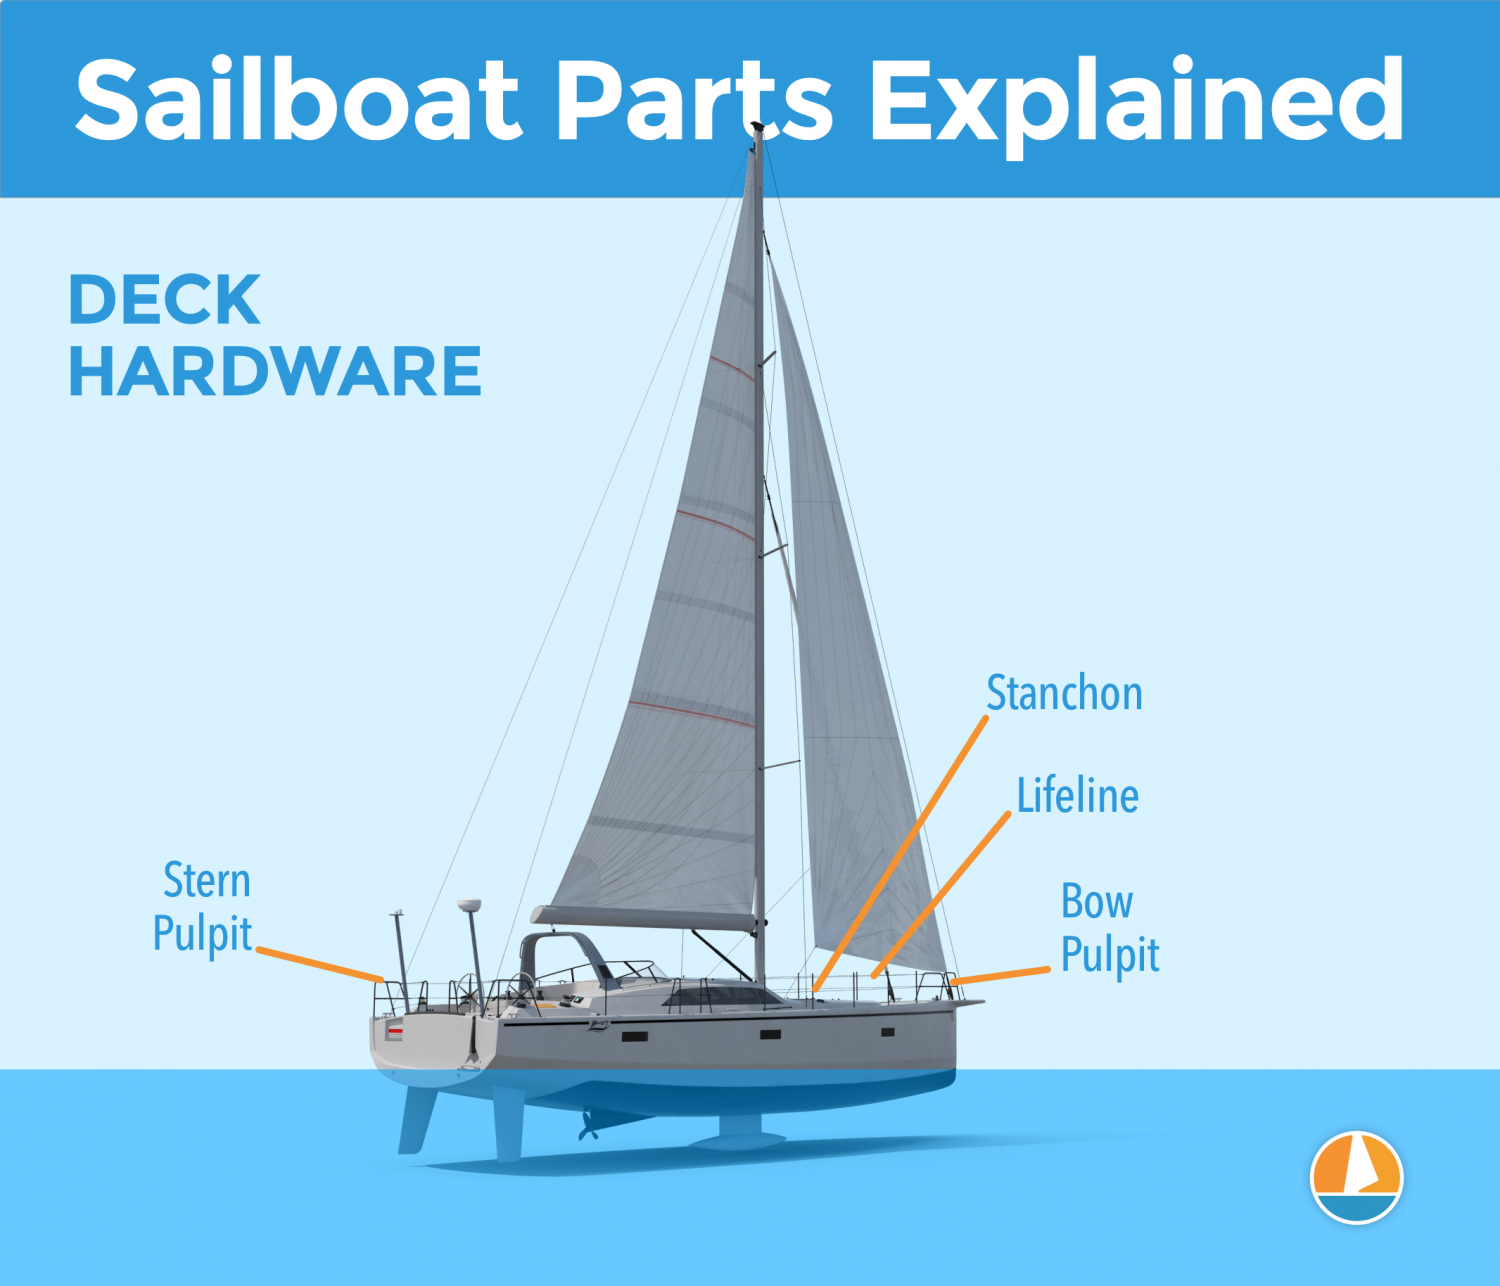
Just a brief mention of the different deck hardware parts:
- Pulpits are fenced platforms on the sailboat's stern and bow, which is why they are called the bow pulpit and stern pulpit here. They typically have a solid steel framing for safety.
- Stanchons are the standing poles supporting the lifeline , which combined for a sort of fencing around the sailboat's deck. On most sailboats, steel and steel cables are used for the stanchons and lifelines.
Mainsheet Traveler
The mainsheet traveler is a rail in the cockpit that is used to control the mainsheet. It helps to lock the mainsheet in place, fixing the mainsails angle to the wind.
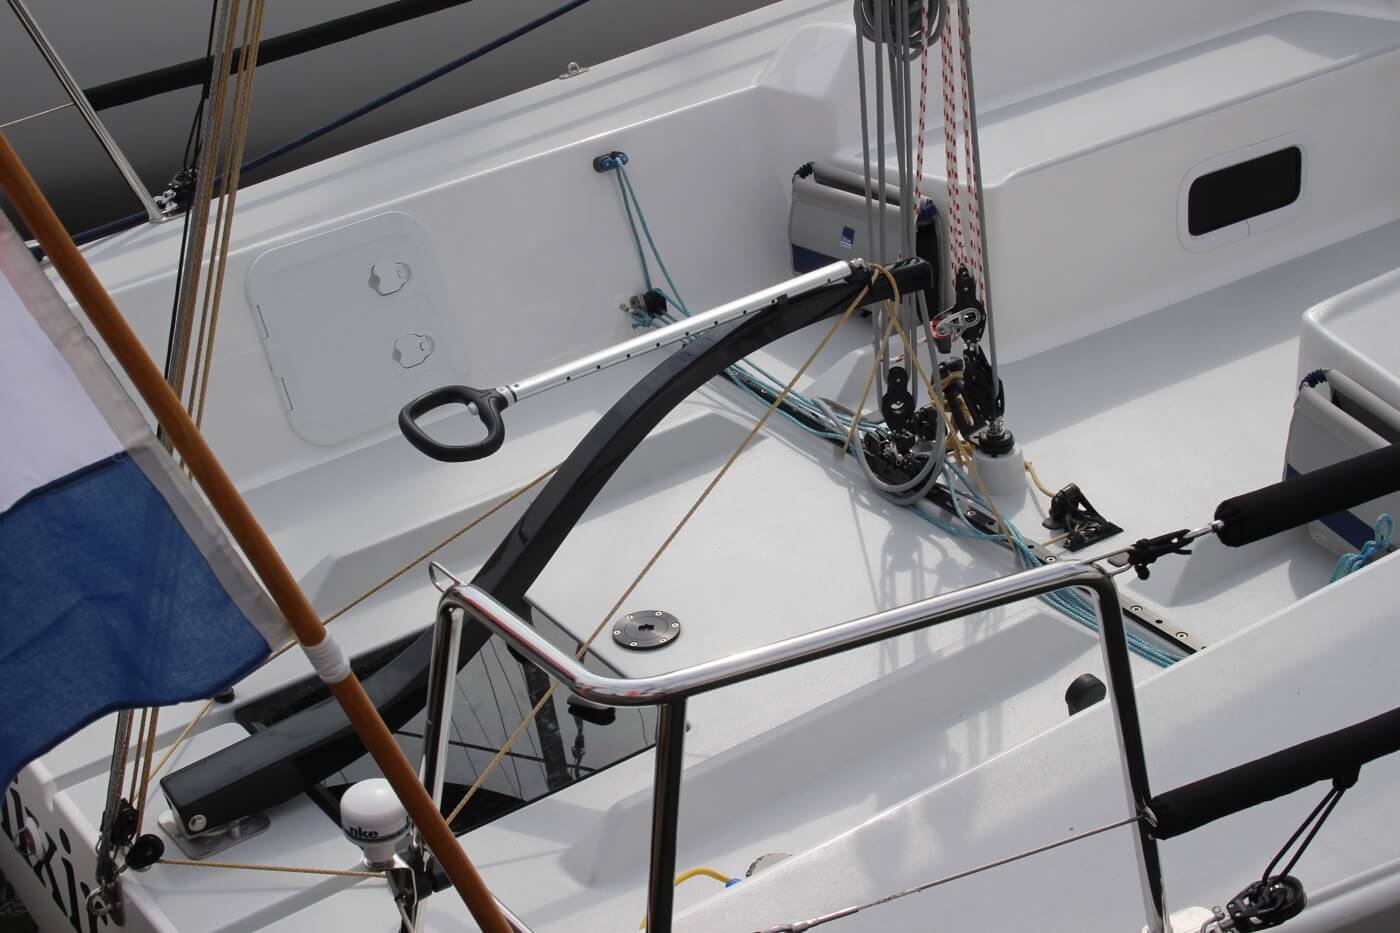
If you're interested in learning more about how to use the mainsheet traveler, Matej has written a great list of tips for using your mainsheet traveler the right way . It's a good starting point for beginners.
Winches are mechanical or electronic spools that are used to easily trim lines and sheets. Most sailboats use winches to control the jib sheets. Modern large sailing yachts use electronic winches for nearly all lines. This makes it incredibly easy to trim your lines.
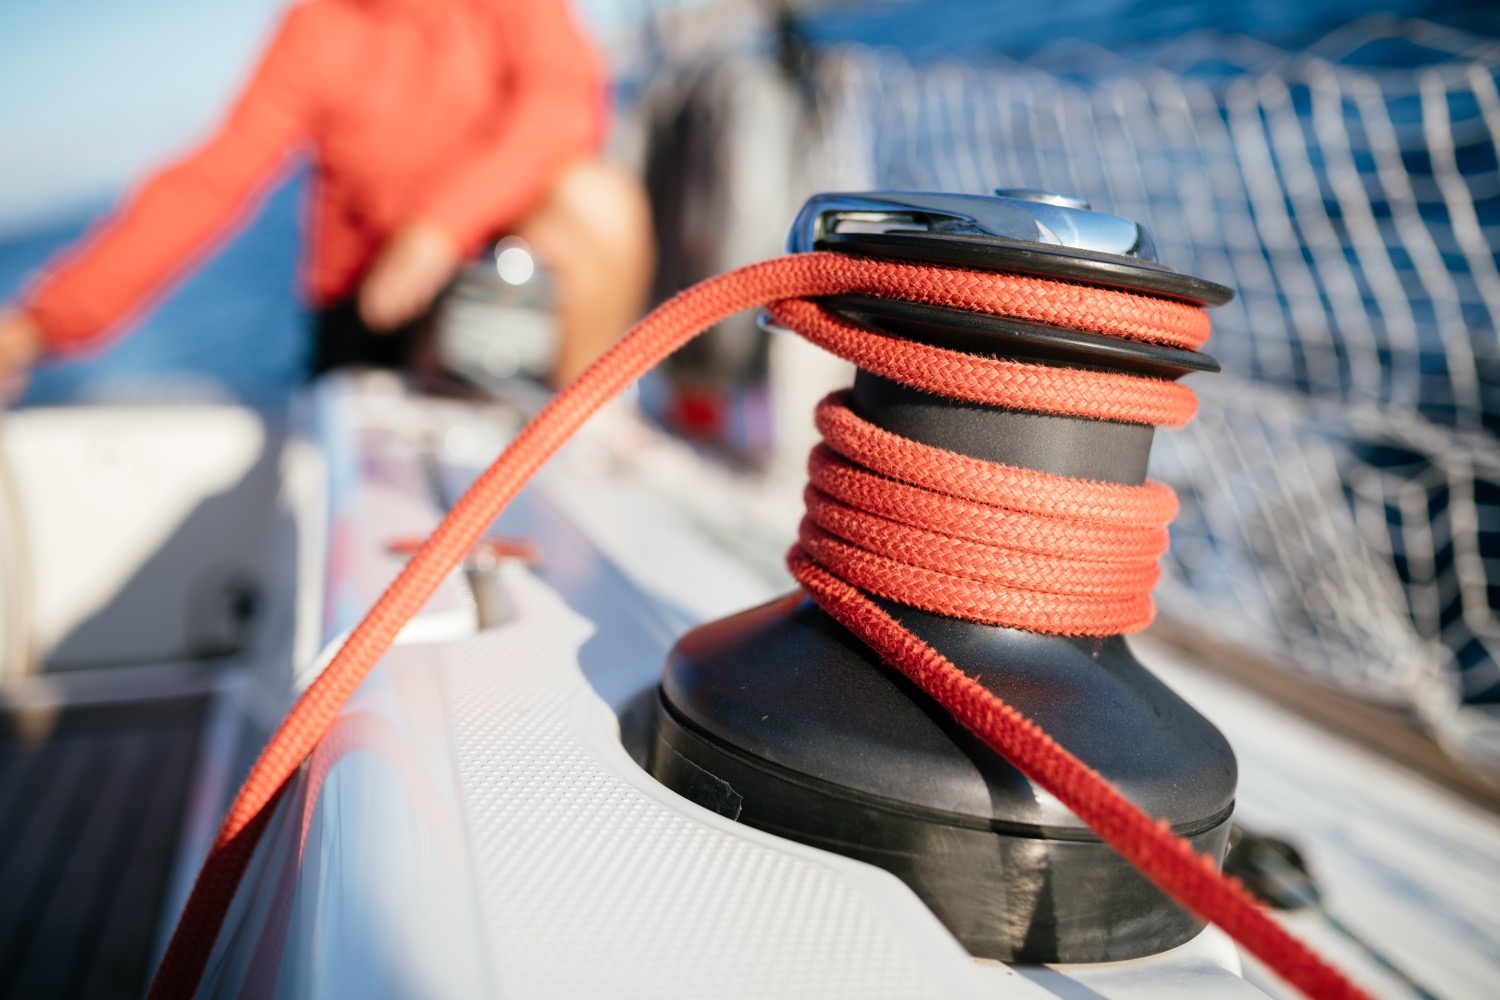
You'll find the compass typically in the cockpit. It's the most old-skool navigation tool out there, but I'm convinced it's also one of the most reliable. In any way, it definitely is the most solid backup navigator you can get for the money.
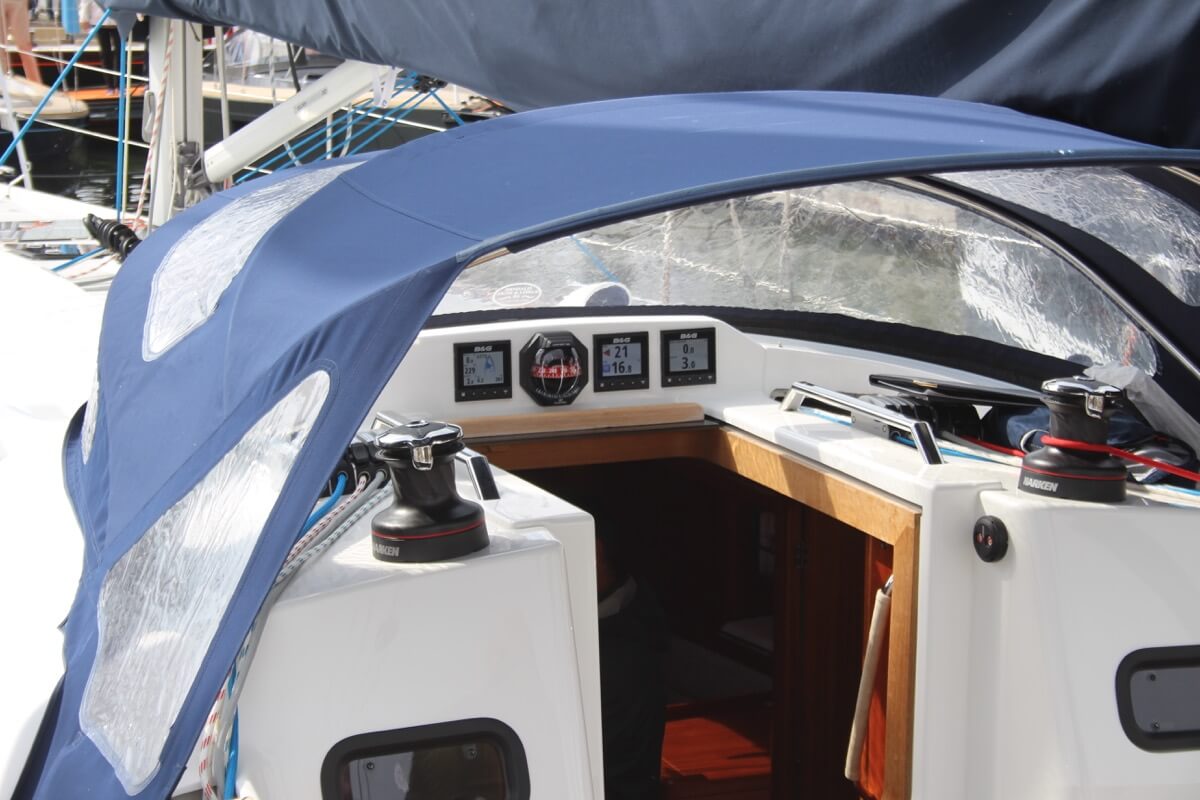
Want to learn how to use a compass quickly and reliably? It's easy. Just read my step-by-step beginner guide on How To Use a Compass (opens in new tab .
Chartplotter
Most sailboats nowadays use, besides a compass and a map, a chartplotter. Chartplotters are GPS devices that show a map and a course. It's very similar to your normal car navigation.
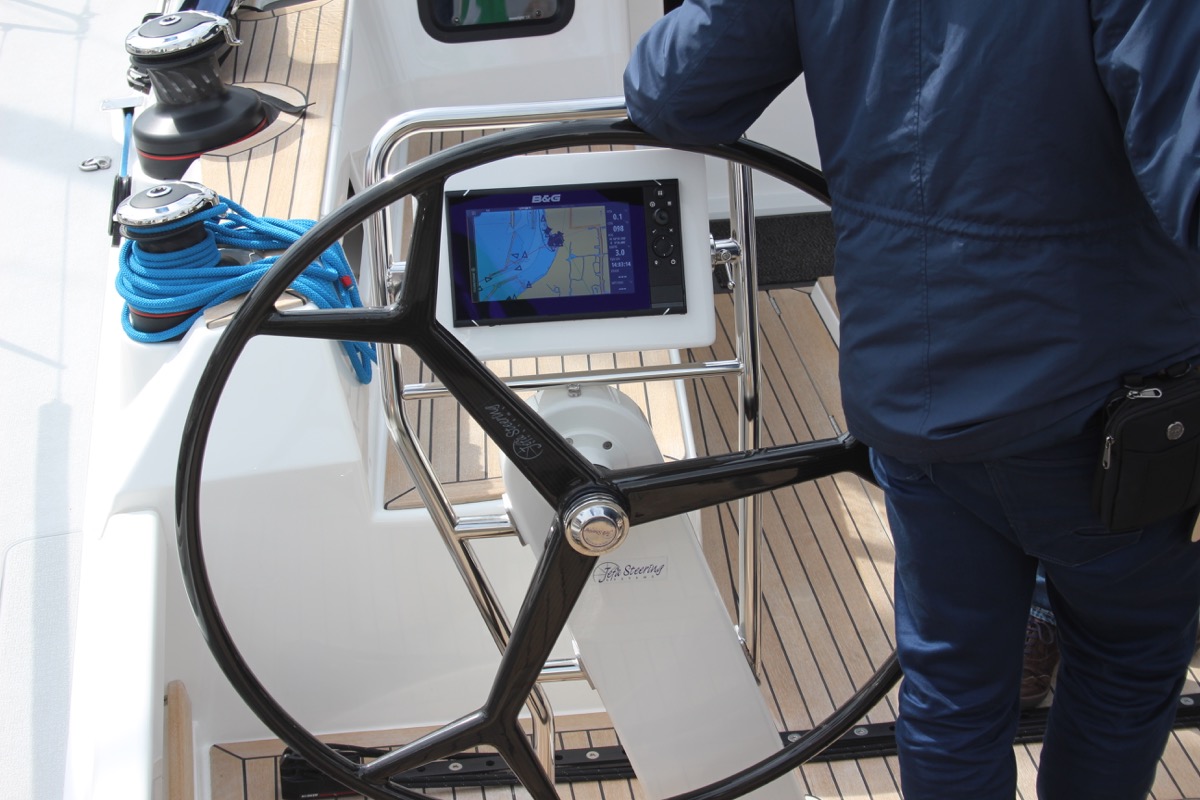
Outboard motor
Most sailboats have some sort of motor to help out when there's just the slightest breeze. These engines aren't very big or powerful, and most sailboats up to 32' use an outboard motor. You'll find these at the back of the boat.
Most sailboats carry 1 - 3 anchors: one bow anchor (the main one) and two stern anchors. The last two are optional and are mostly used by bluewater cruisers.
I hope this was helpful, and that you've gained a good understanding of the different parts involved in sailing. I wanted to write a good walk-through instead of overwhelming you with lists and lists of nautical terms. I hope I've succeeded. If so, I appreciate any comments and tips below.
I've tried to be as comprehensive as possible, without getting into the real nitty gritty. That would make for a gigantic article. However, if you feel I've left something out that really should be in here, please let me know in the comments below, so I can update the article.
I own a small 20 foot yacht called a Red witch made locally back in the 70s here in Western Australia i found your article great and enjoyed reading it i know it will be a great help for me in my future leaning to sail regards John.
David Gardner
İ think this is a good explanation of the difference between a ”rope” and a ”line”:
Rope is unemployed cordage. In other words, when it is in a coil and has not been assigned a job, it is just a rope.
On the other hand, when you prepare a rope for a specific task, it becomes employed and is a line. The line is labeled by the job it performs; for example, anchor line, dock line, fender line, etc.
Hey Mr. Buckles
I am taking on new crew to race with me on my Flying Scot (19ft dingy). I find your Sailboat Parts Explained to be clear and concise. I believe it will help my new crew learn the language that we use on the boat quickly without being overwhelmed.
PS: my grandparents were from Friesland and emigrated to America.
Thank you Shawn for the well written, clear and easy to digest introductory article. Just after reading this first article I feel excited and ready to set sails and go!! LOL!! Cheers! Daniel.
steve Balog
well done, chap
Great intro. However, the overview diagram misidentifies the cockpit location. The cockpit is located aft of the helm. Your diagram points to a location to the fore of the helm.
William Thompson-Ambrose
An excellent introduction to the basic anatomy and function of the sailboat. Anyone who wants to start sailing should consider the above article before stepping aboard! Thank-you
James Huskisson
Thanks for you efforts mate. We’ve all got to start somewhere. Thanks for sharing. Hoping to my first yacht. 25ft Holland. Would love to cross the Bass Strait one day to Tasmania. 👌 Cheers mate
Alan Alexander Percy
thankyou ijust aquired my first sailboat at 66yrs of age its down at pelican point a beautifull place in virginia usa my sailboat is a redwing 30 if you are ever in the area i wouldnt mind your guidance and superior knowledge of how to sail but iam sure your fantastic article will help my sailboat is wings 30 ft
Thanks for quick refresher course. Having sailed in California for 20+ years I now live in Spain where I have to take a spanish exam for a sailboat license. Problem is, it’s only in spanish. So a lot to learn for an old guy like me.
Very comprehensive, thank you
Your article really brought all the pieces together for me today. I have been adventuring my first sailing voyage for 2 months from the Carolinas and am now in Eleuthera waiting on weather to make the Exumas!!! Great job and thanks
Helen Ballard
I’ve at last found something of an adventure to have in sailing, so I’m starting at the basics, I have done a little sailing but need more despite being over 60 life in the old dog etc, thanks for your information 😊
Barbara Scott
I don’t have a sailboat, neither do l plan to literally take to the waters. But for mental exercise, l have decided to take to sailing in my Bermuda sloop, learning what it takes to become a good sailor and run a tight ship, even if it’s just imaginary. Thank you for helping me on my journey to countless adventures and misadventures, just to keep it out of the doldrums! (I’m a 69 year old African American female who have rediscovered why l enjoyed reading The Adventures of Robert Louis Stevenson as well as his captivating description of sea, wind, sailboat,and sailor).
Great article and very good information source for a beginner like me. But I didn’t find out what I had hoped to, which is, what are all those noisy bits of kit on top of the mast? I know the one with the arrow is a weather vane, but the rest? Many thanks, Jay.
Louis Cohen
The main halyard is attached to the head of the mainsail, not the to the mainsheet. In the USA, we say gaff, not gaffer. The gaff often has its own halyard separate from the main halyard.
Other than that it’s a nice article with good diagrams.
A Girl Who Has an Open Sail Dream
Wow! That was a lot of great detail! Thank you, this is going to help me a lot on my project!
Hi, good info, do u know a book that explains all the systems on a candc 27,
Leave a comment
You may also like, guide to understanding sail rig types (with pictures).
There are a lot of different sail rig types and it can be difficult to remember what's what. So I've come up with a system. Let me explain it in this article.

The Ultimate Guide to Sail Types and Rigs (with Pictures)

The Illustrated Guide To Boat Hull Types (11 Examples)

How To Live On a Boat For Free: How I'd Do It

How To Live on a Sailboat: Consider These 5 Things
No products in the cart.
Sailing Ellidah is supported by our readers. Buying through our links may earn us an affiliate commission at no extra cost to you.
The Standing Rigging On A Sailboat Explained
The standing rigging on a sailboat is a system of stainless steel wires that holds the mast upright and supports the spars.
In this guide, I’ll explain the basics of a sailboat’s hardware and rigging, how it works, and why it is a fundamental and vital part of the vessel. We’ll look at the different parts of the rig, where they are located, and their function.
We will also peek at a couple of different types of rigs and their variations to determine their differences. In the end, I will explain some additional terms and answer some practical questions I often get asked.
But first off, it is essential to understand what standing rigging is and its purpose on a sailboat.
The purpose of the standing rigging
Like I said in the beginning, the standing rigging on a sailboat is a system of stainless steel wires that holds the mast upright and supports the spars. When sailing, the rig helps transfer wind forces from the sails to the boat’s structure. This is critical for maintaining the stability and performance of the vessel.
The rig can also consist of other materials, such as synthetic lines or steel rods, yet its purpose is the same. But more on that later.
Since the rig supports the mast, you’ll need to ensure that it is always in appropriate condition before taking your boat out to sea. Let me give you an example from a recent experience.
Dismasting horrors
I had a company inspect the entire rig on my sailboat while preparing for an Atlantic crossing. The rigger didn’t find any issues, but I decided to replace the rig anyway because of its unknown age. I wanted to do the job myself so I could learn how it is done correctly.
Not long after, we left Gibraltar and sailed through rough weather for eight days before arriving in Las Palmas. We were safe and sound and didn’t experience any issues. Unfortunately, several other boats arriving before us had suffered rig failures. They lost their masts and sails—a sorrowful sight but also a reminder of how vital the rigging is on a sailboat.
The most common types of rigging on a sailboat
The most commonly used rig type on modern sailing boats is the fore-and-aft Bermuda Sloop rig with one mast and just one headsail. Closely follows the Cutter rig and the Ketch rig. They all have a relatively simple rigging layout. Still, there are several variations and differences in how they are set up.
A sloop has a single mast, and the Ketch has one main mast and an additional shorter mizzen mast further aft. A Cutter rig is similar to the Bermuda Sloop with an additional cutter forestay, allowing it to fly two overlapping headsails.
You can learn more about the differences and the different types of sails they use in this guide. For now, we’ll focus on the Bermuda rig.
The difference between standing rigging and running rigging
Sometimes things can get confusing as some of our nautical terms are used for multiple items depending on the context. Let me clarify just briefly:
The rig or rigging on a sailboat is a common term for two parts:
- The standing rigging consists of wires supporting the mast on a sailboat and reinforcing the spars from the force of the sails when sailing.
- The running rigging consists of the halyards, sheets, and lines we use to hoist, lower, operate, and control the sails on a sailboat.
Check out my guide on running rigging here !
The difference between a fractional and a masthead rig
A Bermuda rig is split into two groups. The Masthead rig and the Fractional rig.
The Masthead rig has a forestay running from the bow to the top of the mast, and the spreaders point 90 degrees to the sides. A boat with a masthead rig typically carries a bigger overlapping headsail ( Genoa) and a smaller mainsail. Very typical on the Sloop, Ketch, and Cutter rigs.
A Fractional rig has forestays running from the bow to 1/4 – 1/8 from the top of the mast, and the spreaders are swept backward. A boat with a fractional rig also has the mast farther forward than a masthead rig, a bigger mainsail, and a smaller headsail, usually a Jib. Very typical on more performance-oriented sailboats.
There are exceptions in regards to the type of headsail, though. Many performance cruisers use a Genoa instead of a Jib , making the difference smaller.
Some people also fit an inner forestay, or a babystay, to allow flying a smaller staysail.
Explaining the parts and hardware of the standing rigging
The rigging on a sailing vessel relies on stays and shrouds in addition to many hardware parts to secure the mast properly. And we also have nautical terms for each of them. Since a system relies on every aspect of it to be in equally good condition, we want to familiarize ourselves with each part and understand its function.
Forestay and Backstay
The forestay is a wire that runs from the bow to the top of the mast. Some boats, like the Cutter rig, can have several additional inner forestays in different configurations.
The backstay is the wire that runs from the back of the boat to the top of the mast. Backstays have a tensioner, often hydraulic, to increase the tension when sailing upwind. Some rigs, like the Cutter, have running backstays and sometimes checkstays or runners, to support the rig.
The primary purpose of the forestay and backstay is to prevent the mast from moving fore and aft. The tensioner on the backstay also allows us to trim and tune the rig to get a better shape of the sails.
The shrouds are the wires or lines used on modern sailboats and yachts to support the mast from sideways motion.
There are usually four shrouds on each side of the vessel. They are connected to the side of the mast and run down to turnbuckles attached through toggles to the chainplates bolted on the deck.
- Cap shrouds run from the top of the mast to the deck, passing through the tips of the upper spreaders.
- Intermediate shrouds run from the lower part of the mast to the deck, passing through the lower set of spreaders.
- Lower shrouds are connected to the mast under the first spreader and run down to the deck – one fore and one aft on each side of the boat.
This configuration is called continuous rigging. We won’t go into the discontinuous rigging used on bigger boats in this guide, but if you are interested, you can read more about it here .
Shroud materials
Shrouds are usually made of 1 x 19 stainless steel wire. These wires are strong and relatively easy to install but are prone to stretch and corrosion to a certain degree. Another option is using stainless steel rods.
Rod rigging
Rod rigging has a stretch coefficient lower than wire but is more expensive and can be intricate to install. Alternatively, synthetic rigging is becoming more popular as it weighs less than wire and rods.
Synthetic rigging
Fibers like Dyneema and other aramids are lightweight and provide ultra-high tensile strength. However, they are expensive and much more vulnerable to chafing and UV damage than other options. In my opinion, they are best suited for racing and regatta-oriented sailboats.
Wire rigging
I recommend sticking to the classic 316-graded stainless steel wire rigging for cruising sailboats. It is also the most reasonable of the options. If you find yourself in trouble far from home, you are more likely to find replacement wire than another complex rigging type.
Relevant terms on sailboat rigging and hardware
The spreaders are the fins or wings that space the shrouds away from the mast. Most sailboats have at least one set, but some also have two or three. Once a vessel has more than three pairs of spreaders, we are probably talking about a big sailing yacht.
A turnbuckle is the fitting that connects the shrouds to the toggle and chainplate on the deck. These are adjustable, allowing you to tension the rig.
A chainplate is a metal plate bolted to a strong point on the deck or side of the hull. It is usually reinforced with a backing plate underneath to withstand the tension from the shrouds.
The term mast head should be distinct from the term masthead rigging. Out of context, the mast head is the top of the mast.
A toggle is a hardware fitting to connect the turnbuckles on the shrouds and the chainplate.
How tight should the standing rigging be?
It is essential to periodically check the tension of the standing rigging and make adjustments to ensure it is appropriately set. If the rig is too loose, it allows the mast to sway excessively, making the boat perform poorly.
You also risk applying a snatch load during a tack or a gybe which can damage the rig. On the other hand, if the standing rigging is too tight, it can strain the rig and the hull and lead to structural failure.
The standing rigging should be tightened enough to prevent the mast from bending sideways under any point of sail. If you can move the mast by pulling the cap shrouds by hand, the rigging is too loose and should be tensioned. Once the cap shrouds are tightened, follow up with the intermediates and finish with the lower shrouds. It is critical to tension the rig evenly on both sides.
The next you want to do is to take the boat out for a trip. Ensure that the mast isn’t bending over to the leeward side when you are sailing. A little movement in the leeward shrouds is normal, but they shouldn’t swing around. If the mast bends to the leeward side under load, the windward shrouds need to be tightened. Check the shrouds while sailing on both starboard and port tack.
Once the mast is in a column at any point of sail, your rigging should be tight and ready for action.
If you feel uncomfortable adjusting your rig, get a professional rigger to inspect and reset it.
How often should the standing rigging be replaced on a sailboat?
I asked the rigger who produced my new rig for Ellidah about how long I could expect my new rig to last, and he replied with the following:
The standing rigging should be replaced after 10 – 15 years, depending on how hard and often the boat has sailed. If it is well maintained and the vessel has sailed conservatively, it will probably last more than 20 years. However, corrosion or cracked strands indicate that the rig or parts are due for replacement regardless of age.
If you plan on doing extended offshore sailing and don’t know the age of your rig, I recommend replacing it even if it looks fine. This can be done without removing the mast from the boat while it is still in the water.
How much does it cost to replace the standing rigging?
The cost of replacing the standing rigging will vary greatly depending on the size of your boat and the location you get the job done. For my 41 feet sloop, I did most of the installation myself and paid approximately $4700 for the entire rig replacement.
Can Dyneema be used for standing rigging?
Dyneema is a durable synthetic fiber that can be used for standing rigging. Its low weight, and high tensile strength makes it especially popular amongst racers. Many cruisers also carry Dyneema onboard as spare parts for failing rigging.
How long does dyneema standing rigging last?
Dyneema rigging can outlast wire rigging if it doesn’t chafe on anything sharp. There are reports of Dyneema rigging lasting as long as 15 years, but manufacturers like Colligo claim their PVC shrink-wrapped lines should last 8 to 10 years. You can read more here .
Final words
Congratulations! By now, you should have a much better understanding of standing rigging on a sailboat. We’ve covered its purpose and its importance for performance and safety. While many types of rigs and variations exist, the hardware and concepts are often similar. Now it’s time to put your newfound knowledge into practice and set sail!
Or, if you’re not ready just yet, I recommend heading over to my following guide to learn more about running rigging on a sailboat.
Sharing is caring!
Skipper, Electrician and ROV Pilot
Robin is the founder and owner of Sailing Ellidah and has been living on his sailboat since 2019. He is currently on a journey to sail around the world and is passionate about writing his story and helpful content to inspire others who share his interest in sailing.
Very well written. Common sense layout with just enough photos and sketches. I enjoyed reading this article.
Thank you for the kind words.
Leave a Reply Cancel reply
Your email address will not be published. Required fields are marked *
Running Rigging Calculator
Get an instant estimate for your boat, select your boat brand.
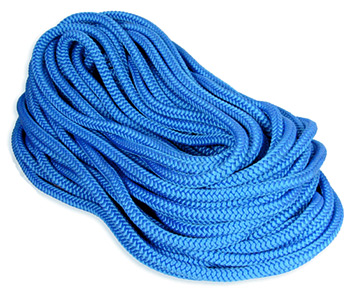
Leaves warehouse: 12 business days
- Copyright 1998-2024 SB Owners, LLC. All rights reserved.

- Policies | Contact Us

IMAGES
VIDEO
COMMENTS
The difference between standing rigging and running rigging. Sometimes things can get confusing as some of our nautical terms are used for multiple items depending on the context. Let me clarify just briefly: The rig or rigging on a sailboat is a common term for two parts, the standing, and the running rigging.
Standing rigging keeps the mast in place, but it's the running rigging that handles all the action aboard a boat under sail. The many components in a modern running rigging system—sheets, outhauls, vang control, halyards—work in conjunction with wide range of blocks to keep friction to a minimum. Ralph Naranjo.
Running rigging is the rigging of a sailing vessel that is used for raising, lowering, shaping and controlling the sails on a sailing vessel—as opposed to the standing rigging, which supports the mast and bowsprit. Running rigging varies between vessels that are rigged fore and aft and those that are square-rigged.
Running rigging refers to the set of lines or ropes used to control the sails on a sailboat. It includes halyards, sheets, and control lines that regulate sail positioning, trim, and hoisting. These essential components are crucial for maneuverability and sail adjustment during sailing.
Sailboat Rigging: Part 2 - Running Rigging. Sailboat rigging can be described as being either running rigging which is adjustable and controls the sails - or standing rigging, which fixed and is there to support the mast. And there's a huge amount of it on the average cruising boat... You'll need a whole lot more of it if you fly a spinnaker!
PLEASE NOTE: THIS VIDEO HAS BEEN UPDATED WITH ENHANCED GRAPHICS AND IMPROVED SOUND. CHECK IT OUT HERE https://youtu.be/tRgWtPaCQQcA beginners guide to sailbo...
Running rigging, on the other hand, comprises the movable components needed to control, adjust, and handle the sails. These elements allow us to raise, lower, and trim the sails according to wind conditions and the boat's course. Understanding the distinction between the two types of rigging is vital in operating a sailboat safely and ...
A beginners guide to sailboat rigging, including standing rigging and running rigging. This animated tutorial is the first in a series and covers sails, line...
Short answer running rigging on a sailboat: Running rigging refers to the ropes and lines used for controlling the sails and other movable parts on a sailboat. It includes halyards, sheets, braces, and control lines. Properly rigged running rigging is essential for efficient sail handling and maneuvering of the boat. Understanding Running Rigging on a
Running rigging refers to the system of ropes, lines, and hardware used to control and adjust the sails on a sailboat. This is in contrast to standing rigging, which consists of the fixed lines and cables that support the mast and other structural components of the boat. Running rigging allows sailors to manipulate the shape and position of the ...
In part 3 of our series on sailboat parts, we dive into two types of rigging: standing rigging and running rigging. I use a 3D model and some diagrams to giv...
Yacht running rigging is the ropes and cables used to control the movement of the sails and spars of a sailing yacht. It generally consists of halyards, sheets, guys, and sometimes vangs, used to raise, lower, and angle the sails.
Nylon is durable, with excellent internal and surface resistance to abrasion, a high strength to weight ratio, and a Specific Gravity of 1.14. It does absorb water and shrink, with a loss of 10%-15% of its strength. Polyester: Stretchier than newer fibers, it holds color well and has great abrasion resistance.
Running rigging is the system of ropes and lines that control the sails, spars, and other movable parts of a sailboat. It is designed to be adjustable, allowing sailors to trim the sails to match the wind conditions and course of the boat. In contrast, standing rigging is the system of cables and wires that support the mast and keep it upright.
Sailboat rigging components refer to the various parts and systems that help support and control the sails on a sailboat. These components include standing rigging (the fixed parts) and running rigging (lines that can be adjusted). Some common examples of rigging components are the mast, boom, shrouds, stays, halyards, sheets, and blocks. 2.
On the other hand, running rigging is the rigging for controlling and shaping the sails on a sailboat. Running rigging consists of the main and jib sheet, the boom vang, the downhaul, and the jib halyard. The subdivision of running rigging concerns the jeers, lifts, and halyards (halyards). This supporting equipment raises or lowers the sails ...
When it comes to running rigging, cruising sailors can learn a lot from racers, and in the process maximize their fun while getting the most out of their sails, hardware and lines. This rendering of a roughly 40-foot cruising boat shows a deck layout optimized for performance sailing, with plenty of lines that are well-led for trimming and ...
Pro sailor Erik Shampain provides a guide and tips to match the right cordage for a specific running rigging applicaiton. ... pulling a 2-to-1 and then to the sail for a 24-to-1. Or, better yet ...
Running rigging is thought of more often with sailing as sailors use them to set, trim and adjust the sails. The standing rigging, on the other hand is left standing there. The truth is, your standing rigging is only there to hold the mast in the proper position to achieve better sail shape.
The running rigging is the rigging on a sailboat that's used to operate the sails. For example, the halyard, which is used to lower and heave the mainsail. The standing rigging is the rigging that is used to support the mast and sail plan. Standing Rigging. Here are the different parts that belong to the standing rigging:
The difference between standing rigging and running rigging. Sometimes things can get confusing as some of our nautical terms are used for multiple items depending on the context. Let me clarify just briefly: The rig or rigging on a sailboat is a common term for two parts:. The standing rigging consists of wires supporting the mast on a sailboat and reinforcing the spars from the force of the ...
Our running rigging calculator can instantly spec lines for more than 5,000 sailboats. Just select your boat below and you're a couple clicks away from new, top quality rigging. We've reduced the choices to a minimum to make ordering as simple as possible. (If you prefer more choices, please see our Running Rigging Builder.)
A running backstay is a rigging component on a sailboat which helps support the mast. [1] [2] A running backstay runs from each lateral corner of the stern to the mast at the level where the forestay begins in the fractional rig.Because they are attached low on the mast, they can present a significant problem in an accidental gybe, as the boom hits the stay, with the possibility of breaking ...
Discovery team member Joe Mazraani fans away the sand to reveal a deadeye used as part of the sail rigging on the passenger steamship Le Lyonnais, during a dive on the wreck, Saturday, Aug. 24 ...