Jenna Rainey

CEO + ARTIST + EDUCATOR


hey friend!
I’m jenna rainey. , i'm an artist, self-taught designer, and multi-faceted creative entrepreneur who is hell-bent on teaching everyone how to find their inner creative voice..
My favorite supplies
A highly creative nerd with a unique breed of humor and the proud earner of a self-bestowed award for being the world’s most curious and driven human.

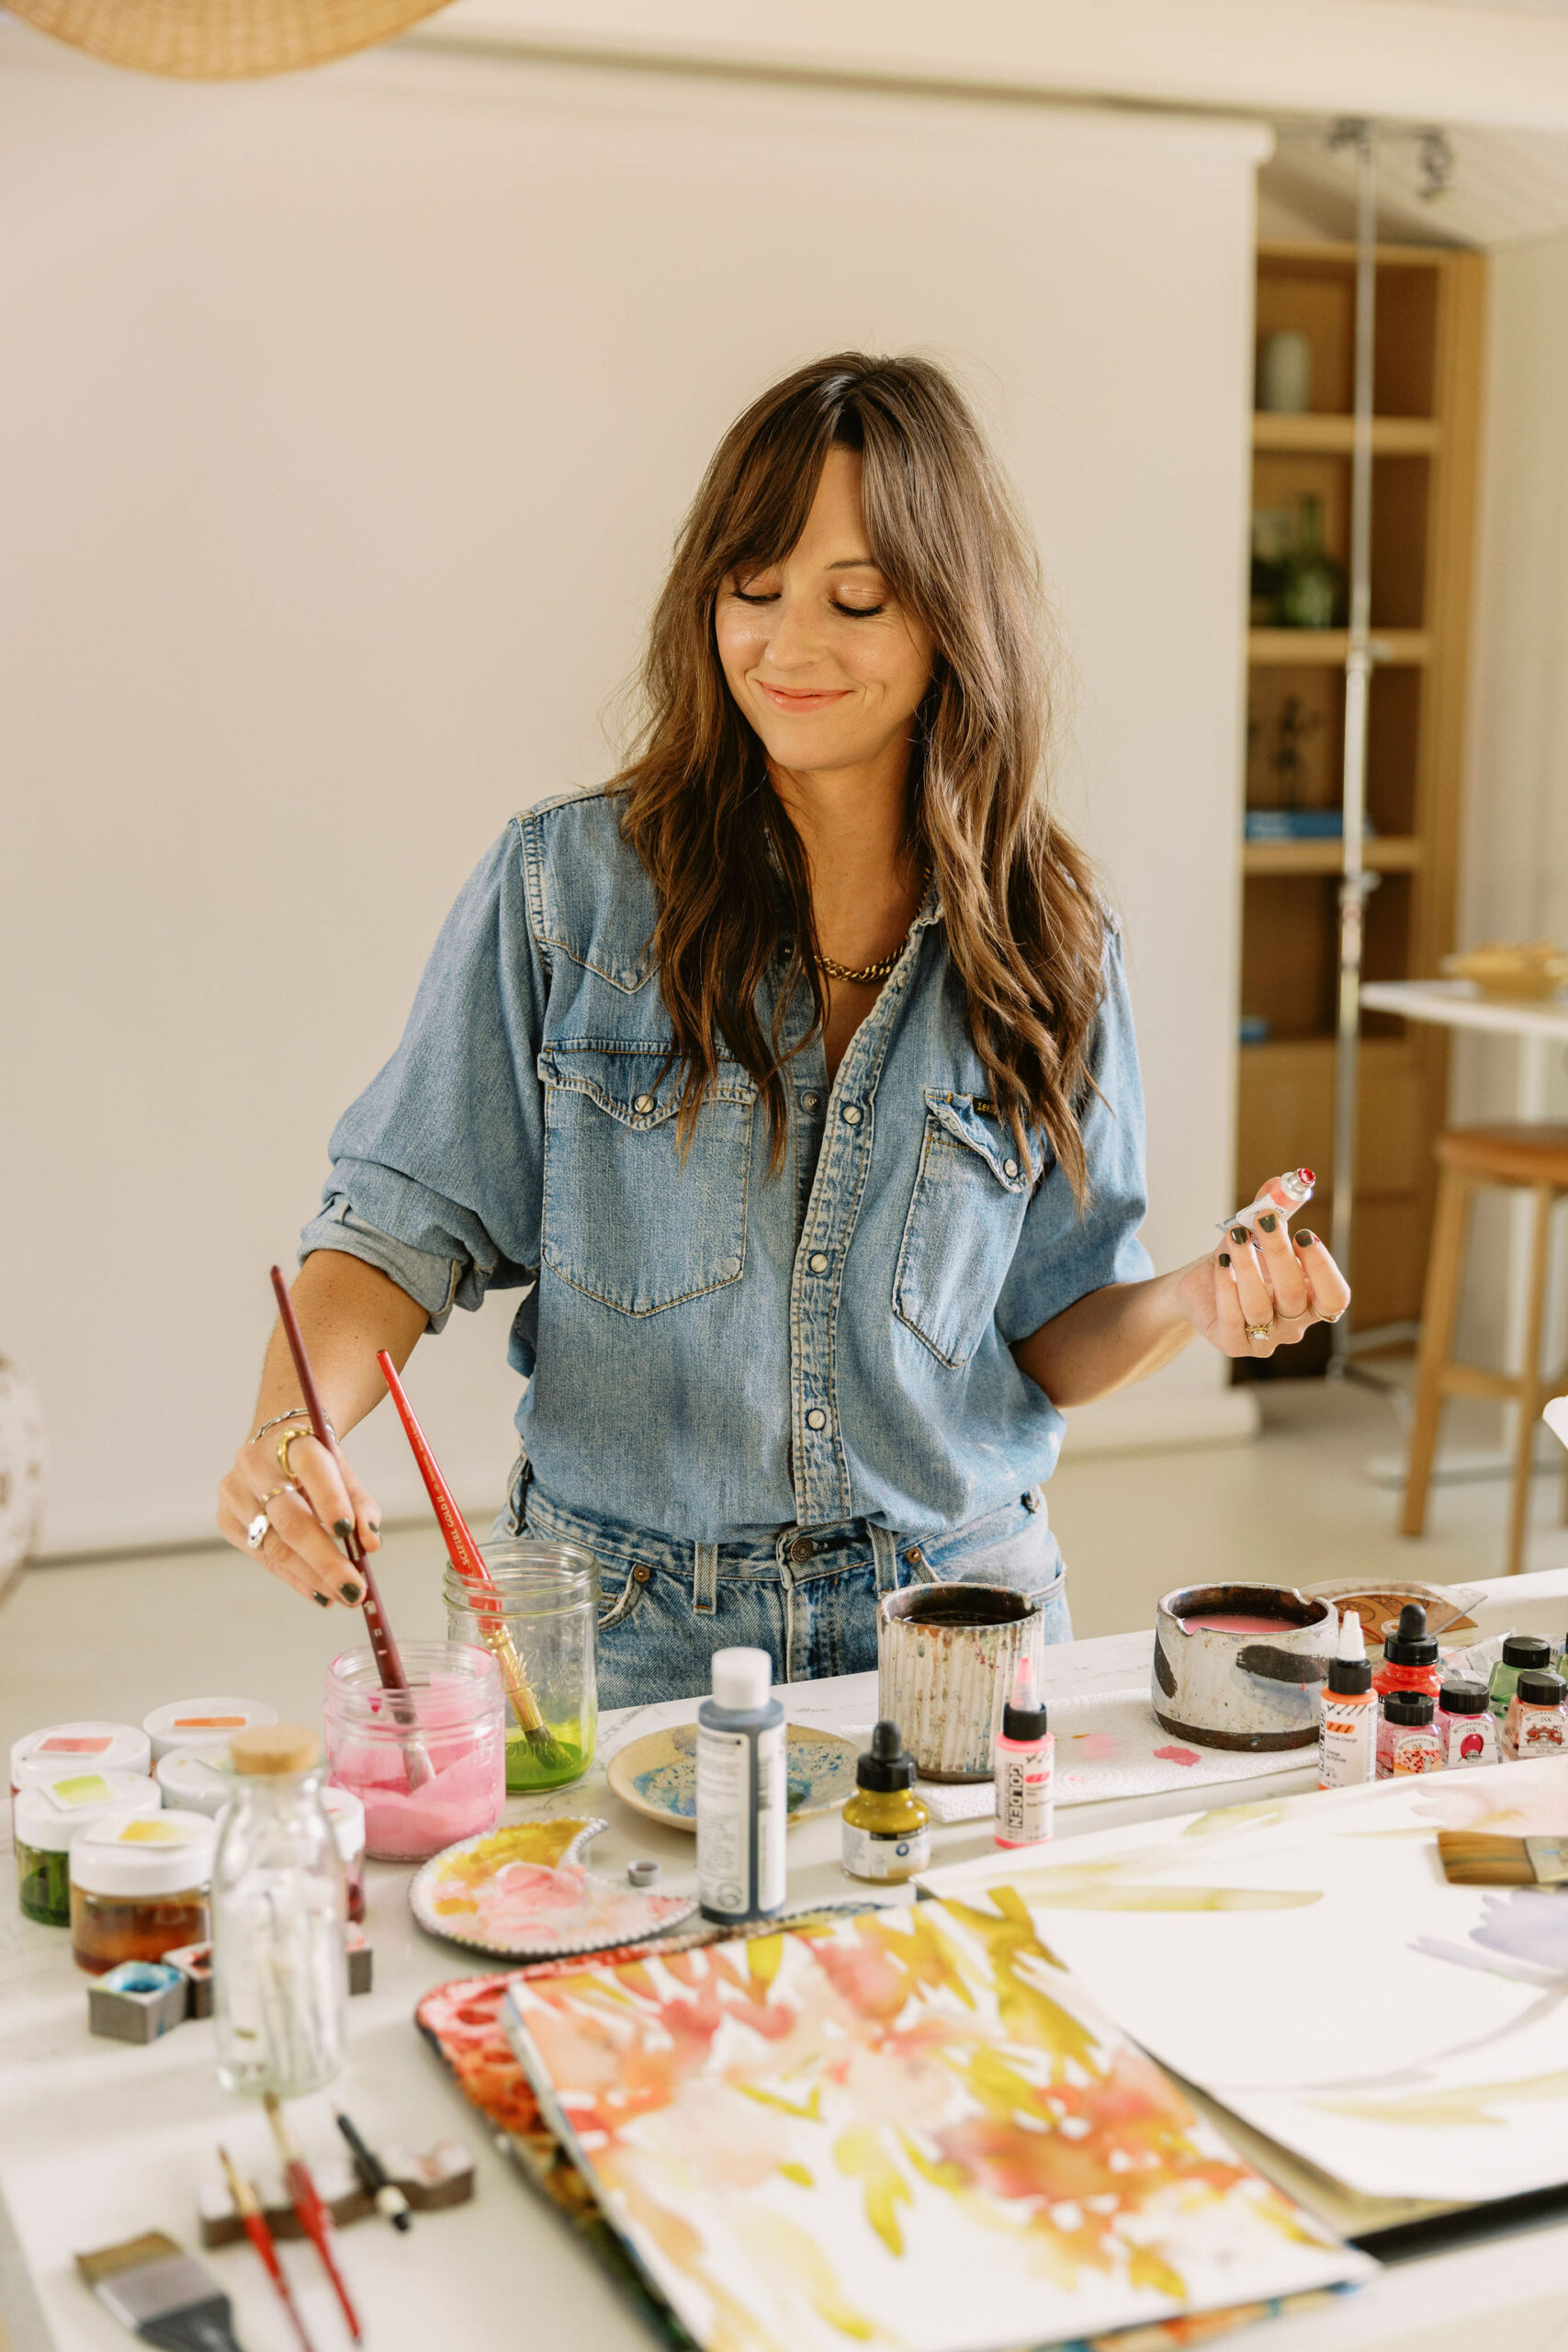
Hey I'm Jenna!
Hang out on youtube, it’s like netflix-binging bob ross videos, but with a dose of dry + quirky humor and fewer happy little tree references. .

Wanna Learn Watercolor ?
i wrote some books

Master Watercolor magic
GRAB THE FREE GUIDE

Watercolor Sailboat
Jenna .
This week, I'm teaching you how to paint a quick and easy watercolor sailboat landscape!
When I don't have a lot of time or I just want to play with colors and basic shapes, I paint loose-style. It's just whimsical and fun!
This watercolor sailboat takes less than 10 minutes to paint but includes simple techniques to inspire and spark creativity. This is a great tutorial for beginners, too!
Watercolor Sailboat Step by Step
00:00 – Intro. 00:32 – Color mixing. 01:06 – Painting the sail boat. 02:16 – Painting waves. 03:01 – Painting trees and background. 04:53 – Painting the sky. 06:14 – My thoughts on the painting. 06:51 – YOUR thoughts?
Links & Freebies
Get access to all my favorite art supplies and business tools here. My Amazon storefront with supplies and other random things I love. My Spotify painting playlist My Floral Watercolor E-book My Calligraphy E-book
Related videos
Complete Beginner's Guide to Watercolor Complete Beginner's Guide to Watercolor: Top Questions Answered Complete Beginner's Guide to Watercolor Flowers Watercolor Techniques: Wet-on-Wet Watercolor Techniques: Wet-on-Dry 10 Tips to Improve Watercolor
… and for even more tutorials, subscribe to my YouTube channel!
Patreon Community
Join my Patreon community! You have a variety of fun options to choose from like:
- Watch my YouTube tutorials ad-free
- Get early access to the tutorials before they're released on YouTube
- Patreon-exclusive tutorials
Head on over to Patreon to get all the fun details.
by Jenna Rainey
+ show Comments
- Hide Comments
add a comment
Leave a Reply Cancel reply
Your email address will not be published. Required fields are marked *

Browse By Category
art + creativity
So Hot Right Now
Starting a New Hobby as an Adult

The Joy of Experimentation: How to Express Yourself Through Different Art Mediums

Art and Meditation: 3 Ways You Can Use Art to Enhance Your Meditation Practice

Exploring Abstract Art for Beginner Watercolor Painters

The Connection Between Art and Mental Health

Finding (or Building) an Artistic Community: A Guide for Emerging Artists
back to blog home
Previous Post
« How to Map Out Your Content Calendar
“Should I Have a Blog?” Reasons Why Blogs Are Important »

The Complete Beginner's Guide to Watercolor
Get a rundown of all my recommended supplies, learn fundamental techniques and tips including color theory and composition, and walk away feeling super confident with your new love of watercolor!

Free e-book
Kickstart your art practice!
*signing up will subscribe you to our email list, you may unsubscribe at any time, though doing so means we cannot contact you with more free, valuable education and tips on this topic. you also agree to our terms and conditions and privacy policy ., an artist, self-taught designer, and multi-faceted creative entrepreneur who is hell-bent on teaching everyone how to find their inner creative voice., i'm jenna rainey..

Customer Support
YOU'VE GOT MAIL!
back to the top

Read the blog
watch me on youtube
my art community
art retreats
everyday watercolor books
licensing resources + tips
The Ceo advice column
Customer service
program login
community login
contact us!
© 2018-2024 JENNA RAINEY LLC | TERMS & CONDITIONS | PRIVACY POLICY | SITE CREDIT

@JENNARAINEY

Easy Step-by-Step Sunset Acrylic Painting for Beginners
Have you ever just stood and watched a sunset? I mean, really watched it? I’ve always been in love with sunsets, the sky with a mix of rainbow colors and this time, I decided to paint a cool sunset acrylic painting. Although, it has been a while since I painted anything because of my inner perfectionist. I’d start a piece but never finish it, thinking that each stroke could be better, neater, perfect. And because of that, I have stacks of canvases gathering dust with many cool ideas I want to do.
But this time, I just picked up the brush, turned off the perfectionist and decided to just paint. No rules, no expectations, just pure, uninhibited joy of painting.
I started with the sky, splashing it with blues, yellows and reds and blending them all together. Then, I added these cute little mountains along a line. For the river below, I added more reds and maroons to mirror the colors of the sunset and darkness. The finishing touch? A small boat with a teeny tiny light.
Anyway, I was so caught up in my painting that I didn’t take step-by-step pictures. But don’t worry, I’ll walk you through it, helping you create your own version of this sunset acrylic painting. And remember, it doesn’t need to be perfect, it just needs to be your version!
Tools for Sunset Acrylic Painting
Though a lot of little art stuff is required to have a whole painting experience, however, some items without which following tasks are impossible to accomplish are the following.
Note: This post contains affiliate links to Amazon products. If you make a purchase through these links, we may earn a small commission at no extra cost to you.

Any acrylic paints.

Canvas board or pad.

Different sizes of brushes .

Masking tape for the messy peeps and to get a crisp border!

Gesso (optional)

Palette for mixing the paints.
How to paint a sunset
Gather all of your tools, and let’s start the sunset acrylic painting!
First, I stick a masking tape around the corners, it helps to get the clean borders at the end. I am a messy person, and I sometimes even mix the colors on the tape so it is important to get some help and keep things neat and clean!
I started with a thin layer of white paint, not sure why I did it (as the canvas is already prepared) or if it going to make any difference, but I just felt like doing it. It made the background a bit smoother, though and helped with blending. Then, I used a blue color on the top right side. I added more to the right because I wanted to capture the colors of the sunset rather than the sun part.

You can also darken the blue on the corners to give it more depth and a darker appearance, but I wanted it more vibrant, so I didn’t. I proceeded to add a bit of red along the blue and blended them, which created a bit of a purplish hue on the border. As you move to the left, add a bit of orange color (by mixing red and yellow).

And then, I proceeded with yellow on the left to give it a sunny appearance. Blending these colors gives a smoother transition.

To paint the river, I’ll repeat the same process in the reverse direction. So, starting with yellow and leading it to red. I didn’t add blue in the reflection to make it appear dark and vibrant.

After blending the base shades, we now need to add some drama! So, I started adding a bit of yellow and red color for clouds. They don’t have to cover the entire sky, and could be on one side for an asymmetrical look and don’t need any details as they are pretty far away. So, any random strokes of color will do the job.

Using a smaller brush with black and grey paint, create a thin line of tiny mountains along the division between the sky and the river. These mountains are small to give an impression of distance and stretched from one side of the canvas to the other. Add some grey areas to these mountains for depth and texture.

To give the sky a more dramatic effect, use a small brush to layer more red on top of the blue area on the right side (clouds again). Try to maintain a natural transition of colors to intensify your sky and add more depth.

Repeating the same process for the river, except I am using more maroon here to give more darker appearance. Add random strokes of yellow, red and maroon, yellow for the brightest area and vice versa. If you want to create a sense of depth, add a few darker (you could mix a tiny bit of black or blue with your red) and lighter (add a little white or yellow) clouds as well. I have also added some more clouds on the sky, which I don’t really like, honestly, but they turned out to be okay at the end.

And, for the finishing effect, I am using my smallest detail brush and black paint to paint a tiny silhouette of a boat on the river. You can choose to place it anywhere, but preferably, it should be on the area where the color of the water is brightest. This will help the silhouette stand out. For an added effect, use the yellow or white paint to add a small dot on the boat to represent a light.
And, our sunset acrylic painting is ready! Just wait for it to dry and remove the masking tape to reveal the crisp border, which makes it look so much better!

FAQs for Sunset Acrylic Painting
What colors will I need for this Sunset acrylic painting?
You’ll primarily need blue, red, orange, yellow, maroon, black, and grey. You can also use additional colors like purple, dark blue etc. if you want to customize your sunset.
2. Do I need to have prior painting experience to create this?
Not at all! It is an easy-peasy painting, perfect for beginners.
3. What brushes are recommended for this painting?
A medium brush for the broader strokes in the sky and river reflection, and a small brush for detailing like the boat and light should do the job.
4. Can I use another type of paint instead of acrylic?
While this tutorial focuses on acrylics, you can certainly adapt the techniques for oils or watercolors. Just keep in mind the drying times and blending techniques for each medium.
5. How long will it take for the painting to dry?
Acrylic paint dries relatively quickly. In a room with standard ventilation, it should be dry to the touch within an hour or so. But, if you’ve used thick layers, give it up to 24 hours to dry completely.
6. My sunset colors aren’t blending smoothly. Any tips?
Make sure both colors you’re blending are still wet. Acrylics dry fast, so you might need to work quickly or use a retarder to help. It helps to slow down the drying process so you can blend better. And I would recommend using a softer brush.
7. Can I add other elements to the painting?
Absolutely! While the Sunset acrylic painting is made easy-peasy and minimal, feel free to add birds, trees, or any other elements that speak to you.
8. The river reflection isn’t looking right. What can I do?
Reflections can be tricky. Make sure you’re mirroring the colors from the sky, and use horizontal strokes to give a watery effect. If needed, you can always let the paint dry and paint over to adjust.
9. Can I varnish the painting?
Yes, after ensuring the acrylic paint is completely dry, you can apply a varnish to protect the painting and give it a glossy or matte finish, based on your preference.
10. Do I need to prepare my canvas before painting?
Most canvases you buy from stores come pre-primed, so you can start painting straight away. However, if you’re using raw canvas, you’d want to prime it with gesso first.
11. Do you have any other beginner-friendly ideas to paint?
Sure, here are easy-peasy aesthetic painting ideas you can try as a beginner. You can also check out my Youtube to watch some more beginner-friendly tutorials!
Similar Posts

10 Creative Painting Ideas You Can Try As A Beginner
I’ve curated 10 Creative Painting Ideas that are easy and fun. From quiet mountains to cool city scenes, there’s something for everyone to love and try!

10 Easy Abstract Art Ideas To Try As A Beginner
Discover 10 abstract art ideas for expressing the inexpressible. checkout these cool watercolor flowers, monochromatic themes, and more for artistic inspiration.

10 Creative Girl Drawing To Try As A Beginner
Draw stunning girl drawing with 10 creative ideas for beginners! From line art to fantasy and realism, follow easy tutorials and bring your drawings to life!

Acrylic Pouring Techniques – A Comprehensive Guide
This guide covers everything related to acrylic pouring techniques from the most basic concepts to the most advanced techniques helping beginners as well as experts.

Couple Painting Ideas To Make Your Date Night Unforgettable
Looking for a fun and creative way to spend your date night? Check out my 8 couple painting ideas for a fun-filled and memorable experience together.

9 Things to Consider Before Starting an ART Business in 2024
Read this before launching your art business to avoid the mistakes I made. This guide covers everything from niche selection to online marketing, tailored for artists ready to turn their passion into profit.
Leave a Reply Cancel reply
Your email address will not be published. Required fields are marked *
Save my name, email, and website in this browser for the next time I comment.
- Start Here!
- Art Tutorials
- Art Lessons
Art Supplies
- Shopping Cart

How to Paint a Sailboat Watercolor Painting Tutorial
Sailing is one of my favorite things to do and painting sailboats is almost as fun! This lovely sailboat flew in the wind on Somes Sound on Mount Desert Island, Maine. It was one of those perfect sailing days. The light sparkled, the wind blew steadily and the last of summer heated the air. Since I didn't have a sailboat there, I sketched and took photos of the sailboats moving up and down the Sound.
The shimmering water is the tricky part of this painting. It's a great opportunity to practice your dry brush! This painting needs rough press paper to get that sparkling water. The rest of the painting is simple. Trees in the distance and a pared down palette. Keep the colors and your brush strokes simple. Sailing at its finest on a summer day in Maine!

Painting Tutorial Level
Skill Building
M. Graham watercolors
Painting Demonstration 1

Always sketch very lightly in watercolor since most pencil lines will show. You want the focus on the painting, not the drawing. Unless, of course, you're highlighting the pencil lines!

Since I'm painting a light object with a lot of brushstrokes around it (for the water) I can either mask it out, preserve highlights with wax or use white gouache. I decide on a combination of the last two since they feel more spontaneous than masking and I don't have too many bright highlights.
When you use a wax crayon, always remember it's there for better or worse. It will not come off and leave paper the same!
Disclaimer: Jennifer Branch Gallery is a participant in the Amazon Services LLC Associates Program, an affiliate advertising program designed to provide a means for sites to earn advertising fees by advertising and linking to amazon.com. I receive a small rebate for your entire order (starting at 4%) if you choose to purchase through Amazon. Most items can be bought multiple places and I highly recommend local art stores if you have one! Any other recommendation links I receive no compensation for. These referrals help me support this website, and I thank you for any purchase you make through them. I will never recommend a product I have not used frequently and believe is the best tool for the purpose!
Painting Demonstration 2

I want barely there water sparkling in the background. Very pale highlights and dark shadows, so dry brush is the solution! Dry brush and texture is why I chose the rough press paper, after all.
With a tricky dry brush where every stroke shows, I like to test the brush a few times on an area of the painting that isn't quite so tricky or a scrap of paper. As you can see, I got the texture just right in the trees at the upper part of the painting. Some extra texture there is perfect and it will be dark enough the individual strokes don't show.
Since all those strokes show up in the water, make them count! Move your brush with the waves. Notice how highlights show up in horizontal swathes across the water. Work with the water, not against it.
A squirrel hair brush is perfect for hit and miss dry brush like this. It barely touches the ridges of the paper so you can really get that sparkle!

Painting Demonstration 3

Since this is dry brush, there's no time between washes! I continue moving around the painting, using slightly varying blues and values. This gives me that great water shimmer! If some of the dry brush hits a still wet area, great! that gives a natural feeling variation.
I still keep everything light in value in this wash. I don't want thick sludgy paint, but effervescent sparkle!
Artist Tips

Painting Demonstration 4

Now that dark background! I want a bit of a a golden glow, but subtle instead of harsh so I use quinacridone gold. This is one of the few paintings I never use a yellow in!
I paint a loose wet brush on dry paper wash of the gold, then drop in pthalocyanine green. I'm keeping it loose since the background is not the focus, the sailboat is!
The reflection of the sailboat is also a golden glow in the water, so I use quinacridone gold again. I'm still painting dry brush since I want the water to sparkle there too, not be dulled. The reflection is also a shadow which makes it quite complicated to paint.
Painting Demonstration 5

Now it's time to turn the golden green into hazy rich darks. While it's drying, I move maroon perylene into the trees to darken them. The rich red helps with the strong, clear color. Then I scrabble in ultramarine blue to make the trees green again. Finally, I add cobalt blue for the slightly opaque haze.
I dash quinacridone dry brush on the wooden mast. A bit of ultramarine blue and pthalo green gives shape to the boat.
Painting Demonstration 6

After the painting has dried completely, I start on the sail. The gorgeous sail is really the star of the painting so it's fun to finally start painting it! Still, it has to be kept simple since there really isn't much to the sail. Quinacridone gold gives the faint glow of the reflecting sun.
I continue adding texture and color to the waves. I need strong darks to balance out the background trees.
I keep a light hand on the waves since the lovely shimmering could be destroyed with a few strokes too many!
Painting Demonstration 7

The last stage is the details and it's hard to keep them from getting too fussy!
I continue the details on the sail. I use the top mainsail reinforcement as an excuse to dull down the arrow pointing the viewer out of the painting!
To purchase How to Paint a Sailboat original watercolor painting, please click!
How to Paint a Sailboat Final Watercolor Painting!
Related Art Lessons

- Painting Galleries
- Latitude Pens
- Contact Me!
All Paintings, Images, Videos, Text and Website Design Copyright 2022 by Jennifer Branch. All Rights Reserved. No Image, Video, Text or Website Design may be used without my written, specific permission.
The 5 Best Sailboats For Beginners

Last Updated by
Daniel Wade
December 27, 2023
Sailing is a fun activity for people of all experience levels. In fact, learning to sail a basic boat is relatively easy—in the right environment, you can start cruising with minimal experience.
However, the idea of a beginner commanding a 55-foot ketch in the middle of the Atlantic Ocean is a bit ridiculous. Even though virtually everyone can sail, beginners should learn the basics in a controlled environment—and on the correct boat.
Boat size doesn’t necessarily affect its beginner-friendliness, because sailors need to take into account factors such as rig simplicity and handling characteristics.
Many beginners make the mistake of picking the wrong boat to begin with, which can lead to frustration and turn them off of sailing forever.
To mitigate these issues, this article will cover the best sailboats for beginners —so you can get on the water and start sailing safely and comfortably.
Table of contents
Best Rigs for Beginners
There are many types of sailboat rigging , and some are more beginner-friendly than others. Unfortunately, some of the most aesthetically pleasing rigs are also the most complicated.
Eventually, sailors can acquire enough skill to master complex rigs, but it’s best to start simple.
Arguably, one of the simplest sailing rigs is the Lateen Rig. This rig consists of a mast, boom, and spar, along with a single halyard and mainsheet. With only two ropes in its simplest configuration, the Lateen Rig makes an excellent starter sailboat, and it will be featured on this list.
For larger boats, the Bermuda Sloop rig is an excellent choice. This rig is quite common and includes a jib for a larger sail plan.
For those who desire a slightly more robust (but single sail) layout, the gaff-rigged catboat is also an excellent choice. This versatile craft (and rig) has a large and relatively simple single sail, which is easier to handle than multiple sails.
Top Five Sailboats for Beginners
Now, we’ll go over the top five sailboats for beginners . These boats will descend in order from smallest to largest, but not by the level of experience needed.
Remember, just because you’re new to sailing doesn’t mean you have to settle for a boat that’s too small. Beginners can handle larger boats with some training, and some are easier to handle than their smaller counterparts.
The following boats were chosen because of their handling characteristics, low cost-of-ownership, and simplicity, as all of these factors are important for choosing the best beginner sailboat.
5) Sailing Dinghy
The sailing dinghy is the quintessential starter sailboat. These tiny, lightweight, popular, and highly affordable little craft is easy to operate and relatively difficult to capsize. The popular Optimist Sailing Dinghy, while designed for children up to the age of about 15, can be used (sometimes hilariously) by adults as well. An Optimist-style dingy is a great option for beginners over the age of 15, as boats of this style can be found in a variety of sizes. The sailing dinghy is a very popular youth racing sailboat, especially in the United States and the United Kingdom. While it’s not particularly fast, this little boat has wonderful handling characteristics and is relatively difficult to capsize. This open-cockpit boat uses a centerboard and detachable tiller and can be beached or carried atop a car without much hassle. The mast is removable, and all parts are easily stowed. Overall, the Optimist and its copycats are a remarkable little craft, equally useful as a tender for a larger boat or a standalone beginner sailboat.
Dinghy rigs vary between builders, but many use the simple Spirit Rig. The rig consists of a single sail and mainsheet, along with one mast, boom, and spar. The leech is stiffened by battens, and ties along the luff secure it all to the mast. Hoisting and securing the rig is easy, and lines are secured to the boat by a cleat. This simple rig has plenty of sail area for most places, and sailors can secure the mainsheet to a block or simply hold it in their hands.
The price of sailing dinghies can vary widely depending on multiple factors. Professionally-made sailing dinghies start around $3,500 new, and plywood kits are available for around $1,000 to $2,000. Used dinghies (including Optimist sailing dinghies) can be found on Craigslist for as low as a few hundred dollars.
{{boat-info="/boats/vanguard-sunfish"}}
The Sunfish is a brilliant little sailboat, and a very fast boat indeed. This little racing dinghy, while only 13 feet in length, can be an enormous amount of fun for beginners and experienced sailors alike. The best way to describe the handling of a Sunfish is, ‘tender,’ though it’s not difficult to master this little boat. For its size, the Sunfish has a relatively large sail area and a very shallow draft. This boat has a small cockpit and can be controlled easily by a single person. The large sail plan of the Lateen-Rigged Sunfish makes for excellent performance in light winds and amazing speed on windy days. The Sunfish is a lightweight fiberglass boat with a simple rig and is a great step-up from a sailing dinghy. It’s possible to learn how to sail on this boat, but every sailor who’s spent time on a Sunfish will probably recommend bringing a towel. The boat is relatively easy to capsize for beginners and it heels aggressively, but these characteristics can teach sailors some important lessons. The heeling characteristics of the Sunfish can help beginners get accustomed to the feeling and help them understand the limits of a sailboat and how to avoid capsizing.
The Sunfish features a Lateen Rig, which has some shared characteristics with the simple Spirit Rig. The Lateen Rig has a single spar, mast, and boom, and is easy to set up and dismantle. The mast is removable as well, making stowing and transportation relatively easy. The large sail plan of the Sunfish makes it ideal for lakes and other areas where the wind is sporadic or very low, and the boat can be safely handled in many conditions. The boat is great for racing and learning and is also available in a Bermuda rig. The Sunfish is recognizable by the distinctive fish logo in the top corner of the sail, and the classic rainbow sails striping.
The Sunfish is still commercially manufactured. You can purchase one new from the factory for around $5,000 today, and options are available to make the boat your own. While the boat is designed to be sailed by a single person, two adults can purchase this boat and use it together comfortably. Used Sunfish prices vary, but a fully-outfitted boat in good condition can cost upwards of $1,000. They hold their value well, and they’re a great choice for beginners.
{{boat-info="/boats/vanguard-laser"}}
The Laser is considered by many to be the Sunfish’s main competitor. The two boats are the same length (13 feet 9 inches) and share many of the same handling characteristics. However, the boats do have some notable differences. Many people consider the Laser to be a step-up from the Sunfish in difficulty, as the boat handles much more like a racer. The Laser has been used in the Olympics for racing. The laser is small and simple enough for beginners but requires skill to operate. Beginners can learn a lot from sailing a Laser and have an enormous amount of fun in the process. This fast little boat is simple and easy to set up but handles like a racecar. If you’re a beginner on a laser, you’ll probably capsize at some point—which isn’t always a problem if you’re in a controlled environment, as the boat can be righted easily.
The laser is a Cat Rigged boat. This means it has only one mainsail and no headsails. The simple rig has a mast and a boom and is very easy to set up. The sail area of the laser is relatively large and designed for speed in high winds. The rig combined with the overall design of the sailboat makes it handle tenderly, which may be off-putting to some beginners. Regardless, it’s still a blast to sail for beginners with some experience.
New Laser sailboats start around $6,000 which is slightly more than the Sunfish. This simple centerboard cruiser is constructed as a race boat, which can explain some of the price increase. Used Laser sailboats are available on the market, though usually not as common as the Sunfish. Used Laser prices vary widely.
2) Gaff-Rigged Catboat
The gaff-rigged catboat isn’t a brand of boat—it’s a style of a sailboat that was once a popular workboat on the New England coast. This boat, which has only one mainsail and no headsails, is available in a wide range of designs. Catboats are famous for their handling and power and make a great sailboat for beginners. These vessels are available with centerboards, keels, cabins, and in open designs. Most catboats range from 15 to 19-feet long and can be built from wood or fiberglass. Catboats are easy to handle, and one who learns on a small catboat can easily transition to a larger one. Besides being one of the most easily recognizable sailboats, catboats are also some of the most versatile. A catboat can be just as suitable for lake cruising as it is for coastal waters.
The most common type of catboat rig is the Gaff Rig. This classic and robust rig is more complex than the simple Spirit and Lateen rig, but it’s more suitable for a ‘proper ship.’ The Gaff Rig can provide similar power as an equivalent Bermuda Rig, with much more elegance and a shorter mast. Many sailors prefer the classic Gaff Rig for its handling characteristics and durability.
It’s impossible to specify the price of catboats because they vary so much in design and size. New catboats (between 15 and 25-feet) can be purchased for less than $20,000, and used boats are numerous and varied. Cabin catboats tend to cost more, especially new—some run for more than $50,000 with a high level of amenities, including a head and galley. Numerous catboat plans are available online, and sailors report constructing them (usually of plywood) for just a few thousand dollars.
1) West Wight Potter 19
{{boat-info="/boats/west-wight-potter-19"}}
The West Wight Potter 19 is a fiberglass sailboat designed for safety, easy handling, and beginner-friendliness. This 19-foot trailer-sailor features a cabin with a vee-berth, a simple rig, and a retractable keel. The West Wight Potter 19 could potentially be the best cabin sailboat for beginners, and certainly one of the safest—the West Wight Potter 19, according to the manufacturer, is quite literally unsinkable. The hull is filled with buoyant materials, allowing the boat to be flooded and remain afloat. However, unsinkability isn’t the only characteristic of this boat that makes it ideal for beginners. The rig is simple and easy to set up, and the handling characteristics are excellent. The boat is not prone to aggressive heeling and handles confidently in a variety of conditions. While one generally wouldn’t consider it to be a blue-water cruiser, it’s still extremely capable—one sailor even sailed this vessel from California to Hawaii , which is over 2,000 nautical miles. The theoretical hull speed of this boat is around 5.4 knots, but it actually has a tendency to plane and achieve higher speeds. It’s a flat-bottomed cruiser, making it easy to beach and transport with its retractable keel and removable rudder. The West Wight Potter 19 is a great introduction to large sailboats and carries amenities normally reserved for boats at least 1/3 larger.
The West Wight Potter 19 is a Bermuda-Rigged sloop. The sail plan is sufficiently large to propel the boat in a variety of conditions, but not so large that it overpowers the boat. Sailors can single-hand the boat with ease, and set up and takedown are easy and require no special tools. The boat handles well in a variety of conditions and is well-known for its superior stability. The rig comes apart easily and can be stowed and trailered by one person.
The West Wight Potter 19 has been produced and sold commercially since the 1970s, and the used market has plenty of boats available, generally starting around $5,000. New West Wight Potter 19 sailboats are remarkably affordable compared to other boats with comparable characteristics. The West Wight Potter 19 is manufactured by International Marine in California. New sailboats start at just shy of $25,000. Owners can add an enormous range of extra features to their boats, including a hull-strengthening ‘blue water’ package, a stove, a head, electrical power, spare parts, and much more. The boats are highly customizable and can be outfitted for weekender sailing or long-term liveaboard cruising.
How to Pick a Sailboat
Picking a sailboat for beginners doesn’t have to be difficult. Before deciding on a boat, consider your experience level and location.
If you only have access to rough ocean, it may not be the best idea to get an open dinghy.
If you live near a lake, a Sunfish could be a great way to start.
Also, consider your budget. If you’re looking for a $50 sailboat, you can probably find one, but it won’t be ideal.
If you have just a few thousand dollars to spend, you can set yourself up nicely with a little research .
Also, consider what you want to do with the sailboat. Recreation, fishing , cruising , and exploration are options, and require different kinds of boats.
Whichever you end up choosing, make sure you try it out and can sail it comfortably.
Related Articles
How To Buy A Beginner Sailboat
Sail Maintenance For Beginners
Can a Novice Sail Around the World?
I've personally had thousands of questions about sailing and sailboats over the years. As I learn and experience sailing, and the community, I share the answers that work and make sense to me, here on Life of Sailing.
by this author
Best Sailboats
Most Recent

What Does "Sailing By The Lee" Mean?
October 3, 2023

The Best Sailing Schools And Programs: Reviews & Ratings
September 26, 2023
Important Legal Info
Lifeofsailing.com is a participant in the Amazon Services LLC Associates Program, an affiliate advertising program designed to provide a means for sites to earn advertising fees by advertising and linking to Amazon. This site also participates in other affiliate programs and is compensated for referring traffic and business to these companies.
Similar Posts

Affordable Sailboats You Can Build at Home
September 13, 2023

Best Small Sailboats With Standing Headroom
December 28, 2023

Best Bluewater Sailboats Under $50K
Popular posts.

Best Liveaboard Catamaran Sailboats

Elizabeth O'Malley
June 15, 2022

4 Best Electric Outboard Motors

How Long Did It Take The Vikings To Sail To England?

10 Best Sailboat Brands (And Why)
December 20, 2023

7 Best Places To Liveaboard A Sailboat
Get the best sailing content.
Top Rated Posts
Lifeofsailing.com is a participant in the Amazon Services LLC Associates Program, an affiliate advertising program designed to provide a means for sites to earn advertising fees by advertising and linking to Amazon. This site also participates in other affiliate programs and is compensated for referring traffic and business to these companies. (866) 342-SAIL
© 2024 Life of Sailing Email: [email protected] Address: 11816 Inwood Rd #3024 Dallas, TX 75244 Disclaimer Privacy Policy
Acrylic Step-by-Step Tutorial – Easy Fishing Boat Painting
- By Will Kemp
- acrylic painting / painting
- 74 Comments

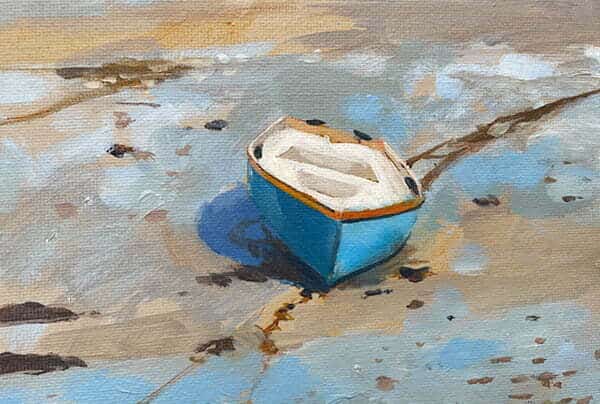
Will Kemp, Fishing Boat at St Michael’s Mount, 10 x 8 inches, Acrylic on Board
Acrylic Step-by-Step Tutorial
Are you looking for an easy acrylic painting tutorial for beginners?
After posting photos from my recent trip to St Michael’s Mount , the most popular request was to create an acrylic step-by-step tutorial of the little blue boat. So here it is, a new free acrylic lesson!
Grab a brew, maybe a biscuit or two (now the weather’s turning a bit more autumnal I’ve got a piece of particularly good ginger cake from the local farmers market) and let’s get painting, I really hope you enjoy it.
(p.s Students have had some fantastic results with this lesson)

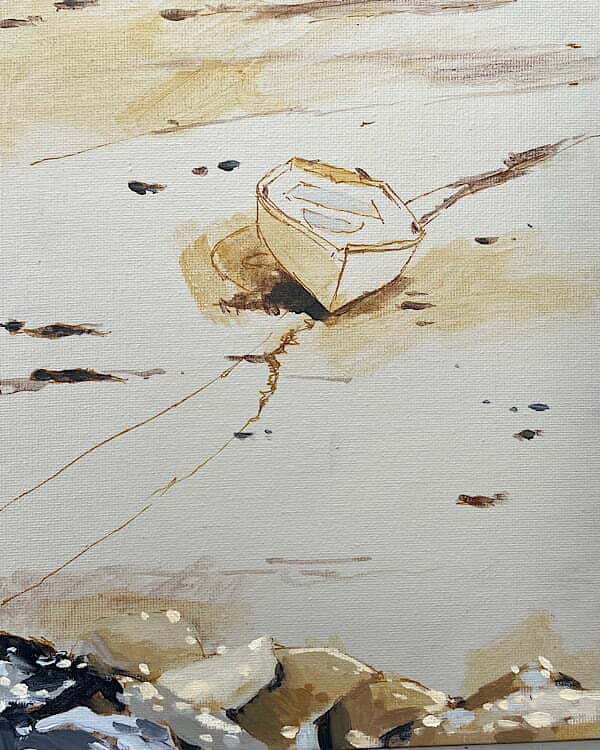
Downloading the acrylic step-by-step reference
You can download the photo below as a reference image, print it out, and follow along.

You can download a larger version of the image here. (The size of the image is 1:1 to the size I painted, 10 x 8 inches)
Acrylic painting tutorial materials:
- 10 x 8 inch (25.4 x 20cm) canvas or board
Acrylic Paints
I use a mix of Golden and Winsor & Newton Acrylic Paints, these were the ones I used for the demo, but they could be interchanged between other brands and still work well.
Heavy Body Paints from Golden
- Titanium White
- Ultramarine Blue
- Yellow Ochre
- Burnt Umber
- Phthalo Blue (Green Shade)
Winsor & Newton Professional Acrylic
- Naphthol Red Light
- Phthalo Blue (Red Shade)
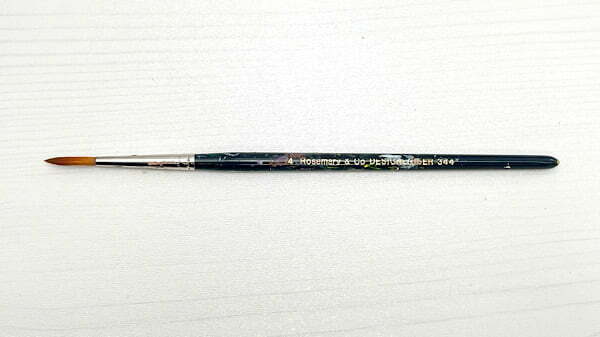
Round Synthetic – Rosemary & Co, Series 344. Designer Golden Synthetic , size 4
- Filbert – Isabey Isacryl size 6
- Small Round Synthetic – Rosemary & Co Designer series 344 size 4
- Round Synthetic – Princeton, Aspen 9000R, size 4
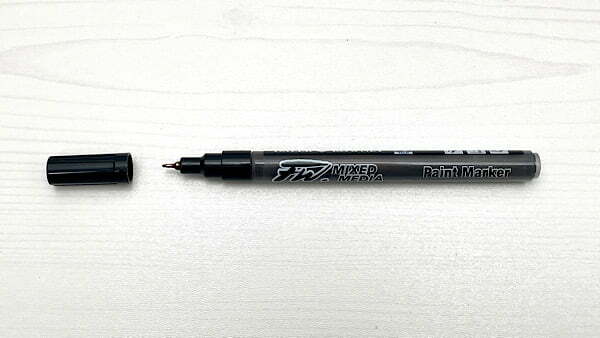
0.8mm Daler Rowney mixed-media paint marker filled with sepia high flow acrylic from Golden Paints.
- F & W Daler Rowney mixed-media paint marker
- Tear-off palette
- Palette Knife
How do you choose a colour palette for your acrylic painting?
Before I begin selecting my paints for any painting, I ask myself, what can I see?
What colour palette is going to be most helpful for this scene? What’s the feel I’m going for and what colours do I like?
Importantly what colours don’t I need? Am I going to paint impasto or in glazes ? Do I want an opaque or transparent pigment? And if using oil paints, what’s the drying time of those pigments?
I work my way around the scene, scanning for colours. If you look at our reference photo, you can see a warm muted yellow at the bottom, so I’d ask myself, are there any brighter yellows than this in the subject? Not really, so a Yellow Ochre for this piece would work well.
Now my eye has jumped to the warmth on the front of the boat, I’m going to need a red so I’m going for a Naphthol Red Light (a Cadmium Red would also work fine).
Then I’ve also got cool tones, specifically the blues.
Within the boat, you can see a turquoise blue, so I’ll use Phthalo Blue (Green Shade) for that, in the reflected light, it’s slightly warmer, so I’m selecting Phthalo Blue (Red Shade) and for the warmer shadow under the boat, Ultramarine Blue.
For the dark areas, I can mix Burnt Umber with Ultramarine Blue to create a black.
There’s almost a vivid transparent yellow-green for the green areas so that you could use a bright lemon yellow, but I’m going to use some Green Gold to give that lovely glow.
Step #1. Coloured Ground & Drawing Out

Line drawing using a high flow sepia acrylic within a mixed media pen
How do you paint sand without using yellow?
Our perception of what colour sand is is largely based on memories. Golden and bathed in sunlight, but when you look at the sand in our image, it’s a very muted colour, and that’s even with dappled sunlight over it.
Mixing a muted sand colour will feel greyer than you think it should be, but this will help with our approach to the rest of the colours in the painting. I want something that goes towards a cool hue because I can add warmer glazes in the later stages of the painting so I’ve chosen a mix of Titanium White and a small amount of Raw Umber.
Slightly dilute it with a few drops of water to move more smoothly and is easier to apply. Brush it over the whole canvas using a decorators brush or a flat synthetic brush, making sure it covers the canvas opaquely yet isn’t too thick. I don’t want to make it thick because I still want to be able to draw on top of it. Also, you don’t want to lose too much of the canvas texture.
If it isn’t flowing smoothly, dip the tip of your brush into a bit of water and continue applying, and if you do apply it too heavily, you can use the edge of your palette knife to scrape the paint off.
Okay, now we’re just going to leave that to dry before drawing out.
Drawing the s-curve

Look for the underlying s-curve made by the seaweed and ropes
I’ve drawn out using an acrylic marker.
It’s a mixed-media marker from Daler Rowney, with a really fine 0.8mm tip which makes a lovely line. What I like most is you can choose whatever medium you want to go into the empty marker. I’m using a high flow acrylic from Golden paints in a Sepia, designed originally for airbrushing, it’s already been thinned by the manufacturer.
So the drawing is actually pretty simple.
The main objects are the curve of rocks in the foreground which helps to frame the view and gives us that sense of depth from the boat. Then just a slight indication at the top where the seaweed is coming in, and also the shape of the ropes on the sand so you have this nice diagonal S-curve that sweeps through the composition.
Finally, just some very simple shapes on the boat, putting the cast shadow in and just an indication of shapes on the interior of the boat that will be lighter whiter areas.
Step #2. Burnt umber block-in

Looking at the rock on the bottom left, there’s this warmth to the surface, so having that in first will provide us with another good base. Initially, I wash in with diluted Burnt Umber to give a warm glow underneath. Brush wise; I’m using a small round synthetic brush (size 4 Design Series from Rosemary & Co series, 344)
Then, using a mix of Ultramarine Blue and Burnt Umber I mix a lovely deep, rich, cool black. I paint that very dark tone on top of the warmth, which will help us to judge the value range within the painting. If you notice there is a little dark area around the base of the boat to indicate the shadow cast onto the sand, this will help it feel like it’s set in, grounded and give the impression of some solidity.
Once you’ve made that black mix, take a little bit to one side and add some white and a bit more Burnt Umber to get a nice grey tone. You can use this for the rocks in the foreground a little later on in the painting.
Also, there are a few tiny rocks painted in, I’m always looking for these underlying areas which might break through shapes, and these little rocks are so important to add interest to what might usually feel like a very flat surface.
Step #3. Painting warmth in the sand

Before painting the greys over the rocks, I apply a thin glaze of Yellow Ochre diluted with water.
Paint this over that entire area, just like a stain to add some warmth to the rocks in the foreground first. If you look back at the reference image, you can see underneath that grey rock bottom or left; there’s a lovely yellow warmth.
I’m using a filbert brush from Isabey Isacryl range, size 6 for this section.
Also, I wash in the back of the boat edge and the brim at the top where you’ve got warm wood, a little bit next to the right-hand side of it where the sun’s hitting it, and top left. So it’s now created this underlying pattern of dappled sunlight. If it goes on a bit too strong, you can take a paper towel and pull it back.
I take a tiny bit of the black mix and white for the foreground textured rocks to give us a range of greys and apply them thicker, with broken marks.
Okay, nice, that Yellow Ochre has really added that sunshine feel to the piece!
Step #4. Adding colour to the rocks
Now I’m layering up the colours on the rocks to add more form, using Titanium White, Yellow Ochre and a touch of Burnt Umber to darken the mix; I paint a diluted base over the Yellow Ochre and vary the intensity for the darker shadows within the rocks.
Take a tiny amount of this brown mix and add white to create a warm light for some of the highlights on the very edges of the rock.
I’m using a round brush from Princeton, the Aspen range, 6500R size 4.
These little highlights help bring that a sense of light; again, just on the top of the rock brings it to life.
Step #5. Adding reflections in the sand

For the blue, I’ve mixed Ultramarine Blue with a bit of Phthalo Blue (Red Shade) and Titanium White to create this reflective light in the foreground. I’ve also used Raw Umber so that I can knock back the blue if it becomes a bit too intense.
I’m varying the thickness of the application, depending on how much of the ground, acting as the sand, I want to show through. Here I’ve swapped back to the filbert brush.
I’m just adding a bit more white where I’ve got a sense of light coming in on the right-hand side by the boat.
Leaving elements of the ground colour showing through gives us that illusion of the sand underneath. You can add a bit of the Raw Umber to mute it down for some of the more muted blues; at the very top, with the dry brush, drag it over some of these areas to give this reflection on the sand.
Step #6. Adding our lightest light

Now we’ve got these blues in, it’s going to be handy to paint in the boat, so we can then judge all the hues together to see if we need to adjust anything. Start with pure Titanium White. Paint the very widest area on the boat, and then add a little bit of Raw Umber to darken it slightly for painting in the shadow areas indicating the seat void.
Step #7. Balancing blues

Next step in the tutorial is balancing the blues.
I put out a tiny bit of Phthalo Blue (green shade) and mix it with Titanium White. This pigment has very high tinting strength, so you don’t need very much paint at all. Add a little bit of Raw Umber, so it’s not super intense, and you’ll get a lovely turquoise colour, perfect for the light side of the boat. Once that initial colour has been blocked in, I can lighten it or darken it, to give a bit more form to the hull of the boat.

I use Phthalo Blue (red shade) mixed with white and Burnt Umber for the shadow side, and then a bit of Ultramarine Blue and a tiny touch of Naphthol Red Light for the cast shadow made by the boat.
Step #8. Altering intensities to the painting

It felt like when the boat was painted in, and the more intense pigments were introduced, the reflection of the sky on the sand was competing with the boat a bit too much.
I wanted the boat to be the main centre of focus. So, I glazed down the areas of bright reflections with a mix of Raw Umber, a touch of Ultramarine Blue and a touch of Titanium White.
This knocks it down a bit so that it’s darker tonally.
Step #9. Painting pebbles in the sand

Now it feels like the boat is the main focus, but I’ve lost a little of the darkness around some of the actual initial drawing.
What I’m going to do is re-emphasise parts so that we’ve got a nice contrast.
What I do like is the cast shadow blue, which looks great. And the lightness in the background, where there’s light sneaking around the corner.
We are now adding a few small random dashes to indicate pebbles on the beach. Vary the tone of these slightly, so they don’t all feel the same.
Step #10. Adding warmth to the boat
With a bit of Naphthol Red Light, Yellow Ochre and Titanium White, mix a warm brown orange and paint around the edge of the boat; the addition of these punchy oranges suddenly make the blues look so much bluer.
I also reinforce some of the drawing and some of those darker lines around the boat.
Step #11. Refining the edges

So the last thing to do here is add that very fine rope on the front of the boat, which ties the whole composition together, grounds the scene and adds a bit more definition to it. Also, notice how the boat is more in focus than some of the more painterly marks around it.
Step #11. Adding a Green Gold glow
Then glaze over all the areas of green with the Green Gold, adding that bit of seaweed glow to the painting.
Finishing touches – painting dappled light
To break up the background, I brought in reflected light with these dots; I also felt the highlights on the rocks were competing too much, so I blocked them in more solidly to finish.
Really hope you enjoy it!
p.s you can see more acrylic painting tutorials here and this Cornish Seascape Video Course
Join the Art School Newsletter (it's Free)
Sign up now to get the latest posts, news about products & art inspiration, straight to your inbox.
- First name *
- I respect your privacy and take protecting it very seriously - privacy policy
You Might Also Like

How to Paint a Still Life with Acrylics

New Horizons and Coastlines to Explore

How to Apply a Varnish to an Acrylic Painting
This post has 74 comments.

What a beautiful subject, Will! I really love your painting. Thanks for the instructions!

Thanks so much Lisa, really hope you enjoy it. Will

This is great! Thank you for the tutorial and colour mixing “recipes”!
Hope they help with your mixes Nancy.

This is wonderful!! I love how you talk through the process and the logic behind each step… thank you!!
My pleasure Mae.

Thank you So much! Your work is so beautiful!! I really appreciate your sharing yourProcess. God has blessed you mightily And in turn you bless us with your gift as an educator.
Will study what you have shared. Please know that your warmth and God given talent come through your work so beautifully. Warmest aloha, Kathy
You’re very kind Kathy, glad you found the explanations of the process helpful. Will

Very nice !!! following your instructions I’ll try it !! Thank you Will !
Good one Margarita!

Really enjoyable! I have never fancied using acrylics? But this painting of yours together with the detailed guide you give makes me want to have a go?! So good! Thanks again.
Cheers Des.

Will, always look forward to your generous sharing. This is lovely and I would like to try it in watercolor. Thank you.
Yes, it would translate well to watercolour as well.

Thank you so much Will. You’re very kind to make all this available to subscribers. I totally agree with all the above comments. Explaining the logic behind your choices & methodology makes the whole learning process so much easier for me, a complete novice, to grasp. Your emails, videos, all the info on your website are much appreciated.
Hey Yuen, so pleased to hear that you found the explanations helpful. Will

Hi will, I already attempted the blue boat when you first posted it as I thought it was such a lovely subject. I used oils, tit white, burnt umber, cobalt blue, yellow ochre and a touch of viridian. I was quite pleased with my attempt, but now having seen this post with your instructions I’m going to paint it again, maybe still using oils, maybe acrylics. I’m sure it will be much improved this time!
Good one Brenda, hope you enjoy it the second time round!

So helpful thank you
Thanks Cathy

It is very helpful and fun. Thanks for the guiding steps ! I enjoy it very much
Thanks Vivian, pleased you enjoyed the steps.

Absolutely beautiful – I’m inspired!
That’s great to hear Joanne

Thank you, Will! I was one of the people who requested a lesson from this photo, and here it is! I always learn so much from your discussions and such a beautiful final result! I will start it today! How is the remodel coming along? . Enjoy your day!
My pleasure, really hope it turns out well Nancy. Remodelling is coming along well. Will

Another great tutorial. What is interesting is that the light in the painting is more like the brightness you see here in Australia. Must have been a particularly sunny day in Cornwall.
Thanks Stewart, yes, it was some pretty special light that day. Cheers, Will

Thank you, Will…for sharing this tutorial. You are amazing! Can’t wait to do this one…it is one of my favorite of your photos.
Thanks so much Ruth, really hope your painting turns out well. Will

A gorgeous picture! And thank you for explaining it so clearly.
Glad the explanations helped to understand the thought process behind the painting Chirin.

Dear Will, I always come back to your lessons because they are clear and calming in this chaotic time. This lesson, it helped that you differentiated between the phthalo blues used to color the boat. Very insightful, as usual.
Glad the Phthalo Blue section helped Linda, yes, a little tweak in blues can really help to push a colour range. Will

Thank you! How do you keep your brush strokes so varied and lively?
Hey Matt, If you swap brushes throughout the painting it can help to get used to trying to capture a section within the confines of that particular brush. So try a decorators brush for a detailed part, or a round brush for a block-in. By working within a constraint will force a creative response. Will

Thanks so much for your tutorials. The step by step explanations are fantastic. You are making the most of your beautiful part of the world. Question: do you paint outdoors much? Warm wishes, Syl
Hi Syl, glad you enjoyed it, yes, I do paint outdoors for landscapes. Will

Hi Will, Thank you for taking time out of your busy schedule to put together this latest tutorial for us. The blue boat painting is just charming and I can’t wait to try it out. I’ve been meaning to send you feedback about your water mixable oil tutorial and now ten months have passed. The course was spot on from beginning to end and I learned a lot. The Vermeer vignette was especially instructive and fun to paint. I don’t know how you do it but all your courses are terrific. Also thank you for your generous free tutorials. Best regards from California!
So pleased you enjoyed it Karen, and glad that the water-mixable oil course was of help. There are quite a few considerations to balance so really pleased that the Vermeer series helped. Will

Thank you for sharing this beautiful painting and most of all the detailed process notes. I paint mostly in oil and am going to give this a shot.
Good one Allan, would translate well with oils aswell.

Very good of course yet I’m am not interested in what students want to know rather what you the artist want to show!—With all respect go back to your instincts – your basics that brought you to this point of teaching. Best Michael
Hey Michael, glad you enjoyed the steps, the teaching method for this tutorial is exactly how I would approach any classical teaching. I had actually taken this image to create a painting as part of my personal practice, but with the response from students thought it would be nice to share the process. Cheers, Will

Thank you Will. If anyone makes me want to try acrylics again , its you .. you made that little boat scene come to life .. great work..
That’s lovely to hear Victoria.

I really appreciate you sharing techniques and tuition with us beginners. It’s very generous and so very helpful to see and learn in stages. Thank you so much
My pleasure Carole. Will

I’ll try this one now that you demonstrated. I noticed the boat right away but felt the scene was “ to much” for my current level. Thanks Will
Hope the steps help Abbey. Cheers, Will

WHOO-HOO! Can’t wait to try this out. Can you help me to translate your colors using student-grade acrylics? I can usually find one of the Phthalo Blues. What could I use to replace either the red shade or green shade of Phthalo Blue?
Have a great day and thank you so much for the painting!
Hi Laundrea, you would be able to use the student Phthalo Blue for most of the painting, maybe a little lemon yellow to mix the turquoise.
Cheers, Will

I’ve enjoyed reading this piece immensely, Will. The meticulous step-by-step and the detailing of your thought process is incredibly helpful to beginners like me. You are such a generous teacher who never fails to inspire: I always come here or re-watch your various courses when I feel stuck. And I always find nuggets of advice and wisdom that help me move forward.
Hope you’re having fun and making good progress with whatever you’re working on at the moment. As always, looking forward to your next post.
That’s so great to hear Jo, really pleased the lessons have been helpful. Will

Will, you are the Bomb!! Thank you for sharing once again. I have painting along with you in the past and will certainly paint this lovely little boat scene. Salud!!
Hope it turns out well Faye. Will

Thanks Will! I always enjoy the boat projects the best! Had a bit of trouble with the darker side of the boat, but got it figured out in the end. Thanks again
Good one Jeff, pleased you enjoyed it. Will

I love this tutorial- am going to try it but need to get a paintbrush. I have the filbert you suggested from a previous course but need the round one and have a question. There are two different brushes listed but appear to be the same size. Is it just a US/UK difference? Also, as I am slowly adding to my supplies- do you suggest the short handled or long handled brush? Thank you for your wonderful, incredibly helpful and patient teaching style. I love your artwork and you are really an inspirational teacher.
Pleased you enjoyed it Barbara, the two brushes listed (on Rosemary & Co) are the same size brush, just different length handles. For smaller pieces, I tend to use a shorter handle for the smaller detail brush but use a long handle for filberts so I can keep a distance from the easel. Cheers, Will

thank you for this wonderful Tutorial…..learned so much about color and subtle touches to make the work come alive.
So pleased your painting went well Delores. Will
I just did this painting after not doing any art for many months- it was so approachable and satisfying to complete. I needed something to jumpstart my motivation and this was just the thing. I was pleased with the result (with the usual- I should have done this or that thing that happens after you walk away) and am looking forward to another project from you. You’re the best.
That’s fantastic to hear Barbara, so pleased for you. Will

This was so helpful Will – love the impressionistic quality of your painting. Do you ever do abstract paintings or would you teach a class on doing abstract art in acrylics or oils?
Glad you enjoyed it Donna, I do paint abstracts, good to know a class on abstraction would be of interest. Cheers, Will

Happy thanksgiving to you’all too from the other side of the Atlantic. Very thankful for your teachings and inspiration. I’ve been following your blog for some time now, and there is one thing in particular about the way you paint that I wish I could do better without exaggeration, because then it would be choppy. It has to do with the looseness of your brush strokes. For example I see the boat, and in one section of the side there are several colors of blue and grey blue that are distinct yet combined. So is it the layering and allowing the paint to dry underneath or a particular brush or something else? Maybe I simply have to stop swiping!? And while you mention looseness in your lessons regularly, I’m not getting it, although maybe I missed a lesson somewhere along the line, so please direct me accordingly if you already have this teaching somewhere on your website. I’d really like to sink this aspect into my work. Thanks … Laura
Thanks so much Laura, you might find this lesson helpful on How to Loosen up your Acrylic Paintings – Impressionistic Apples Tutorial It’s a free video tutorial so it might help being able to see how I apply the paint. To create the most free flowing style you would normally draw with the brush, but I’ve shown a pencil drawing layout to get the structure of the shapes down. Hope it helps, Will

Hi Will, thank you for this tutorial. I hope to give it a go during this holiday. Happy New Year from across the pond. Jude
Thanks so much Jude, and you, really hope you enjoy it. Will

You are such a talented artist and gifted teacher!!! Love the way you bring warmth in to the painting, in a cold setting!! Thank you for shearing this … I really enjoyed painting it.
Great to hear Sarani, so pleased you enjoyed the lesson. Will

Will- 1. You need to get a TV program going with the BBC. 2. There’s no one like you over here in the States. Do this! V/R Jane
Ha, ha, you’re very kind Jane, really pleased you enjoyed the lesson. Will
Leave a Reply Cancel reply
This site uses Akismet to reduce spam. Learn how your comment data is processed .
- New? Start Here
- Shop All Courses
- FAQ’s & Contact Will
- Free videos
- 7 Painting Principles
- Student Success Stories
- Art Tuition Bundle Offers
Videos » Easy Red boat acrylic painting tutorial for beginners step by step

Red boat on lake water reflections Live streaming Acrylic simple painting lesson for new artists Fully guided YOU CAN PAINT THIS with The Art Sherpa Traceable-Grid, " Art-work and Extra info downlaod the pdf here.
facebook group - https://www.facebook.com/groups/TheArtSherpa/ Garb: https://teespring.com/stores/the-art-sherpa
Below are a list of Recommended materials. This includes Amazon Affiliate program, and you support The Art Sherpa when using them. These are linked here to make thing easy and convenient for you. full disclosure here http://bit.ly/affiliatedisclosureTAS *** Acrylic Paint Colors *** ***Yellow Ocher:PY 43 OR Yellow Oxide PY 42 same thing kinda ***Burnt Sienna: PBr 7
***Cadmium Yellow Medium : PY 35
***Cadmium Red medium : PR 108
***Phthalo Green Blue shade : PG 7
***Phthalo Blue Green shade :PB 15:3 for Pro and PB15 for student
***Dioxazine Purple: PV 23
***Quinacridone Magenta: PR 122
***Titanium white: PW 6
***Mars black: PBk 11 9x12 canvas or surface
If you dont have a color you can exchange your colors for any of the ones listed here-
Cad Red Medium pure or hue - Pyrolle Red, Primary red -or vermillion- Naphthol Red Medium -
Quinacridone magenta, Quinacridone Rose , Crimson, deep magenta
Phtahlo Blue , Windsor Blue , Cyan Blue
Ultramarine- Anthraquinone Blue
Cadmium Yellow- Cadmium yellow Hue , Hansa Yellow Medium ,
Phthalo Green- Cobalt Green , Viridian Green Hue
Burnt Sienna -Burnt Umber
Mars black - Carbon Black
Dioxazine purple - Ultramarine Violet
Titanium white - Primary white
***** More Materials These are used often in my lessons but may not be use here ********* New Wave Paper peel Paint Pallet : https://amzn.to/2ROk6xw T Square Ruler - https://amzn.to/2Jpic1c Saral Paper: http://amzn.to/2zBrLbN Chalk: https://amzn.to/2FhPVa9 Sharpener : https://amzn.to/2Fhj19M Artist Tape : https://amzn.to/2qZTywt Tracing Paper 9x12 : https://amzn.to/2r0V55h Art storage I LOVE Art bin : https://amzn.to/2NDohsw
MY EASEL Best European Easel *OS3 http://amzn.to/1Xm9Ieu Jack Richeson La Vara Easel, Table Top http://amzn.to/2audtKw Books : Painting in Acrylics: The Indispensable Guide: https://amzn.to/2LQ64c3 How to Mix Skin color - https://amzn.to/2FeEv7j Victoria Finlay History of Color: https://amzn.to/2Jn0Yl1
Help is keep making great videos like this https://theartsherpa.com/patron
Acrylic April Playlist:
If you love this video you may also like this boat painting
HEART MAIL: The Art Sherpa 9490 fm 1960 RD W suite 200 Humble TX 77338
Artwork is the property of Cinnamon Cooney and The Art Sherpa LLC. and is intended for the personal enjoyment of the student. You may sell, donate or Gift a painting you do following one of my lessons in a private setting. If a paintings you make of my original design are offered for sale in a retail setting of any kind ( this includes online) , please attribute ‘Original design by Cinnamon Cooney, The Art Sherpa. www.theartsherpa.com’ Please, create no prints or mechanical reproductions of your paintings of my original design. This is a violation of my copyright and use policy.
If you’d like to share our tutorial/original painting design with a church group, skilled nursing facility or other nonprofit interest, do get in touch with Labs we can help you
For commercial use or licensing in the painting party, social painting, or other venues; please visit our business website:
https://theartsherpa.com/labs
The Art Sherpa Experience
Learn to paint with Acrylics Step by Step with The Art Sherpa. There are 600+ free video art lessons for beginners. You CAN paint this. Begin YOUR art Journey today by finding the perfect acrylic painting on canvas to follow along with. With the #1 beginners acrylic painting channel on YouTube, there is something you will be excited to create, and can hang on your wall today. We have Big Art Quest lessons that will take you through every beginner step and lessons to get you painting your own masterpieces. Join our art family for Live streaming video lessons on YouTube and Facebook. Take your art to go with Mobile! Why are these art lessons free? So YOU can save for more art supplies and have fun!

IMAGES
COMMENTS
Hello my creative friends! In this acrylic painting tutorial we will go step by step to learn how to paint a sailboat in the ocean. Thank you to my awesome p...
Painting for First-time or Beginner painter: Simple Sailboat Please LIKE👍this video, SUBSCRIBE to the channel & SHARE with your community🎨Support Paint wi...
Learn how to paint a sailboat scene in this, step by step, acrylic painting tutorial with artist Ashley Krieger. This lesson will teach you the steps to take...
Project Description: Easy Sunset with sailboat painting on canvas full tutorial of this relaxing Serene Seascape. Fully guided Step by step in live and replay for the brand new art student. This is a colorful fiery simple sunset you will love to put on you wall and drift off to summer. Full Image : goo.gl/GYpfW7.
Sailboats At Sunset Beginners ACRYLIC Tutorial YOU CAN PAINT 🚢 Abstract can be easy with The Art Sherpa Step by step Classes. facebook group ... With the #1 beginners acrylic painting channel on YouTube, there is something you will be excited to create, and can hang on your wall today. We have Big Art Quest lessons that will take you through ...
Very easy Sunset Sailboat 🌟🎨 Easy Acrylic painting tutorial for beginners. Acrylic course for those who want to learn how to paint better. It's all 100% real-time, with multi-camera angles, and thoroughly explained. YOU CAN PAINT THIS !! The Art Sherpa brings you all your art lessons.
This is a great tutorial for beginners, too! Watercolor Sailboat Step by Step. 00:00 - Intro. 00:32 - Color mixing. 01:06 - Painting the sail boat. 02:16 - Painting waves. 03:01 - Painting trees and background. 04:53 - Painting the sky. 06:14 - My thoughts on the painting.
This lesson was done by Derek Macara a very talented acrylic painter who I was so happy he agreed to teach something for you. Be sure to check it out if you'd like a slower version, enjoy
2. Do I need to have prior painting experience to create this? Not at all! It is an easy-peasy painting, perfect for beginners. 3. What brushes are recommended for this painting? A medium brush for the broader strokes in the sky and river reflection, and a small brush for detailing like the boat and light should do the job. 4.
Sailing is one of my favorite things to do and painting sailboats is almost as fun! This lovely sailboat flew in the wind on Somes Sound on Mount Desert Island, Maine. ... Painting Tutorial Level. Beginner Intermediate Advanced. Skill Building. Drybrush Texture Painting Water Wax Resist. Art Supplies. 14" x 20" Arches Rough Press Isabey Pointed ...
Today, I painted a sail boat.Beginners can draw along easily. Follow me step by step.Please subscribe and like. Thank you~~오늘은 요트가 보이는 풍경을 그려보았어요. 초보자 ...
Here is an easy sailboat painting tutorial. Love how the colors in this one turned out! ⛵️#art #artist #painting #acrylicpainting #tutorial #easy #howto
Sunset sea and beached Boat 🌟🎨 Easy Acrylic painting tutorial for beginners. Acrylic course for those who want to learn how to paint better. It's all 100% real-time, with multi-camera angles, and thoroughly explained. ... With the #1 beginners acrylic painting channel on YouTube, there is something you will be excited to create, and can ...
Oct 18, 2023 - Make a beautiful sailboat acrylic painting on canvas. Learn simple acrylic paint tutorials and techniques for beginners. Use acrylic paints for your first sailboat painting or explore using oil paints or watercolors. Painting ideas with sailboats and clouds or abstract sailboats. Start your sailboat acrylic painting tutorials now.
Unleash your creativity with these easy sailboat painting ideas. Learn step-by-step techniques to create stunning sailboat paintings that will add a touch of nautical charm to your artwork collection.
In this acrylic painting for beginners, I will show how to paint easy abstract sailboats. I used palette knife and brushes (flat industrial brush (bristles o...
After you have finished with the 600 grit sandpaper, it is time to move on to 800, then 1200. This process is important so you will be painting on as smooth a surface as possible. It is then a good idea to wipe the surfaces of the boat down with a damp cloth to remove any of the dust and flakes of metal/wood.
4) Sunfish. thedougabides13. The Sunfish is a brilliant little sailboat, and a very fast boat indeed. This little racing dinghy, while only 13 feet in length, can be an enormous amount of fun for beginners and experienced sailors alike.
Using acrylics is the easiest way to learn how to paint successfully. My acrylic painting lessons stem from classical oil painting techniques, so they will teach you the foundations of painting in both mediums. Acrylics are very forgiving for beginners to work with. They are water-soluble, fast-drying and water-resistant when dry.
Hi, this is a simple sailboat watercolor painting composition for all new Extreme Beginners! It covers the glazing technique, drawing and layout of the compo...
Paint the very widest area on the boat, and then add a little bit of Raw Umber to darken it slightly for painting in the shadow areas indicating the seat void. Step #7. Balancing blues. Next step in the tutorial is balancing the blues. I put out a tiny bit of Phthalo Blue (green shade) and mix it with Titanium White.
HEART MAIL: The Art Sherpa 9490 fm 1960 RD W suite 200 Humble TX 77338. Artwork is the property of Cinnamon Cooney and The Art Sherpa LLC. and is intended for the personal enjoyment of the student. You may sell, donate or Gift a painting you do following one of my lessons in a private setting. If a paintings you make of my original design are ...
This video shows how to paint a sailing boat in watercolor. It´s simple and easy, for beginners. Get my drawing book: http://amzn.to/1K7L8EdFollow my Instagr...