
- AMERICA'S CUP
- CLASSIFIEDS
- NEWSLETTERS
- SUBMIT NEWS

Beginners guide to using a Spinnaker!


Related Articles
Yachting Monthly
- Digital edition

Spinnaker masterclass: tailored downwind sailing
- James Stevens
- March 15, 2021
There’s more than one way to rig, hoist, set and drop your spinnaker. Choosing the right setup and skills is key to success with the kite, explains James Stevens

Set properly and using the right techniques for your boat, nothing beats a good passage under spinnaker. Credit: David Harding
There are, I suspect a surprising number of cruising yachts which have a spinnaker in their sail locker which has never come out of the bag.
The kind of pictures loved by yachting photographers of racing boats on their ear with spinnakers in the water and crew hanging on by their fingertips do little to encourage cruising yachtsmen.
On the other hand a spinnaker can take hours off a cross-Channel trip and it’s a real pleasure to feel the boat powering downwind with the thought of an early arrival.
It looks good too. But you have to know the ropes because as the pictures show it can go spectacularly wrong on a windy day.
Often cruising sailors will have learned to use a spinnaker, either in dinghies or on a racing boat.
If you try to replicate this on a cruising boat, often with a small crew and with a makeshift rigging setup, you’ll be sailing into troubled waters.

What if it goes pear-shaped? Knowing how to control the sail, and what to do when it goes wrong is the key to mastering the spinnaker. Credit: Rick Tomlinson
Getting the rigging right for your boat and choosing the skills that are going to work best for your crew will help you keep control of the sail and maintain calm on board.
The secret when starting out is to think it through and set it in light winds when making a mistake is easily retrievable.
In displacement yachts, symmetric spinnakers tend to be the most effective way of sailing downwind.
With an asymmetric you’ll need to sail the angles and gybe , but a symmetric lets you sail dead downwind.
They can, however, be used when the wind angle from the bow is from about 80° to 180° so they’re very versatile sails.
The most comfortable point of sail is a broad reach at about 120° to the wind.
Spinnakers become harder to control as the wind moves forward, the apparent wind increases and the boat heels more, or with the wind right aft as the boat slows and there’s a danger of an accidental gybe especially if it’s rough.
The difficult skills are raising, lowering and gybing.
Systems like snuffers can help with this, but we’ll look at the basic skills, which can then be modified.
Once the spinnaker is up it is relatively easy to trim and if the wind is stable and if the helm can steer a straight course, you can enjoy fast, relaxed cruising.
Using the spinnaker: the right sails and setup
Half the battle with flying a spinnaker is making sure you’ve got your setup right before you hoist.
As we all know, the spinnaker halyard exits the mast above the forestay, while the two clews are sheeted back to the cockpit via blocks on the quarter, and the guys are led aft via blocks midships.
The pole height is controlled by an uphaul at the mast and a downhaul, which is led aft via a block on the foredeck.
The pole’s inboard end attaches to the mast, often on an adjustable track, and the windward guy passes through the jaws on the pole’s outboard end next to the windward clew.
Hardware is changing
Racing innovations are helping make life easier for cruising sailors, says David Barden, production director at Allspars.
‘Many racing teams are using modern soft attachments, blocks and rings, including soft Dyneema pad eyes combined with blocks such as Karver KBO and INO blocks that can deal with the high loads but are extremely light. These are also popular in long-distance cruising because they are robust and reliable and don’t have metal fittings that can fatigue.
‘Although blocks still produce less friction, low-friction rings are used all over boats; they work well on tweaker lines. If you are end-to-end gybing, tweakers mean you only need one sheet on each side, and you pull the windward tweaker on to turn the sheet into a guy.
‘Snugging the leeward tweaker down in heavy conditions help stabilise the spinnaker.;
Sail choice is critical
Using the wrong spinnaker could make your life difficult too, says Peter Sanders of Sanders Sails.
‘The chances are that only one spinnaker will be carried so it must cover all the conditions that the crew are capable of using it in. The problem with most symmetric spinnakers on cruising yachts is that they are just too heavy.

Credit: Maxine Heath
‘The cheapest nylon that you can buy is 1.5oz, therefore it is common for sailmakers to offer this weight for all yachts over 30ft, but it is heavy, bulky and requires at least 12 knots of apparent wind to stop it from hanging like a deflated balloon.
‘Sailing downwind, this means a true wind of about 18 knots, which is too much for most cruisers to consider a spinnaker. Most of the time, ‘light is right’, so 0.75oz spinnakers on yacht up to 35ft and 0.9oz above that, are much easier to handle, set and gybe.
‘If you have an old or second-hand spinnaker, it may not be the right size. The result will be instability, rolling and the possibility of broaching, which never helps relations on board. Similarly, spinnakers have some stretch to absorb gusts, but if it’s old, it will become deeper and baggier with tight leech tapes and it will retain water making it hard to set.
‘Most spinnakers today are made with a true-radial panel layout thanks to the advancement in sail design software. In the past, spinnakers were made on the floor so the middle panels were horizontally cut, making it possible for the sailmaker to shape the seams.’
Using a spinnaker: the hoist
The first hoist needs to be in light winds.

Before you hoist, prepare the spinnaker on what will be the leeward side. Credit: Richard Langdon/Ocean Images
It is easier to hoist the spinnaker with the jib set – this avoids the spinnaker wrapping round the forestay before it’s trimmed.
Secure the bag on the foredeck on the leeward side by the rail at the foot of the jib.

Setting the pole is the next step. Make sure that the end jaw is facing upwards so that the pole can drop down and away from the sheet in a gybe. Credit: Richard Langdon/Ocean Images
Attach the sheet and guy to the sail.
Double check that the sheet and guy are over and not through the guardrails – every racing skipper will have had this problem at least once.

If you have enough crew, it’s essential to hoist hand-over-hand at the mast, and you’ll also be able to see the masthead for when the spinnaker is set. Credit: Richard Langdon/Ocean Images
The guy goes round the front of the forestay.
Hoist the heel of the pole on the mast to about head height.
The outer end of the pole should be on the windward side of the forestay.
Put the guy through the jaw of the pole.

Once the sail is full, it’s harder to winch the guy back, so sneak the guy back, bringing the windward clew up to the end of the pole and off the forestay. Credit: Richard Langdon/Ocean Images
Attach the halyard to the head of the sail; this is quite tricky as it has to pass outside the jib.
Hoist the outer end of the pole with the uphaul until it is horizontal.
Have a little slack on the downhaul but secure it or it will lift up too far when the spinnaker fills.

Mark your halyard to show when the sail is fully hoisted, says rigging expert David Barden. Credit: Richard Langdon/Ocean Images
Using the guy pull the corner of the spinnaker out of the bag.
This is known as sneaking the guy.
Hold on to or, if short crewed, secure the sheet and guy so they don’t run when they come under tension.
Right, now for the big moment.
Steer downwind to keep the spinnaker blanketed by the mainsail and pull the spinnaker halyard hand over hand as fast as possible.

With the hoist complete, tidy up on deck, and adjust the pole and sheets to trim the sail. Credit: Richard Langdon/Ocean Images
You might have to winch the last metre or so to get it to the top.
Winch in the guy which will pull the pole back and slowly steer up from a run to a broad reach.
Sheet in the spinnaker and drop or roll up the jib.
Wow! It fills and the boat speed jumps up.
Where it can go wrong

Credit: Richard Langdon/Ocean Images
It’s vital that the crew in the cockpit know what the person on the foredeck is trying to do.
Everyone needs to concentrate and it helps to have someone in charge other than the helm, even if there are only a few crew.
The ropes are often led the wrong way or twisted around another rope or wire. Preparation is the best way to avoid this.
The wind has to be very light to allow you to detach a sheet or guy from a hoisted spinnaker while you undo a tangle. Normally you have to drop and start again.
Sometimes the head of the sail fills with wind and there is a twist in the middle creating a wineglass effect.
To remove this you have to unravel it upwards. The helm has to steer downwind to blanket the spinnaker being careful not to gybe.
Pull on the sheet either from the cockpit or side deck, and try and persuade the twist to move upwards. This isn’t going to work if the spinnaker is filling at the top.
If it’s really jammed it will have to come down.
If the spinnaker fills on the way up it’s going to be hard work winching the halyard. The helm can help by steering downwind.
There are a number of other problems such as hoisting it the wrong way up which means dropping it again and hoping no one notices.
Trimming the spinnaker
Set it right.
The spinnaker is most efficient when there is a flow of air across it.
The leading windward edge should be pulled aft with the guy until it is close to curling inwards.
The height of the pole should be adjusted so both clews of the spinnaker are the same height above the deck.
Wherever the leeward clew is, adjust both ends of the pole to match it and keep the pole horizontal.

When reaching, make sure the pole is not touching the forestay. Credit: Richard Langdon/Ocean Images
If the course is a beam or close reach the guy is eased forward and the sheet wound in.
The pole will need to be lowered to keep the luff tight and the clews level.
Ease the uphaul and tension the downhaul and slide the heel of the pole down the mast. Avoid allowing the pole to press against the forestay as this can cause damage to the foil track for the jib, and in extremis can break the pole.
The main usually has to be sheeted in further than normal for this point of sail to prevent it from being backwinded.
Be ready to ease the main and kicker if you become overpowered.
With the wind further aft the pole is brought back by winding in the guy and easing the sheet all the time keeping the leading edge almost curling.

With the pole too high, the sail pays off, inducing heel rather than drive. Credit: Richard Langdon/Ocean Images
Remember to ease the pole downhaul as the pole comes back.

With the pole too low, the luff is pulled tightly, luffing too early. Credit: Richard Langdon/Ocean Images
Keep the spinnaker close to the boat – don’t let it fly too far away from the forestay or it will rock from side to side.
With wind astern the sail is more stable if the sheet is pulled down to towards the toe rail halfway down the boat by a barber hauler.

Pole back to keep the belly of the sail close to the forestay. Credit: Richard Langdon/Ocean Images
Racing sailors never cleat the guy or the sheet.
What can go wrong
Oversheeting the spinnaker makes the boat less stable and heel over more.
In windy weather, this can cause the boat to screw up into the wind in a broach and it is invariably accompanied by a lot of sail flapping and an alarming amount of heel.
The main and spinnaker sheets need to be eased to allow the helm to steer downwind and get the boat back on its feet.
Releasing the kicking strap will lift the boom and allow wind to spill out of the head of the main.

If you oversheet the spinnaker, it can cause the boat to become unstable. Credit: Rick Tomlinson
This is important if the boat has heeled so far over in the wind that the boom is dragging in the water.
A common mistake is to have the guy too far forward with the sail billowing like washing on the line.
The boat will heel over more than with the correct trim and you’ll need to use more helm, which is slower.
Choose your gybe
Gybing is quite difficult when sailing shorthanded, so many cruising yachtsmen only set the spinnaker when there is a long reach ahead and lower the sail if a gybe is involved.
But of course a gybe is much quicker than dropping and resetting the sail.
On a boat over about 10 metres it is much safer to have twin sheets and guys.
Each clew of the spinnaker is connected to two ropes. The sheet is attached to the sail cringle and the guy is attached to the sheet on the back of the snap shackle.
Each corner of the sail has one rope under tension and the other, the lazy sheet or guy, slack ready for the gybe.
Continues below…

How to reef to sail safely through any weather
Pete Goss delivers his masterclass on when to reef, and explains why it is critical to keeping control of your…

10 tips to make your sails last longer
Professional skipper Simon Phillips shares his tips on how to get better value from your sails

Night pilotage: How to enter unfamiliar harbours
James Stevens looks at how best to prepare for arriving at an unfamiliar harbour after dark and what to be…

How to navigate using waves
Developing a thorough understanding of what the waves are telling you can provide you with a 'sixth sense' when it…
The lazy sheet should be resting above and not below the end of the pole.
It is helpful to have the guys and sheets made of different colours as there is going to be a lot of rope in the cockpit.
The reason for this system is that during the gybe, the spinnaker can be sailed using the two sheets and no pole while the guys are swapped over on the end of the pole.
Sos the foredeck crew is not having to handle a spinnaker pole with a bar-tight rope on the end of it.
Talk this one through before you start. Everyone needs to understand what is happening at both ends of the boat.
The dip pole gybe
Steer on a very broad reach without collapsing the spinnaker.
Raise the heel of the pole up the track on the mast. Wind in the lazy sheet on the windward side on a winch.

1. Grab the guy . Prepare for the gybe by taking the lazy guy forward to the bow. Credit: Richard Langdon/Ocean Images
The guy, which is through the pole, is now slack.
The foredeck crew releases the jaws on the end of the pole and the guy will lift out leaving the spinnaker flying with the sheets and no pole.
The helm has to steer carefully to keep the spinnaker filling especially if it starts swaying from side to side.

2. Catch the pole. If there’s space, a dip-pole gybe can be easier if the bowman is in front of the forestay. As the pole swings across, clip in the new guy. Credit: Richard Langdon/Ocean Images
The cockpit crew ease the pole uphaul allowing the end to drop while the foredeck crew swings the outer end of the pole just above the deck inside the forestay.
If you have the luxury of a bowman they should be on the pulpit facing aft with the new guy in their hand waiting to drop it into the jaws of the pole.
The cockpit crew needs to ensure there is plenty of slack in the new guy.

3. Pole across. During the gybe, the spinnaker is flown without the pole, which requires careful helming. Credit: Richard Langdon/Ocean Images
At this moment a mistake occurs which has happened on nearly every boat I’ve sailed on.
It is very easy to drop the new guy into the jaws the wrong way round so there is a twist when the pole goes up again and the spinnaker is on the new gybe.

4. Flying free. During the gybe, the cockpit crew need to keep the sail flying. Credit: Richard Langdon/Ocean Images
The bowman shouts ‘Made!’ when the new guy is in the pole.
The main is sheeted in and the helmsman gybes as the new guy is wound in, the downhaul eased, the pole raised and the old sheet eased to allow the new guy through the pole to take the strain.

5. Reset the sail . With the pole on the new side, winch on the guy and set the sail. Note that the jib sheet has been kept on top of the pole, ready for when the spinnaker drops. Credit: Richard Langdon/Ocean Images
This isn’t something to try for the first time on a windy day, but it can be taken in slow time in light winds while everyone gets their heads around what’s happening.
Cruising crews are generally short handed so take it steadily and carefully – it takes months of practice for a racing crew to gybe the pole to make it look like an extension of the boom.
End for end gybe
This is a technique used on dinghies and smaller yachts.
It is easier and much safer with twin sheets and guys.
The pole must be attached to both the uphaul and the downhaul with a bridle.

The pole is taken off the mast in an end-for-end gybe, so bridles for the uphaul and downhaul are necessary
The crew ease the guy and fly the spinnaker with the sheets alone.
The foredeck crew takes a bight of the new guy to the mast, detaches the pole from the mast and inserts the new guy into the jaw.
The pole is now pushed out to the new side, the old guy taken out of the jaw and the pole secured to the mast.
The dip pole is more complicated but safer for new crews.
The cockpit crew need to watch the foredeck carefully.
It is really annoying to be perched on the pulpit or by the mast and not have sufficient slack on the new guy to drop it into the jaws of the pole or have insufficient ease on the uphaul to pass the pole under the forestay.

Make sure you give the foredeck enough slack. Credit: Richard Langdon/Ocean Images
The cockpit crew should avoid winding in the new guy before the pole has been hoisted up on the new side.
It takes quite a lot of skill to steer and give instructions. Better to have the crew boss calling the gybe without having to worry about steering at the same time.
If the spinnaker collapses it can wind itself around the forestay.
Most problems with a spinnaker are best sorted by steering downwind, or by dropping it.
Using a spinnaker: the drop
There are several ways of doing this. The most common is to retrieve the spinnaker down the main hatch.
Again, this is easier with twin sheets and guys. Hoist or unroll the jib. Take a bight of the lazy guy directly from the sail on the leeward side under the boom over the rail and into the main hatch.

Pass the lazy guy aft to the companionway hatch while the crew prepares to gather in the sail. Credit: Richard Langdon/Ocean Images
Ease the guy until the pole is just off the forestay. Steer downwind.
The person lowering the halyard makes sure it is clear to run.

With the guy eased, the sail will stream out like a flag behind the main. Credit: Richard Langdon/Ocean Images
At this point the cockpit crew can either let the guy and lazy sheet run through the pole on the windward side or the foredeck crew can ping the snap shackle releasing the sheet and guy from the windward corner of the sail.
Either way the sail is now flapping like a huge flag behind the main, held by the halyard and a crew member in the main hatch, holding the lazy guy.

Don’t drop the halyard too quickly to give the crew time to gather in the sail. Credit: Richard Langdon/Ocean Images
The halyard is eased quickly and the hatch crew gather as it comes down, trying to avoid dragging it in the sea.
Lower the pole and tidy up the lines.
Letterbox drop
On boats with a loose-footed main the spinnaker can be retrieved by passing the lazy guy between the foot of the main and the boom.

A letterbox drop can help avoid trailing the spinnaker in the water. Credit: Richard Langdon/Ocean Images
The spinnaker is pulled down in the lee of the main through this slot into the main hatch – a technique known as a letterbox drop which is effective in removing any wind in the spinnaker and making it less likely to trail in the water.
If the helm steers on a reach rather than a run the spinnaker is harder to retrieve because it won’t be blanketed by the main.
The first third of the halyard should be dropped quickly to de-power the spinnaker but no more or it ends in the sea.

Keeping the spinnaker clear of the water when dropping it is key. Credit: Rick Tomlinson
It’s really important that the spinnaker does not drop into the sea while still held by three corners or the boat will end up as a trawler pulling a huge bag of sail through the water.
You must release the windward ropes fully before lowering the halyard so it is held by only two corners.
It is equally important not to release the ropes from both clews or the sail ends up flying horizontally from the top of the mast.
Steering downwind is the only way of getting it back.
Using a spinnaker: snuffers
To save all this hassle it is possible to rig a snuffer, which is a giant collapsible tube which can slide up and down the sail.
The spinnaker is set with the pole, sheets and guys ready and hoisted like a sausage with the sail in the snuffer.
Using another halyard in the snuffer, the tube is pulled up, releasing the sail from the deck upwards.

Pull the snuffer over the sail before dropping
Once set, the folded tube stays at the head of the sail.
To retrieve the spinnaker, the boat is sailed on a run to blanket the spinnaker and the snuffer tube is pulled back down.
What could be easier – except of course if it jams on the way down. But it is simpler than the traditional drop and the spinnaker doesn’t need repacking

A snuffer can take the stress out of setting the spinnaker, though they sometimes jam. Credit: Richard Langdon/Ocean Images
With a normal drop the cabin by the main hatch ends up full of spinnaker and it is time to repack it.
Many racing boats have a hook on the deckhead in the cabin which takes the head cringle.
This allows the crew to work down the two edges of the sail from the top undoing any twists.

Repack the spinnaker by following the tapes. Credit: Richard Langdon
Having reached the clews, the three corners are gathered and the sail pushed into the bag keeping the corners on the top.

James Stevens, author of the Yachtmaster Handbook, spent 10 of his 23 years at the RYA as Training Manager and Yachtmaster Chief Examiner
The skill is to prevent a twist when it is rehoisted.
Another slower and safer technique is to find the head, sit on it so you know where it is and work down one edge flaking as you go.
When you get to the clew, sit on the folds and work down the other edge from the head.
Sit on all the folds and pack into the bag carefully, leaving the folds until last. If it goes up with a twist the beers at the bar afterwards are on the packer!
Decades ago when offshore racing was less frenetic, sailors used to drop the spinnaker at night.
That is unthinkable when racing now but a good idea for cruising sailors.
Some of my most memorable cruising has been sailing on a summers evening in light airs with a spinnaker powering us towards our destination knowing that the extra speed has allowed us to arrive before dark to enjoy that special thrill of entering a harbour at the end of a great sail.
Thanks to UKSA in Cowes for the use of their Sweden 43 www.uksa.org 01983 294941
Enjoyed reading Spinnaker masterclass: tailored downwind sailing?
A subscription to Yachting Monthly magazine costs around 40% less than the cover price .
Print and digital editions are available through Magazines Direct – where you can also find the latest deals .
YM is packed with information to help you get the most from your time on the water.
- Take your seamanship to the next level with tips, advice and skills from our experts
- Impartial in-depth reviews of the latest yachts and equipment
- Cruising guides to help you reach those dream destinations
Follow us on Facebook , Twitter and Instagram.
- Spinnaker Sails: Navigating the Winds of Adventure
Sailing enthusiasts, brace yourselves! In the world of sailing, nothing quite matches the thrill of harnessing the power of the wind with a spinnaker sail. Whether you're a seasoned sailor or a novice eager to learn, understanding the nuances of spinnaker sailing opens up a world of possibilities. Let's embark on a journey through the seas of knowledge, exploring the art and science of spinnaker sails.
Introduction
Brief overview of spinnaker sails.
Picture this: a vast expanse of open water, your sailboat gliding gracefully, propelled by the billowing beauty of a spinnaker sail. Spinnaker sails, often called kites, are specialty sails designed for downwind sailing. They come in various shapes and sizes, each catering to specific sailing conditions.
Importance of Spinnaker in Sailing
The spinnaker is not just a sail ; it's a game-changer. It allows sailors to harness wind power efficiently, enhancing speed and performance. Whether you're cruising or racing, understanding how to deploy and manage a spinnaker adds a new dimension to your sailing experience.
Understanding Spinnaker Sails
Definition and types of spinnaker.
At its core, a spinnaker is a large, lightweight sail designed for sailing off the wind. There are two main types: symmetrical kites, perfect for downwind runs, and asymmetrical spinnakers, ideal for reaching and running in various wind angles.
Components of a Spinnaker Sail
To master the art of spinnaker sailing, it's crucial to understand the key components of the sail. From the head and tack to the clew, each part plays a vital role in ensuring optimal performance.
Sailing with Spinnakers
Techniques for using spinnakers.
Hoisting a spinnaker is one thing; sailing with it is another. Learn the techniques to catch the wind efficiently, including gybing and reaching, to make the most of your spinnaker experience.
Advantages and Challenges of Spinnaker Sailing
While the benefits of spinnaker sailing are vast, challenges like accidental gybes and handling in strong winds exist. Discover how to navigate these challenges for a smoother sailing experience.
Spinnaker Rigging
Key aspects of spinnaker rigging.
Rigging a spinnaker requires precision. Explore the key aspects of rigging, from attaching the halyard to securing the sheets, ensuring a secure and efficient setup.
Step-by-Step Guide to Rigging a Spinnaker
Delve into a step-by-step guide on how to rig a spinnaker. Whether you're a beginner or need a refresher, these detailed instructions will have you rigging like a pro in no time.
Read our top notch articles on topics such as sailing, sailing tips and destinations in our Magazine.
Different Types of Spinnaker Sails
Symmetrical kite vs. asymmetrical spinnaker.
Uncover the differences between symmetrical and asymmetrical spinnakers. Each type has its advantages, and choosing the right one depends on your sailing style and preferences.
Choosing the Right Spinnaker for Your Sailboat
Not all spinnakers are created equal. Learn how to select the perfect spinnaker for your sailboat, considering factors like size, material, and sailing conditions.
Sailboat Diagrams and Rigging
Importance of sailboat diagrams.
Sailboat diagrams serve as invaluable tools for understanding rigging and sail deployment. Explore the significance of these diagrams and how they enhance your sailing knowledge.
Understanding Sailboat Rigging with Diagrams
Break down the complexity of sailboat rigging with the help of diagrams. From running rigging to spinnaker poles, visualize the setup to enhance your comprehension.
Addressing Common Issues
How to prevent letterbox flapping in the wind.
For many sailors, the flapping of the letterbox can be a nuisance. Discover effective tips to prevent this common issue, ensuring a peaceful and undisturbed sailing experience.
Solutions for Spinnaker-Related Challenges
Spinnaker sailing comes with its share of challenges. Explore solutions to common issues like tangled lines and accidental jibes, ensuring smooth sailing every time.
Read more useful sailing tips:
The art of spinnaker flying, tips for a successful spinnaker flying experience.
Flying a spinnaker is an art that requires finesse. Learn valuable tips, from trimming the sail to adjusting the pole, to maximize your enjoyment while sailing downwind.
Enhancing Sailing Skills with Spinnaker Maneuvers
Take your sailing skills to the next level with spinnaker maneuvers. Master the art of gybing and reaching, adding versatility to your sailing repertoire.
Spinnaker Sailing and Yachts
Integrating spinnakers into yacht sailing.
Yachts, with their larger sails, pose unique challenges and opportunities for spinnaker sailing. Explore how to integrate spinnakers seamlessly into yacht sailing for an exhilarating experience.
Advantages of Using Spinnakers on Yachts
Discover the advantages of using spinnakers on yachts, from increased speed to a more dynamic and engaging sailing experience.
Step-by-Step Spinnaker Sheet Guide
Importance of spinnaker sheets.
Spinnaker sheets play a crucial role in sail control. Understand their importance and learn how to rig and handle them effectively for optimal performance.
Rigging and Handling Spinnaker Sheets
A detailed guide on the proper rigging and handling of spinnaker sheets. Explore the intricacies of sheet control to enhance your overall sailing experience.
Yacht Spinnaker Rigging Diagram
Understanding the rigging process with a diagram.
Dive into the intricacies of yacht spinnaker rigging with the help of detailed diagrams. Visualize the setup and avoid common mistakes for a seamless sailing experience.
Common Mistakes to Avoid in Spinnaker Rigging
Learn from the mistakes of others. Explore common errors in spinnaker rigging and discover how to avoid them for a safer and more enjoyable sailing journey.
Sailing Pole and Its Role
Significance of sailing poles in spinnaker sailing.
Sailing poles play a crucial role in spinnaker sailing maneuvers. Uncover their significance and how to use them effectively for enhanced performance.
Proper Use and Handling of Sailing Poles
A step-by-step guide on the proper use and handling of sailing poles. Whether you're a novice or an experienced sailor, mastering this skill is essential for successful spinnaker sailing.
Purchasing Asymmetrical Spinnakers
Factors to consider when buying asymmetrical spinnakers.
Looking to invest in an asymmetrical spinnaker? Explore the factors to consider, from size to material, ensuring you make an informed and satisfying purchase.
Where to Find Quality Asymmetrical Spinnakers for Sale
Finding the right asymmetrical spinnaker is crucial. Discover reliable sources and marketplaces where you can purchase quality sails for your sailing adventures.
Sailing Safety Tips
Ensuring safety while using spinnakers.
Safety should always be a priority. Explore essential tips and precautions to ensure a safe sailing experience when using spinnakers.
Precautions and Guidelines for Spinnaker Sailing
Delve into specific precautions and guidelines for spinnaker sailing. From checking weather conditions to proper communication, these tips enhance the safety of your sailing adventures.
Recap of Key Points
Summarize the key takeaways from the article, emphasizing the importance of spinnaker sailing and the skills acquired.
Encouragement for Readers to Explore Spinnaker Sailing
Conclude with an encouraging message, urging readers to embrace the thrill of spinnaker sailing and embark on their own exciting journeys.
Get Ready to Set Sail!
As we wrap up our exploration of spinnaker sailing, remember that the seas are calling, and adventure awaits. The world of spinnaker sails is vast and exhilarating, offering endless possibilities for those willing to ride the winds. Whether you're a seasoned sailor or a curious novice, spinnaker sailing is an art worth mastering.
So what are you waiting for? Take a look at our range of charter boats and head to some of our favourite sailing destinations .
Practical Boat Owner
- Digital edition

How to rig a spinnaker on a small yacht – what you need and where to fit it
- David Harding
- July 26, 2024
David Harding helps a PBO reader figure out how to rig a spinnaker on her Contessa 26

Jo Mooring Aldridge has had a cruising chute on her Contessa 26, Sulali , for years. But she has hardly used it, because it only flies happily with the apparent wind on or a few points abaft the beam.
Her solution was to buy a spinnaker. That was the easy part. Next, she started thinking about everything else she had to buy and fit. David Harding shares some tips to help Jo rig a spinnaker on Sulali.
Kit for a kite
All you need with a cruising chute is a halyard, a means of attaching – and, preferably, adjusting – the tack strop, a couple of sheets, and a block on or near each quarter.
A spinnaker is more complex. You will need:
■ A pole and an attachment point on the mast for its inboard end. You can attach the pole to a fixed ring, though it’s better to have one that can slide up and down on a track. The pole should be fitted with a pair of bridles for the uphaul and downhaul, and it will need somewhere to live on deck when not in use.
■ An uphaul (topping lift) and a downhaul. The uphaul runs through a sheave or a block on the mast, normally at about spreader height on a boat with a single-spreader rig.
It can then be run aft if you want to adjust it from the cockpit. On a boat of the Contessa’s size, the downhaul can be led to a point just ahead of the mast, as it is on dinghies; larger boats will need the block further forward, to provide a more vertical pull.
■ Sheets and guys Boats up to 30ft (9m) or so usually have a single set of sheets rather than sheets and lazy guys, because they’re seldom under enough load to present difficulties during gybes. Instead of lazy guys, you find barber haulers, alternatively called tweakers or twinning lines. Barber haulers deflect the guy (which becomes the sheet on the other tack) downwards and outwards to the point of maximum beam, thereby increasing the angle between pole and guy for a more effective pull.
Each barber hauler consists of a relatively light block through which the sheet is roven before passing through the turning block on the quarter. Snatch blocks are ideal, because they can be snapped on and off. A line attached to the block passes through another block which is fixed as far outboard and as close to the point of maximum beam as possible. The line needs to be long enough not to deflect the (leeward) sheet on any point of sailing. From the toerail, it should be led to a cleat within easy reach of the cockpit.
Rig a spinnaker: Fixing the kit
Jo was already part-way there with Sulali , because she had the spinnaker, the sheets, the halyard, the pole, and the track on the mast with a ring. The halyard ran through a block at the masthead and then down the outside to a winch; nothing could be simpler. Most masts on new boats come with the necessary provisions for a spinnaker halyard, but if yours doesn’t, you may want to call in a rigger. Shackling a block to the masthead is one thing; cutting through the mast wall and inserting a sheave box is a job many people would rather leave to an expert.
1. Feeding a mouse line through the uphaul sheave

2. Jeremy removed the old T-tracks from the gunwales…

3. …and put plenty of sealant around the screw holes…

4. …before positioning the new sections of track from Barton

5. Fortunately, most of the holes lined up with those used for the old tracks…

6. …but sometimes Jeremy had to drill at an angle to avoid the screw securing the toerail

7. The deck eye and cam cleat for the downhaul by the mast came next

8. In the cockpit, Jeremy worked out the position for the clutch that would handle the roller reefing line

9. The barber-hauler lines would also need a fair lead to the winch after passing through the cam cleats on the coaming. Securing fittings to the coamings was easy because we could reach the inside from the quarter berths

10. How it works in practice: the loose line on the primary winch is the sheet of the furled genoa. The barber-hauler passes through the forward block on the track and is led back to the cleat on the outside of the coaming. The genoa’s roller reefing line is held in the clutch, and the spinnaker guy is around the aftermost winch

11. To allow the Harken ratchet blocks to rotate freely, we attached them with short strops. Bungy cord taken around the pulpit stops them hitting the deck when not in use

12. Although the downhaul is cleated by the mast, a long tail means that it can be adjusted from the comfort of the cockpit.

13. The track for the pole attachment on the mast allows about 3ft (1m) of travel. It couldn’t go any lower because of the mainsail’s roller reefing handle

14. We tied the uphaul and downhaul bridles around the pole, using the eyes to stop the line sliding rather than to take the weight

Rig a spinnaker: Reeving the uphaul
A similar situation applies with the pole uphaul. The least you need is a block shackled to an eye on the mast, but an internal system is neater. On Sulali, the mast was fitted with an uphaul sheave just below the spreaders and an exit sheave at deck level. The mouse line had broken, so I went up the mast, removed the sheave box and dropped a new line down with a large washer on the end. Then I removed the lower sheave box and fished out the mouse before pulling through the 6mm uphaul line.
The pole came next. We riveted eyes to the top and bottom at each end before making bridles with pre-stretched 5mm line and stainless steel rings. The line for the upper bridle passed around the pole and through the eyes on the bottom, which would be subjected merely to the deflection loads instead of taking the full weight of the uphaul.
Rig a spinnaker: Hardware choices
We chose most of the rest of the hardware from Barton’s catalogue; blocks, deck eyes and cam cleats. To make life as easy as possible, I suggested that Jo buy a pair of ratchet blocks for the sheets. The extra price compared with plain blocks is well worth paying, because a ratchet makes an enormous difference. Barton doesn’t make ratchet blocks, so we got them from Harken.
Other items on our list from Barton included two, 5ft (1.52m) lengths of 20mm T track and a pair of genoa slides. As on all Contessa 26s, the blocks for Sulali’s headsail sheets were attached to tracks on the wooden toerail. The obvious place for the barber hauler blocks was on the same tracks, but the section was of obscure Dutch origin and we could find no slides to fit it.
Help from a pro to rig a spinnaker
Since Jo keeps Sulali in Lymington, it seemed sensible to enlist the help of Jeremy Rogers in fitting the hardware. Jeremy built the Contessa 26 for many years and now undertakes restorations and refits at his yard in Milford-on-Sea, just down the road. He also sailed his own 26, Rosina of Beaulieu, to overall victory in last year’s Round-the-Island race.
Removing the old genoa tracks was simply a matter of lifting them off, having removed the screws that secured them to the toerail. Before fitting the replacements, Jeremy applied a generous daub of sealant around the holes to make sure no water could get into the wood, though the spacing of the holes in the Barton track meant that not all the original holes in the toerail could be used. Jeremy had to drill some new ones – which was easy enough, except in a couple of places each side when the holes in the track were directly above the screws that secured the toerail to the bulwarks.
His solution was to drill at an angle from the vertical so the screw he was about to put in would diverge from the one that was in the way. By the time the new one was screwed in tight, the fact that the head was slightly askew could hardly be noticed.
Deck eye for the downhaul
Once the tracks were secured, we looked at the best position for the deck eye to which the downhaul block was to be shackled. We had already agreed that Jo would adjust the uphaul and downhaul from on deck, since none of the other control lines on Sulali were led aft, so we put the eye just ahead of the mast and the cam cleat further aft on the mast’s port side. Before drilling holes in the deck, it’s important to make sure that any lines will have a fair lead and can easily be adjusted.
The headliner moulding and the deckhead are solidly bonded around the foot of the mast on the Contessa 26, so Jeremy fastened the eye using bolts long enough to go through both laminates. For the cam cleat, it was simply a question of putting a couple of machine screws into the thick deck moulding by the mast step. Other boats may present more of a challenge – especially when there’s a gap between the deck and a non-removable headliner – unless the builder has bonded aluminium plates to the underside of the deck laminate in the right position.
Clutches and cleats
The final hardware attachments were on the cockpit coamings. First, Jeremy fitted a clutch for the genoa’s roller reefing line, which had previously occupied the spinnaker winch on the port side. He positioned it carefully so the line could still be led around the winch without causing unnecessary chafe. Then he bolted a cam cleat to the outside of each coaming for the barber haulers. Again, alignment with the spinnaker sheet winches was important; the barber haulers can be under substantial load on a close reach, so it’s useful to be able to take them around a winch.
Bolting the clutch and cleats to the coamings was relatively simple, because the inside of the coamings were easily reached from the quarter berths. We used penny washers to spread the load.
In terms of hardware bolted to the deck, that was all we needed. Spinnaker winches can be useful, but on many boats the primary winches serve both headsail and spinnaker sheets with the help of jamming foot blocks.
Rig a spinnaker: IMPORTANT MEASUREMENTS
■ Spinnaker pole: the normal length of a pole is the same as the J measurement, i.e., the distance from the front of the mast to the base of the forestay.
■ Pole attachment ring on mast: typically about 5ft (1.5m) above the deck on a 26-footer. The objective is to fly the spinnaker with the pole horizontal and the clews level. If you fit a track, its upper end should be high enough to cater for the maximum pole height and its lower end should, ideally, be close to the deck. That way, you can slide the track to the bottom and leave the pole attached to the mast when sailing upwind. The topping lift can stay attached, too, held against the mast with a plastic clip on the end of a length of bungy.
■ Cordage (approximate lengths, for guidance only) Halyard: length of mast from base to halyard sheave/block x 2.5 (longer if led aft) Sheets/guys: LOA x 2.5 Uphaul: distance from base of mast to sheave/block x 3 Downhaul: LOA x 1 Tweakers: LOA x 0.5
Finishing off
Our final jobs were to attach the ratchet blocks to the quarter, buy some 6mm line for the downhaul and barber haulers, set everything up and wait for a suitable day to make sure it all worked. Fortunately, it did.
Once her autopilot is working properly, Jo should be able to hoist, dowse and gybe the spinnaker on her own in winds up to 10 or 12 knots. And, much of the time, she will be sailing far more efficiently than she would with a cruising chute .
■ Remember that buying the spinnaker is only the start; everything else you need could easily come to as much again
■ If in doubt about what’s needed or where to fit it, ask your sailmaker or rigger. They will have an interest in helping you get everything right. Boats, rigs and deck layouts vary so much that it’s impossible to provide guidelines on how to rig a spinnaker to cover every situation.
Continues below…

Cruising chute or spinnaker? We compare both sails on the same boat on different points of sail
Many cruising sailors favour a cruising chute over a spinnaker – but how do the two sails compare on different…

How to use a cruising chute
For non-racing sailors, a cruising chute is often the downwind sail of choice: it’s nothing to be afraid of, but…

Sail trim: Sailing downwind without a spinnaker
Sailing efficiently when the wind comes astern doesn’t mean you have to fly a spinnaker or cruising chute. David Harding…

Spinnaker repair: how to do it yourself
Andy Pag saves thousands of pounds on a replacement by mending his shredded sail himself using a domestic sewing machine
Enjoy reading How to rig a spinnaker on a small yacht – what you need and where to fit it?
A subscription to Practical Boat Owner magazine costs around 40% less than the cover price .
Print and digital editions are available through Magazines Direct – where you can also find the latest deals .
PBO is packed with information to help you get the most from boat ownership – whether sail or power.
- Take your DIY skills to the next level with trusted advice on boat maintenance and repairs
- Impartial in-depth gear reviews
- Practical cruising tips for making the most of your time afloat
Follow us on Facebook , Instagram, TikTok and Twitter
Rigging a spinnaker
The spinnaker is a powerful sail that provides plenty of downwind sailing fun. The asymmetric spinnaker shown here is the spinnaker of choice for all modern dinghy classes, having taken over from the traditional and more complex symmetrical spinnaker.
RIGGING A SPINNAKER
When not in use, a modern spinnaker is stowed, ready rigged, in a chute that runs the length of the foredeck and back toward the cockpit. The spinnaker halyard is a continuous loop of rope led through the spinnaker chute to the bow of the dinghy, diagonally up to a fixed block on the mast, down the mast, and back around a turning block inside the cockpit. Pulling the halyard backward hoists the spinnaker up the mast; pulling the halyard forward pulls the spinnaker back inside its chute.
Choose a quiet day for rigging, put the boat where there is plenty of space, and lay the spinnaker out flat beside it. First of all, look carefully at the shape of the sail to identify the three corners.
The tack (bottom forward corner) is secured to the forward end of the spinnaker pole; the head (top corner), is attached to the uphaul end of the halyard; the clew, or outer corner, is attached to sheets. There are patches supporting rings on the vertical mid-line of the sail, through which the downhaul is led. These help to gather the sail into the chute when it is lowered.
after rigging, do a test hoist before you go on the water. Face the boat into the wind and pull up the halyard slowly to ensure that there are no twists in the sail or sheets, and that you have the three corners of the sail the right way round. Then retrieve it carefully into the chute, keeping it well clear of anything that might snag the sail.

RIGGING A spinnaker

3 Tie the two free ends of the spinnaker sheets together in the cockpit. When the crew grabs the sheet, it can be pulled either way.
4 The downhaul end of the halyard passes through a tack ring to a patch further up the sail. This helps gather the sail when you pull it down.

5 Check that the downhaul pulls the whole sail inside the chute, with just the head and clew protruding. The spinnaker is now ready for hoisting.
HANDLiNG THE spiNNAKER
To hoist, drop, or jibe the spinnaker, the helmsman must bear off downwind until sideways force on the rig is reduced to a minimum. This ensures that both crew can work safely from the center of the boat, with the mainsail blanketing the spinnaker area.

1T0 hoist the spinnaker, pull the halyard hand over hand as fast as possible to ensure that the sail does not catch on the bow.
As the crew continues to hoist the spinnaker, the helmsman maintains a steady downwind course to prevent the spinnaker filling too soon.
3 With the spinnaker fully hoisted and the halyard cleated, the crew sheets in as the helmsman luffs on to a broad reach to power the sail.
The powerful spinnaker quickly lifts the dinghy on to a plane

Sailing with a spinnaker
The popular asymmetric spinnaker shown here is easy to use and provides boost when sailing downwind on a broad reach and responds to the slightest of breezes.
STEERING WITH A SPINNAKER
The technique for sailing with an asymmetric spinnaker relies on sailing the boat flat at full speed on a broad reach, bearing away when a gust hits so that the boat stays level with less sideways pressure on the sails, then luffing as the gust passes to keep the boat flat with increased sideways pressure. This means that unless the wind is absolutely steady, you will never sail perfectly straight line toward your target. Instead, you will keep steering in a series of smooth curves to port or starboard to ensure the boat stays flat and fully powered.
Never sail low and go slow with a spinnaker. Always head up and sail fast, then bear away on the apparent wind.
DROPPING A SPINNAKER
Bear right away for the drop, so that the spinnaker is blanketed and the crew can work from the center of the boat. To control the drop, the crew can stand on the sheet or pass it to the helmsman, then take up all slack on the retrieval line before uncleating the halyard. Pull the spinnaker back into its chute as quickly as possible.

Upwind "no spinnaker" zone
BALANCING THE BOAT
Helmsman and crew should work together to keep the boat as level as possible on the water for maximum speed. The crew constantly trims the spinnaker to make the most of the wind.
Zone to raise spinnaker
SAFE SPINNAKER WORK
There is least pressure on the spinnaker when the wind is directly astern of the dinghy. As soon as the boat luffs on to a broad reach, you move into a "power zone" where the spinnaker will catch the wind, power up, and make hoisting or dropping the spinnaker less safe.
Power zone sailing with a spinnaker
JIBING WITH A SPINNAKER
Dinghies with asymmetric spinnakers sail a direct downwind course by jibing from side to side on a series of broad reaches. When jibing with a spinnaker, the helm should steer a gentle curve from broad reach to broad reach, matching the speed of the turn to the ability of the crew to cross the boat and sheet in the spinnaker on the new side. The boat should stay flat and keep moving at speed throughout the jibe, rather than slowing right down and getting knocked over by the apparent wind.
While concentrating on the spinnaker, don't forget that the mainsail is also jibing, with the boom swinging across the cockpit.

Keep speed up throughout the jibe. Sailing fast reduces load on the rig as the mainsail comes across and the crew sheets in on the new side.

The crew gets ready for the jibe by moving into the cockpit and taking up slack on the new sheet.

2 Bearing off downwind, the crew pulls on the old sheet to flatten the spinnaker in mid-jibe.
4 The helmsman straightens the boat out on the new course.
The crew trims the spinnaker so the luff is just starting to curl, which provides maximum power.
3 The crew pulls in the new sheet and lets the old sheet run free, while moving onto the side deck.

"a good helmsman... uses all his senses—even his sense of smell!'
Arthur Knapp
Continue reading here: Simple trapezing
Was this article helpful?
Recommended Programs

Myboatplans 518 Boat Plans
Related Posts
- Inverted capsize drill - Sailing Techniques
- Setting a symmetrical spinnaker
- Setting an asymmetrical spinnaker
- Using Symmetrical and Asymmetrical Spinnakers
- Rigging the Flopper Stopper
- Rigging a twohanded dinghy
Readers' Questions
How t rig a 49er for the spinnaker?
Rigging a 49er for the spinnaker involves a series of steps and requires specific equipment. Here's a general guide on how to do it: Gather the necessary equipment: You will need a spinnaker sail, spinnaker halyard, two spinnaker sheets, two spinnaker blocks, two spinnaker cleats, and a spinnaker pole. Attach the spinnaker halyard: Attach one end of the spinnaker halyard to the head of the spinnaker sail and run the other end through the masthead sheave and down to the cockpit. Install the spinnaker blocks: Attach the spinnaker blocks to the port and starboard side of the hull, near the mast. These blocks will guide the spinnaker sheets. Install the spinnaker cleats: Attach the spinnaker cleats close by the spinnaker blocks. These cleats will secure the spinnaker sheets once they are adjusted. Attach the spinnaker pole: Connect the spinnaker pole to the mast and secure it with a pole-up hauler. Rig the spinnaker sheets: Attach each spinnaker sheet to the spinnaker clew and run them through the spinnaker blocks. Make sure the sheets are free of any twists or tangles. Set up the control lines: Adjust the spinnaker halyard tension using a halyard tensioning system. Connect the pole-downhaul line to the pole and run it back to the cockpit for easy control. Prepare the spinnaker: Flake the spinnaker sail and attach the spinnaker sock or bag to contain the sail when not in use. Hoist the spinnaker: Hoist the spinnaker by pulling the halyard while someone guides the spinnaker with the control lines, ensuring it flows smoothly. Control the spinnaker: Use the spinnaker sheets for controlling the sail's angle of attack and adjust the pole position and downhaul to maintain a proper shape. Keep in mind that this is a general guide and specific rigging steps may vary depending on the type of 49er or personal preferences. It's always recommended to consult your boat's manual or a professional for detailed instructions.

The $tingy Sailor
Diy trailerable sailboat restoration and improvement without throwing your budget overboard.

How to Rig a Cruising Spinnaker in 4 Stingy Stages
If you don’t have a spinnaker for your sailboat yet, aren’t you a little envious of those big, colorful, billowing sails you sometimes see at your favorite cruising spots? Nothing says, “Yeah, we’ve got this!” quite like a racing or cruising spinnaker. It’s as though the sailboat is puffing its chest out with confidence and strength. No wonder it’s called the fun sail.
In this post, I describe the strategy I used to get started with an asymmetrical spinnaker. You can use the same strategy with a symmetrical spinnaker but the cost is higher due to the required whisker pole and its control lines.
If spinnaker envy has really gotten to you, then you’ve also seen the cost of rigging a spinnaker. You can easily spend as much for the hardware and control lines as for the sail itself. When you consider that you can only use a spinnaker for a few points of sail, it can easily seem like a luxury that is out of reach of the average trailer sailor, not to mention a stingy sailor.
That’s not the whole truth. An asymmetrical spinnaker (also called a gennaker – a cross between a genoa and a symmetrical spinnaker) is definitely an optional upgrade. You can sail without one everywhere that a spinnaker can go, just not as fast or with as much style (and fun!) But it’s not as expensive to get started as you might think and you can upgrade your spinnaker rigging in stages as you get more experience with the sail and want to get the most enjoyment out of it.
The strategy I’m going to describe isn’t my invention. I picked up the basic idea from Dale Mack that appeared in the Technical Tips section of the March 2002 edition of the Catalina 22 Fleet 20 newsletter. But I’ve added a few stingy twists on it that reduce the cost by integrating a spinnaker with my existing rigging on Summer Dance .
The four stages of stingy spinnaker rigging are:
- Start with a used sail and reuse your existing running rigging. You don’t absolutely need more lines or hardware. It’s not as convenient as full rigging, but it works to get started.
- Add a dedicated spinnaker sheet (or two) to swap headsails quicker and to make gybing the spinnaker in front of the forestay possible. Also add turning blocks to lead the sheets.
- Add a dedicated spinnaker halyard and block to swap headsails even quicker and to prevent chafing the jib halyard. Modify your headsail downhaul line if you have one, to work double duty as a spinnaker tack line.
- Add a spinnaker sock (also called a snuffer) and a launch bag (also called a turtle) for quicker, easier, dousing and storage.
Stingy stage 1 – Sail only
You can start learning to fly an asymmetrical spinnaker with just the sail. That is what I did the first year I had my spinnaker. In a nutshell, you use the spinnaker as though it were just another headsail – a very large genoa.
New spinnakers are expensive but there a lots of used ones for sale online. Most spinnakers don’t get used a lot and they don’t blow out like regular sails, so even older spinnakers are often in excellent condition and still very usable. Look for a sail from a reputable loft that is the right size for your sailboat, has no rips or they have been professionally repaired, no dye transfer stains from being stored improperly, and strong stitching. As an example, I purchased a like-new Gleason Sails asymmetrical spinnaker with a launch bag and snuffer for $400 on eBay.
The dimensions of a C-22 (standard rig) asymmetrical spinnaker are 25.69′ (luff), 13.2′ (foot), 23.63′ (leech). That gives you about 250 sq. ft. of sail area, as much as your mainsail and a 150 genoa combined, but it’s all at the bow and high off the water. If you don’t know the right dimensions for your sailboat, you can look it up online in the Sailrite Sail Plan Database .
Flying a spinnaker like a normal headsail means you attach the tack to the stem fitting or headsail pendant just like your genoa. Having a pendant is definitely a plus with a spinnaker. Depending on its cut, most spinnakers are designed to fly higher off the deck then a regular headsail and they don’t work as well if flown low or bent over a pulpit rail. What you give up by not having a spinnaker tack line is the ability to adjust the height and fullness of the spinnaker for different conditions. But at this stage, you’re just working on getting the sail launched, set, gybed, and doused without destroying it.

Attach the head of the spinnaker to your jib halyard and hoist it normally. You won’t use your other headsails at the same time with the spinnaker and the jib halyard is almost identical to a spinnaker halyard, so you might as well use it. The disadvantage is the jib halyard will chafe against the forestay when the spinnaker is flying out in front of the forestay, particularly when the spinnaker is on the opposite side of the forestay from the halyard. But if you only fly the spinnaker occasionally and in light air conditions like spinnakers are intended for, the chafing will be negligible. And if you follow this strategy to the third stage, you’ll add a dedicated spinnaker halyard that eliminates that chafing.
Attach the clew of the spinnaker to your longest jib sheet(s). What you give up by starting with jib sheets is the length you need to gybe the spinnaker in front of the forestay. Instead, you’ll have to learn the more difficult art of gybing the spinnaker between the forestay and the mast just like a jib or genoa. You probably already know how to do this well with a jib or genoa, but a spinnaker is typically double the square footage of a jib and much taller. Squeezing all that cloth behind the forestay while running downwind without wrapping it around the forestay is a trick that doesn’t come easy but it can be done.
Practice, practice, practice. A spinnaker is also more delicate than other headsails. It’s made of lightweight nylon instead of heavier, more durable Dacron. It doesn’t take much to snag and rip a spinnaker, so be extra careful.
Spinnaker sheets need to lead as far aft on the sailboat as practicable so the spinnaker can open as wide and as high as possible. The typical spinnaker setup has turning blocks on the aft corners of the sailboat that lead the sheets forward to the primary winches. As a temporary solution, you can use the holes or aft ears of your mooring cleats.

The cleats add friction to trimming the spinnaker but because they’re only used in light air, the friction is manageable.
In this stage, you have a functional cruising spinnaker that reuses your existing rigging with acceptable compromises – good enough to start having fun flying a spinnaker in light air on downwind runs.
Stingy stage 2 – Add sheets and turning blocks
The goal of stage 2 is to allow you to gybe the spinnaker in front of the forestay. For that, you need much longer sheets than for a regular headsail, typically 2x the boat length for each sheet if you rig separate sheets for port and starboard. Figure 4x the boat length for a single sheet attached by a knot in the middle to the spinnaker clew. For a C-22, that’s 85′-90′ total.
Choose a lightweight rope to reduce the weight pulling down on the sail. Also choose a rope with low stretch for its size. When you have 30′-40′ of sheet under a load, every percent of stretch absorbs some of the force that would otherwise propel your sailboat forward. For Summer Dance , I chose 90′ of 1/4″ New England Ropes Sta Set.

Lead your dedicated spinnaker sheet(s) outside of the forestay, lifeline stanchions, and all other obstructions aft to the mooring cleats or turning blocks if you have them. Use the toerail to hold them on the deck when they’re not in use. When you gybe the spinnaker, the sheets need to run suspended in mid-air only by the clew while the spinnaker flies out front of the boat (remember, you’re running downwind). I recommend you attach the sheet(s) to the clew with a DIY soft shackle .
TIP: When you’re gybing, don’t let the lazy sheet run so slack that it falls in the water and gets swept under the boat. It can foul around the keel or the outboard prop. Contrary to the rule of always tying stopper knots in the ends of your sheets and control lines to keep them from accidentally slipping out of their cleats or clutches, do NOT tie them in the spinnaker sheets. If you lose control of the spinnaker in moderate winds, it could cause a knockdown. It’s better to let the sheets run out of the turning blocks and keep the sailboat upright while you get the spinnaker back under control.
Now is a good time to add spinnaker sheet turning blocks so that you can stop using the mooring cleats. Turning blocks virtually eliminate all friction on the sheets and make gybing the spinnaker faster and smoother. These turning blocks are typically stand-up blocks on pads attached to the top of the coamings as far aft as practicable. You can also use cheek blocks or other types depending on where and how you want to mount them. Whatever type you choose, they need to allow the sheets to run freely between the clew and the winches regardless of which side of the sailboat the spinnaker is on.
TIP: If you have any ambitions about racing with a spinnaker or you’re just performance minded, consider using ratcheting turning blocks. They will let you manually play the air pressure on the sail but also temporarily lock in place so you don’t have to hold all of the pull on the sheets.
The $tingy Sailor mantra is to keep costs minimal, of course. That includes avoiding drilling extraneous holes and installing hardware that doesn’t get used most of the time. So instead of permanently mounting stand-up blocks on the aft coamings that will get in the way when they’re not being used, I chose to attach web blocks to the aft mooring cleats with continuous loops of 5/32″ Dyneema that I spliced myself. That places the blocks at least as far aft as stand-up blocks and even farther outboard.

I girth hitch the loops to both the blocks and the cleats. This lets me remove the blocks easily when they’re not needed. It also makes them reusable almost anywhere I need a temporary block. Since the loads are relatively low, I chose plastic blocks which, combined with the Dyneema loops, are half the price of stainless steel stand-up blocks and work just as well.
In this stage, you have a functional cruising spinnaker that still reuses your jib halyard. But since you have dedicated sheets, you can gybe the sail out front of the forestay, which is easier and safer.
Stingy stage 3 – Add a spinnaker halyard and masthead block
This stage solves the problem of chafing caused by reusing the jib halyard. As you can see in the following drawing, when the jib halyard runs under the forestay pin and then in front of the forestay, it can make a quarter turn around the forestay. It can also chafe on the masthead itself because of the distance between the sheave and where the halyard exits to the spinnaker. You can reduce the chafing a bit until you add a masthead block by attaching your forestay to the top front pin in the masthead instead of the usual, lower pin but the best solution is a dedicated spinnaker halyard and masthead block.
A dedicated halyard lets you run it completely outside of the masthead and places it above and in front of the forestay. In that position, the halyard has a fair lead between the block and the sail regardless of which side the sail is on. The spinnaker halyard can chafe a bit below the block where it crosses the forestay when the sail is on the opposite side, but the wear is negligible. As a bonus, you can leave the jib halyard attached to the jib or genoa tied down to the deck while you’re flying the spinnaker. Then when you douse the spinnaker, you can immediately hoist the lazy headsail without having to change the halyard over first.
To rig a spinnaker halyard, you have to install a block at the masthead. I chose a standard 40mm plastic block but extended it with a second, long D shackle to attach it to the top front masthead pin. You can also use a rigging toggle. The important thing is that the block must be able to swing both up and down and also to port and starboard.

For the most freedom of movement, install a spinnaker crane on the masthead to move the halyard block even farther away from the forestay.

The spinnaker halyard should be low-stretch and at least 2x the mast height, longer if your control lines run aft to the cockpit. For Summer Dance , I chose 60′ of 1/4″ New England Ropes Sta Set. It was when I added the spinnaker halyard that I was glad that I had the foresight to install triple deck organizers in my lines led aft project. I had an unused sheave just waiting to be put to work and all I had to add was a cleat at the cockpit bulkhead.
Once you have a spinnaker halyard rigged to hoist the spinnaker, you don’t have a lot of control over the shape and height of the sail besides with the sheets. Unlike other headsails that work like an airplane wing and you want to trim them flat and tight most of the time, a spinnaker works more like a parachute (they’re sometimes called chutes) and you want it to open full and round — more so when running dead downwind, less so when slightly reaching. You can’t do that well in all conditions when the tack or the head are in fixed positions. For the best control and performance, you want to be able to let the tack rise well up off the deck.
Usually, a sailboat is rigged with a dedicated spinnaker tack line for this. But if you rig a proper headsail downhaul line, you can get double duty out of it. After you douse the jib in preparation for hoisting the spinnaker, detach the downhaul line from the jib and attach it to the tack of the spinnaker. (I typically don’t reave the downhaul line through the jib hanks as is sometimes recommended. If you do, you’ll want to unreave it to use it with the spinnaker). If you don’t have a headsail downhaul line, a headsail pendant helps but isn’t adjustable.

For the best speed, adjust the spinnaker tack line (downhaul line) and the spinnaker sheet until you get the spinnaker as full and high as possible.
In this stage, you’ve got a fully adjustable cruising spinnaker with dedicated rigging that makes changing between the spinnaker and your regular headsails relatively easy. But there’s one more stage that can make it even faster and easier.
Stingy stage 4 – Add a turtle and snuffer
A spinnaker is the largest sail you’ll ever use on your sailboat. It can be unwieldy until you learn its peculiar behavior and how to fly it well. Even dousing it can be sketchy, especially if you sail single-handed. There are two accessories that you can add to help you get a handle on all that Nylon — a launch bag (turtle) and a sock (snuffer).
You’re going to need a sail bag to store your spinnaker in anyway, but the right bag can actually help you to launch and retrieve the sail too. A launch bag (also called a turtle) is a sail bag that has straps or clips (the legs of the turtle) sewn into the bottom or side of the bag. These let you attach the bag to the foredeck to hold it in place while you rig and launch the sail. You can concentrate on rigging the sail while the bag keeps it secure and contained. Some launch bags (like the one shown below) also have a hoop sewn into the top of the bag that helps to hold the bag open while you stuff the sail back in.

Spinnaker sail cloth is so light that almost any breeze will catch in it. But you don’t want the sail to fill while you’re attaching the rigging or before you get the sail hoisted into place. A snuffer (also called a sock) can help.
A snuffer is a long tube of Nylon cloth that slides over the spinnaker and squeezes it closed to “snuff” it. It attaches between the halyard and the sail head with a turning block and becket and it has a hard ring or collar on the bottom that holds the snuffer open and acts as a funnel to squeeze the sail inside. It’s rigged with a loop of line that begins and ends at the collar and runs through the turning block. The loop works like a window shade cord. When you pull down on one side of the loop, it pulls the collar of the snuffer down over the spinnaker to collapse it before you lower the sail. After you hoist the sail, you pull the opposite side of the same line (around the turning block) to compress the tube above the spinnaker and open it.

My spinnaker came with a Chutescoop snuffer when I bought it. It’s really helpful for getting the sail in and out of the launch bag quickly without fouling the sail or the rigging.

Handling the spinnaker single-handed would usually be a train wreck without it.

If you make it to stage 4, you’ve got a fully rigged cruising spinnaker that’s easy to launch, control, and retrieve. If you divide your rigging expenses into the stingy stages like I’ve described in this post, you can spread your purchases out over time with the highest priority ones first and the convenience items last.
I followed this strategy with Summer Dance and spread my rigging out over two years. Now I look for every opportunity I can to fly the spinnaker, even single-handed. It’s amazing how fast Summer Dance can cruise downwind in light air with just the spinnaker. With the other sails doused, the sky is open above and the view is clear all around. The sail’s colors turn an ordinary day on the water into a celebration. That’s when I like to say, “Yeah, I’ve got this!”
Would you like to be notified when I publish more posts like this? Enter your email address below to follow this blog and receive notifications of new posts by email. You will also receive occasional newsletters with exclusive info and deals only for followers and the password to the Downloads page. It’s free and you can unsubscribe at any time but almost nobody does!
Subscribe to Blog via Email
Enter your email address to subscribe to this blog and receive notifications of new posts by email.
Email Address:
Share this:
41 thoughts on “ how to rig a cruising spinnaker in 4 stingy stages ”.
I have a symmetrical spinnaker that came with my boat. It looks like it has never been used. I have the blocks and lines for it, but no spinnaker pole, so I have never used it. They also intimidate me.
I was hesitant about trying a spinnaker in the beginning too, basically because of the complexity of the symmetrical spinnaker rigging, which pretty much needs two people to handle. When I learned how asymmetrical spinnakers work and that they can be flown single-handed, I decided to give it a try. It’s more work than a regular headsail but worth it, in my opinion.
Maybe you could find someone in your local club with a pole that would be willing to show you how to use yours. Then you could decide whether you want to get deeper into it, store it away for the next owner, or maybe sell it to pay for something you would use more.
Yeah, I am planning to meet up with the local trailer sailer club, so I’ll see what happens. There are always more things to buy! I would like a whisker pole so I can run wing and wing. I was speaking to a local yachty and he reckons for my 16ft, I could use a boat hook as a whisker pole. He says he has done so in light air on his 35ft keelboat. I haven’t bothered yet because my local waterway (Gold Coast Broadwater in Queensland, Australia), despite the name, isn’t that broad and seldom do we get a long enough stretch to warrant it.
Seems like it will never end, huh?
The boat hook is a great idea if it’s long enough for you. I love getting multiple uses out of gear. Have you tried running wing and wing without a pole? I do it sometimes when I don’t feel like putting up the spinnaker. It can be tricky to keep one wing from collapsing if you have shifty winds, but when it works, it works well and it takes no time at all to bear off to a reach when you run out of water.
For some reason I can’t reply to your later comment. It must be some sort of nesting issue. Anyway, I’m replying here! Where I usually sail, suffers a lot from shifting winds. The prevailing winds are usually SE, but we can get more S or more E randomly from moment to moment, so I find it hard to keep the headsail from collapsing.
Ah, that’d do it, then.
Looks like you have a very cool place to sail down there so long as you don’t run aground, especially exploring up north? I imagine there are a lot of sand bars to watch out for but great beaches for camping and the barbie, eh?
Yes, it’s a lovely spot. There are council run campgrounds on North and South Stradbroke Islands which are reasonable priced, but as you can imagine, they are very popular. If you stick to the channel, you’re pretty safe, but we have hit the swing keel on the occasional sand shoal by pushing it a little far. 😉 And on a very low tide, certain boat ramps can be difficult to manouvre back to even with the keel wound up, but for a nominal fee, we have started using a local marina’s ramp, which is much easier, and even features pontoons for a nice dry launch and retrieve.
If the $tingy Sailor world tour ever makes it down there, that will be high on my list of places to visit!
Another great article, Thanks! I am considering mounting my 50 W Solar Panel on the Bow Pulpit because I will relocate my battery forward, this way I have a way shorter wire run to charge the battery vice having the panel on the stern. I typically won’t have the Panel mounted while sailing, but if it were I am wondering if it could interfere with headsail function in any way or launching/dousing the Spinnaker. What do you think?
It would definitely be in the way up front. Have you considered on the cabin top in front of the mast? That’s about the only semi-safe spot forward of the stern unless you don’t have a pop top. Then on top of the hatch would be better, in my opinion. Depends on the panel size and how you want to attach it. If I was going to have a portable panel, I’d probably go with suction cups and stick it on top of the cabin somewhere. Running the leads to your charge controller without them getting in the way will be a trick too. All reasons why I’m glad I don’t have one and that my outboard alternator provides all the charging I need.
I have recently started using an 18W solar panel which I attach to my sliding hatch with outdoor velcro. I sized the panel specifically to fit lengthways on one half of the hatch, so that I can add another beside it in parallel. That way when one is shaded by a sail, the other will hopefully be putting out full power, which would result in more power output than a single partly shaded larger panel. I am currently testing the setup in my front yard with the newly installed VHF in standby mode. I have tested it with only a smartphone GPS running while sailing last week, but my radio licence arrived while I was away, so the frontyard test it is.
Our “new” boat (Seaward Fox) came with all the hardware but no spinnaker. You broke this down so well. Great pictures and instructions.
First time discovering your site. Nice job on the Spinnaker project.
I completed a similar project on my Montgomery 15. Only difference I wanted to ease the single handed process of jibing the sail so built a bowsprit out of a piece of 1.5 inch aluminum pipe I acquired from our local metal yard. At first I lashed the pipe to the bow and fore-deck cleat to test the design. It worked. So I had a metal shop modify my bow plate, adding a stainless tube to the plate. Now the bowsprit slips through the bow plate tube and is lashed to the fore-deck cleat. The sail tack extends from the end of the bowsprit and is about 2.5 feet in front of the boat. This gives plenty of room to tack the sail in front of the fore stay.
I know this is late but another great article that speaks to my particular style of sailing. One of the things I’m trying to figure out is how to attach the tack of my A sail when I have a furler drum. If the tack line is adjustable how do you lead it to the cockpit? I’m also little fuzzy on how the turtle and snuffer are rigged. Do you need to attach even more hardware to the top of the mast for them? Where do the control lines go? I was planning on installing a sheave block above the jib halyard so I could have the A sail halyard led to the cockpit.
Thanks for your questions. I’ll try to clarify those points a bit more here.
The tack line on my boat is also my headsail downhaul line. It serves both purposes with one line; as a downhaul when I’m flying my jib or genoa or as the spinnaker tack line when I’m flying it. I never need it for both purposes at the same time. The jib or genoa block the spinnaker too much to fly them at the same time. If you look at my Headsail downhaul solution post, you can see how I have it rigged and how it can work around your furler. However, I have it rigged slightly differently these days now that I have a spinnaker. The stanchion cleat isn’t strong enough for a tack line so, instead of it running to the cockpit through a fairlead at a stanchion base at the edge of the deck, I now run it straight back from the pulpit turning block, through a fairlead mounted in front of my port side deck organizer, and dead end it in a fairlead clam cleat just in front of my cam cleats on the cabin top. I also moved the pulpit turning block from the aft base to the forward base. You can see that in the first picture in Quit spending setup time on turnbuckles .
The turtle bag is just clipped to the pulpit bases on both sides with utility carabiners. They hold it on the deck so that it doesn’t roll overboard and so that it can stay on the foredeck while I’m sailing. When I’m ready to douse the spinnaker back into it, it’s already in place and I don’t have to carry it back to the foredeck.
The snuffer attaches in between the spinnaker halyard shackle and the spinnaker head grommet. Without a snuffer, you would attach the shackle directly to the grommet. The snuffer just sits in between them. That’s what you’re seeing in the last picture of the post. There’s no new hardware needed at the masthead for it.
You do need a block above the jib halyard to run your spinnaker halyard through if you aren’t going to use your jib halyard for the spinnaker like I describe in stage 1. The spinnaker halyard should run to the cockpit parallel to your jib halyard and dead end in its own cleat. You essentially have two headsail halyards that are identical except at the masthead where one is above the other so that it can fly its sail in front of the other, not to one side.
I hope that answers your questions. If not, let me know either here in an email sent from the Contact page.
I just acquired a 1982 Macgregor 22 with a mainsail, jib and spinnaker (with spinnaker pole) and look forward to trying this addition to my arsenal. I have a question on the photograph of your masthead. My boat does not have a masthead assembly but is open revealing a hollow mast. All standing rigging is secured via steel straps secured to the top of the boom. Is your masthead OEM to the boat is an aftermarket item. If aftermarket, where can it be purchased? I’ve tried unsuccessfully hence the question.
My masthead is original for a C-22. If the top of your mast looks like the first picture below, then you’ll need something like in the second picture to hang your spinnaker halyard block from.

Also ask around in the Macgregor forums online. I’m sure those guys know the best way to rig your spinnaker. I’m not as familiar with your boat as I am with C-22s.
Thanks for your question!
Hi, thanks for the great article. I’m using a NorthSail G2 cruising spin on my C22 and love it – super flexible and gives me some speed in light air. Once quick question. In the photo of your tack pendant it looks like you have it rigged inside the pulpit. Is there a reason for that?
robert ouimet madsu http://www.madsu.ca
The picture in this article shows the headsail downhaul used as the spinnaker tack line like I describe in Install a Double Duty Headsail Downhaul so it’s usually inside the pulpit. It could also run in front of the pulpit. With my spinnaker, it just depends on how high and forward it’s flying for the current conditions. If the air is really light, it works best inside the pulpit. In moderate air when it flies fuller in the top half but almost dead downwind, it would work better outside the pulpit. Either way works.
When I have the jib or genoa on, the same line reverts back to use as the downhaul and I attach those sails to a 24″ pendant that I describe in How to Raise Your Foresail with a Pendant .
What size turning blocks did you use for your 1/4″ sheets? I couldn’t tell for sure from the photos. Are 30mm blocks large enough for smooth operation with the nearly 180-degree turn? Or would it be better to size up to 40mm? (as best I can tell, the sheet loads should be low enough that either size will be fine for strength)
I use 40mm blocks for halyards and sheets. They’re easier to handle with gloves on.
Thanks. I think I’ll do the same.
Another excellent, very informative and helpful article. Thank you for investing the time to put this together.
Hi! Wonderful report and wonderful boat!
In a similar way, we do so:
We are in the same boat; his name is “safety & simplicity”.
Best regards!
Pepe Prego Malaga (SPAIN)
Hi Mr Stingy … Thanks for the spinnaker post. Can you help with a couple of questions – I found a cheap spinnaker with the dimensions 20ft luff, 16ft foot, and 20 ft leech. Do you think it will work for me? I’m still searching for a snuffer. Also, could you provide a link to purchase the ‘a continuous loop of Dyneema’ described in the post. Many thanks, love the website. Take care, J.
Those dimensions are short and a bit fat for the C-22. Around 25′ luff/leech and 14′ foot is better. It will fly but it won’t work as well as it should and you’d probably end up disappointed with it. I don’t know of anywhere that sells premade Dyneema loops. I made them myself. Soft shackles would probably work depending on what blocks you put them on. You can find them for sale on Amazon, eBay, West Marine and elsewhere.
Hope that helps, $tingy
Very useful article! Thank you…
We love every edition! I’m trying to figure the best way to stow my rode and chain while cruising. I’ve looked at a couple of bags but they need to clip on to the bow pulpit and the one’s I’ve seen just have carrying straps. Ideas?
Check out Product Review: Bayco Kord Manager .
Thanks for your support, $tingy
I’ve crewed on bigger boats with a symmetrical spinnaker, and it definitely takes a coordinated effort to get it to fly right, Your description makes flying an asymmetrical spinnaker seem doable on my C-22, but in light winds, as you mentioned. Your photos and illustrations were very helpful and high quality. As always, enjoyed reading your posts. Thanks.

If you’re nervous about flying one of these on a small boat, I’d encourage you to go for it. They are easy to manage, just be prudent about when you’re going to hoist it and like any big sail, reef early. Beginners tend of oversheet them (like most sails) so learn to let that sail out until you see a bit of a buckle in the leach. Having the downhaul at the tack is really important for adjusting the shape of the sail as you change points of sail. Most cruising chutes don’t really like running dead down – they’re actually a reaching sail, but you can get them to work dead down. And also for beginners, the other thing to get used to is heading DOWN when the wind pipes up, not heading up. Your muscle memory is going to make you head up in the puffs, you want to do the opposite with a flying sail. Practice those gybes. Leave the main furled to make things easier, and just practice gybing until if feels normal. Most sailors gybe seldomly anyway, so spend some time doing it with this big sail – it’s loads of fun and really impressive for anyone watching. And if the wind comes up, head down, grab the dousing line, and within 20 seconds you’ll have that big sail sitting back in the bag on the foredeck.

thankyou for the advice. i love this site and your videos 🙂
And how does one use it?
Thanks, Charlie Barlow Tumwater, WA
Hi, Charlie
A cruising spinnaker is most useful when sailing not quite dead downwind, at those points of sail where regular headsails and the mainsail are not very efficient. See also How to fly an Asymmetrical Spinnaker .
Thank you looking forward to putting into practice on my Sonata 7m Trailer Sailer-Australia-am soaking Spinnaker as per your advice as l type)
Hello Stingy, just found you and subscribed 04 Dec 2021. We are Sailing4Smiles.com. We’re on a 1982 Cape Dory 36; SV Mingus. Currently in Titusville, FL having passaged from Indiantown, FL to Oriental,NC and working our way south again helping kids as much as we can during our travels. We’ll be Caribbean bound in Dec doing the same thing.
Fair winds on you passage to the Caribbean, Chuck. We’re all jealous!
Hi, love this article and will def try this in the new season. Have you made a spinnaker sock? I used your patterning for winch covers and they are fabulous! I think it must be very easy to make a sock – what do you think? thank you again!
Hi, Pauleen
Yes! Check out https://stingysailor.com/2020/05/23/sew-this-jib-sock-to-protect-your-furled-headsails/
Hi Stingy but helpful!
I am starting to understand how this all works. So helpful. Took me a while to find you but happy i persevered.
Having said that i find that both the photographs and the drawn diagram of the snuffer/sock don’t have enough resolution to zoom in enough.
I am having a hard time still figuring out the block/becket connection….to the snuffer? and then how the head of the spinnaker then connects to this mechanism and the role and position of the pendant.
Finally, how high off the bow does the tack typically fly? and how far forward? Is it just a matter of clearing the anchor pilot and stanchions?
Good resolution photos or drawings would really help! thanks again
Catherine from Lake Ontario
The block forms the upper end of the snuffer. It reverses the direction of the control line so that when you pull down on the line, it pulls the bottom of the sock upward, compressing it over the pendant. The pendant that you see sticking out of the snuffer in the last picture is just a spacer between the halyard shackle/snuffer block and the sail head. It keeps the compressed snuffer above the head of the sail, out of its way. Otherwise, it would pinch the top of the sail together. Not a big deal, but it prevents chafing.
The height of the tack varies depending on conditions, 3′ to 6′ or more, so it needs to be readily adjustable. You’ll always hoist the sail completely to the masthead, then adjust the tack line and sheets to maximize shape of the sail for the wind speed and direction.
Hope that helps!
Leave a comment Cancel reply
This site uses Akismet to reduce spam. Learn how your comment data is processed .

- Already have a WordPress.com account? Log in now.
- Subscribe Subscribed
- Copy shortlink
- Report this content
- View post in Reader
- Manage subscriptions
- Collapse this bar
Home > Resources > Sailing With a Spinnaker – Asymmetrical Basics (Gennakers and Light Air Sails)
Sailing With a Spinnaker – Asymmetrical Basics (Gennakers and Light Air Sails)
24 March 2023
Ask Precision Sails , Design , Featuring - Partners , Products and Accessories , Sails , Spinnakers , Technical

All About Spinnakers with The Foster Journey
Tune in and watch Ron McInnis from Precision Sails and Matt Foster from The Foster Journey discuss all things spinnakers, gennakers, and light wind sails.
In this conversation we talk all about spinnakers, asymmetricals, gennakers, screechers, you name it. Tips, tricks, and how to make it easy to sail with light air sails MATT FOSTER
Light Air Sails: Tips and Tricks for Spinnakers, Gennakers, and More
Light Air Sails have a multitude of names and uses, but all refer to the same functionality in a sail, which is designed to help a boat move efficiently in light winds.
Popular types of light air sails include Asymmetric Spinnakers, Symmetrical Spinnakers, Gennakers, Screechers, and Drifters. Each of these names carries with it a particular connotation or emphasis that reflects the way the sail is used, the shape of the sail, or some other feature. For example, Asymmetrical Spinnakers are typically flown prominently on monohull boats and do not require you to use a spinnaker pole whereas Symmetrical Spinnakers require the use of a spinnaker pole due to their symmetrical panelling and are found commonly on both catamarans and monohulls.
Despite these differences in terminology, sailors around the world are all essentially talking about the same thing when they refer to light air sails. These sails are an indispensable tool in any sailor’s sail inventory, allowing them to make the most of even the lightest breezes and continue to sail when their default sail inventory fails to perform. Many definitions exist and it can be hard to nail them down. Regardless, if you are looking for a Spinnaker, a Gennaker, or something else entirely, the important thing is that you have the right sail for the conditions and that you know how to use it to get the most out of your boat and your time on the water.
Solid Luff vs. Free Flying Luff
Solid luff sails, such as Screechers, and Code Zeros, may require a torsion line, Dyneema line, or wire stay to help get them up into the wind. On the other hand, free-flying luff sails like the Spinnaker have no hard shape to them, making it difficult to sail them upwind.
Design of Light Air Sails
The design of these sails plays an important role in their functionality. By defining the shape and depth of the draft the design can be tailored to your specific rig and sailing conditions for optimal performance.
Spinnaker Sock and Turtle Bags
If you want to simplify your sailing experience, it’s worth considering getting a good Launch Bag or Turtle Bag for easy and efficient storage. This will help to prolong the life of your sails by providing proper care and protection. When looking to buy a Spinnaker Sock or Turtle Bag, make sure that it’s the appropriate size and has sturdy attachments to securely fasten it to your rigging and deck. We’re more than happy to offer our recommendations or you can check out our selection online. Additionally, investing in Socks and Snuffers is a great idea as they make it much easier to hoist and lower your sails.
Do You Have a Bowsprit?
Retractable bowsprits can allow us to design a larger sail, increasing your performance. The position also allows for more of a pulling motion that reduces drag and downforce. While these speed boosts may not be game-changers for the average cruiser, upgrades are always encouraged.
Rigging and Equipment
Your Spinnaker sails on the outside of your other sails and needs a strong line to support it. In light wind, however, you must strike a balance between the weight of the hoisted line and the durability required to support the sail through extended use. While you can often read manual specifications, Ron recommended the Fosters a 10mm line to reduce weight and keep their sail flying high in extremely light wind conditions for their Catalina 387.
Are you looking to replace your lines? Our Precision Sails experts would love to help. We’re able to provide quick and accurate pricing and information for your particular boat. If you already have a sail quote, simply request your consultant to include some line options. If you don’t have a quote yet, click here to get started .
Practice Makes Perfect
To get the most out of your light air sails, practice and test them out in 4-8 knots of wind. Get used to how they behave and know what to expect. With the calm waters and little waves that come with light wind conditions, it’s the perfect time to practice and hone your skills.
Sailing with light air sails can be a delightful experience with the right equipment, techniques, and knowledge. Whether you’re using Spinnakers, Gennakers, or any other type of light air sail, these tips and tricks can help you get the most out of your sailing adventures. Remember to invest in high-performance materials and equipment, and never skimp on quality. For more information and personalized recommendations, speak to one of our sail consultants today.
precisionsails
Related Posts

Full Battens vs Partial Battens vs 2 Full plus 2 Partial Battens
Full Battens VS Partial Battens At
Precision Sails we are asked every day during our customer quote consultation “Should I choose Full Battens or Partial Battens for my new mainsail?” Whether you are cruising or racing you will need to examine the pros and cons of adding full battens to your main sail.Positive Aspects of Full […]

Memories of Sail Repairs, Replacement Sails and FINALLY New Sails
I have had a Tanzer 26 for over 20 years now. The vessel, without much imagination I call The Boat, has served me well and without complaint through yearly cruises on Lake Ontario with my three kids and day sailing with the wife. Did I mention that my wife is a good sport but a definitive lover of a good.

My Need for Cruising Speed Demands a Great Suit of Sails
My Need for Cruising Speed Demands a Great Suit of SailsI like to sail fast mostly in the heavy winds that Lake Ontario throws.
" * " indicates required fields
Thanks for telling us a bit about yourself and your boat. Our team will send you a preliminary quote based on information we have gathered from sailors similar to you.
We will give you a call in order to narrow down the options on your quote and improve the accuracy. If you want us to call you at a specific time, feel free to schedule a time on our calendar!
Thanks for telling us a bit about yourself and your boat. Our team will reach out to offer some suggestions and get started on finding you the perfect sail!
Tips for Sailing with an Asymmetrical Spinnaker
March 30, 2023
For many sailors spinnakers conjure thoughts of mayhem, chaos and shouting. Anxiety reigns over some at the prospect of the windward and leeward marks approaching and the skipper calling for a set or a douse. To some, the concept of flying a spinnaker is a foreign art they avoid trying for fear of “messing it up.” They happily step aside and let someone else do it, while they focus on something less daunting. But spinnakers, and particularly asymmetrical spinnakers, are easy to set, douse and trim when a few simple but important processes are followed. Once the technique is established and practiced, excited anticipation of both the top and the bottom marks, as well as the fun downwind sleigh ride in the middle, is met with a renewed opportunity to shine.

To make sure you’re getting the most out of arguably one of the most fun legs of the race, here are a few tips on how to make the transition to asymmetrical spinnakers. But keep in mind that practice is the most important ingredient.
The teams leading any fleet will tell you about the amount of work done outside of the actual race course to fine tune boat setup, boat handling, maneuvers and team communication. It will take time and practice to hone your asymmetrical trimming skills, or repetition to work out the kinks in dousing. Practicing off the race course offers time and space to mess up, and you definitely will. Even if you can’t dedicate a day to practice ahead of an event, do a few practice sets, jibes and douses before the race.
Clear communication is key heading into any maneuver. As the boat approaches the windward mark, be sure to clearly communicate the type of set that is required. This will be either a bear away set or a jibe set. The bear away set is more common and easier to execute. You can also bear away set and prep for a quick jibe once the spinnaker is full. For the purposes of this article, we will continue with a bear away set.
The skipper or tactician will let the bow team know that the boat is on lay line for the mark and call for the number of boatlengths to the mark. The bow team should have at least three to four boatlengths to prepare for a set. However, if you’re just learning or have new people on board, more prep time is a good idea.
Getting ready for the set starts with pre-setting the tack of the spinnaker to the end of the bowsprit or prod. The bow person feeds the tack out while the pit person or trimmer tails the tackline until the sail is at the end of the sprit. With the tack set, the bow person pulls the clew and head of the sail partially out of the hatch or the sail bag and the mast person leaves the rail to tend to the halyard at the mast.
As the boat rounds the mark, the skipper calls for the bear away and then for the sail to be hoisted. The halyard is jumped at the mast and tailed by the pit person while another crewmember goes to leeward to assist in pulling the clew aft to straighten the foot for a clean hoist prior to the trimmer taking control. Once the sail is at the full hoist position, the mast person calls “made” and the bow should be in the born away position, approximately 140 degrees apparent wind angle. The asymmetrical will fill and the trimmer eases the sail to its normal trimmed position. A tip when you are practicing, mark the optimum sheet position so that the trimmer can preset the sheet to this gross trim position so that when the sail fills it is already nearly perfectly trimmed.
Trimming the sail is quite simple. Just like any other sail, it will tell you when it’s happy and when it’s not, you just have to learn what to look for. Like a jib, if the asymmetrical starts luffing it needs trimming. Unlike trimming a jib, you’ll need to watch the luff of the asymmetrical for a curl, rather than the leech of the jib. To start your trim, bring the sail in until the luff of the asymmetrical is smooth and stops luffing. Once the spinnaker is full, start to slowly ease the sail back out to the point where it barely starts to curl along the luff. And then, you guessed it, trim in again. This is your range of trim. Keep pushing the ease all the way to curl for optimum trim.
Keeping the asymmetrical over trimmed is slow, so always remember that the ease is equally as important as the trim. If the boat feels slow and the sail doesn’t seem to be drawing as it should, then try easing more. The worst that can happen is the luff curls and you pull it back in. Consider, too, that the trimmer is really the helmsman’s guide when going downwind, so make sure your communication between each other is clear, frequent and precise. Communicate what you feel in the spinnaker or on the helm. For example, if you have a lot of pressure in the sail you could ask the helmsman to “press” —turn a little further downwind. If the sail feels light, ask the driver to come up. Create a pre-determined number amount, “up one” or for more up, “up two.” It’s simple, but it will keep the boat moving and the clear communication will generally mean less trimming is needed.
The jibe is also key, but again, quite simple and logical once you’ve practiced a few. An “inside jibe,” where the clew passes from one side of the boat to the other inside the tack is probably the more common option. When it's windy the “outside jibe” is often utilized, where the opposite occurs and the clew passes around the outside of the tack. Whichever jibe you use, make sure your crew knows the dance steps that will ensure a clean maneuver.
Both the speed of the turn and the speed of the sail need to be smooth and in time with one another. Try timing both so that by the time the clew reaches the headstay, the boat is almost dead downwind and the sail then starts to fill on the new side. Once the sail starts filling, then the helm can speed up the turn and land at an apparent wind angle of 140 degrees. Practice jibing and take note of the settings that feel good and fast, then replicate them on the race course. Fine tune as you go along by updating your notes after each race or practice.
So you rocked downwind but now the leeward mark is approaching quickly and you have to figure out how to get this thing down. One of the most commonly asked questions about a douse is “which side are we taking the sail down on?” If you default to the port side on a windward-leeward race course (so the asymmetrical is ready for the next hoist) that question no longer needs to be asked. There are times when the sail will drop or launch on starboard, but 90% of the time you’ll have port roundings, meaning port side sets and douses.
Knowing that we plan to drop on the port side, if the sail isn’t on that side, we need to get it there. This is called a windward douse. In a windward douse, the helmsman does not jibe the boat. The bow team pulls the asymmetrical around the forestay, as if to manually jibe the spinnaker. The asymmetrical is pulled aft on the port side of the boat so that the foot is tight and straight, and the person in the forward hatch grabs the sail by the foot, and starts pulling it down the hatch.
Once a good section of the foot is down below, the rest of the sail will follow when the halyard is eased, trust me, it will. If there are two hands available on the foredeck, one person pulls down on the spinnaker along the luff of the sail and the other pulls down the leech, while the aforementioned crewmember pulls the sail from down below. Once the majority of the sail is down cleanly, the tack will also need to be released. Clear communication, extra hands and controlled releases on the halyard and tack will make sure not only will the sail go below smoothly, it will be ready for the next hoist at the top mark. On many boats, you can even close the corners of the tack, head, and clew in the hatch so you don’t have to go searching for them at the next set.
If the sail is already on the port side, a leeward douse will keep the spinnaker there. Simply pull the clew hard as the helmsman drives the boat down deep, to relieve pressure in the sail. The bow person will lift the foot of the spinnaker over the lifelines and hand the foot to the person in the bow hatch. The steps that follow are the same as the windward douse. Remember to practice all of these nuances. It will get easier and smoother each time meaning you can push the limit to set or douse closer to the mark.
For more resources and expertise, browse our full content library , or you can get in touch directly with Quantum Sail and Design Consultant Andrew Waters .
This content was originally published on SAILING Magazine .
The Discussion
This website uses cookies and collects usage statistics. Privacy Policy
Us, too. We pour that passion into each of our newsletters to help you enjoy sailing even more.
The Ultimate Guide to Sail Types and Rigs (with Pictures)
What's that sail for? Generally, I don't know. So I've come up with a system. I'll explain you everything there is to know about sails and rigs in this article.
What are the different types of sails? Most sailboats have one mainsail and one headsail. Typically, the mainsail is a fore-and-aft bermuda rig (triangular shaped). A jib or genoa is used for the headsail. Most sailors use additional sails for different conditions: the spinnaker (a common downwind sail), gennaker, code zero (for upwind use), and stormsail.
Each sail has its own use. Want to go downwind fast? Use a spinnaker. But you can't just raise any sail and go for it. It's important to understand when (and how) to use each sail. Your rigging also impacts what sails you can use.

On this page:
Different sail types, the sail plan of a bermuda sloop, mainsail designs, headsail options, specialty sails, complete overview of sail uses, mast configurations and rig types.
This article is part 1 of my series on sails and rig types. Part 2 is all about the different types of rigging. If you want to learn to identify every boat you see quickly, make sure to read it. It really explains the different sail plans and types of rigging clearly.

Guide to Understanding Sail Rig Types (with Pictures)
First I'll give you a quick and dirty overview of sails in this list below. Then, I'll walk you through the details of each sail type, and the sail plan, which is the godfather of sail type selection so to speak.
Click here if you just want to scroll through a bunch of pictures .
Here's a list of different models of sails: (Don't worry if you don't yet understand some of the words, I'll explain all of them in a bit)
- Jib - triangular staysail
- Genoa - large jib that overlaps the mainsail
- Spinnaker - large balloon-shaped downwind sail for light airs
- Gennaker - crossover between a Genoa and Spinnaker
- Code Zero or Screecher - upwind spinnaker
- Drifter or reacher - a large, powerful, hanked on genoa, but made from lightweight fabric
- Windseeker - tall, narrow, high-clewed, and lightweight jib
- Trysail - smaller front-and-aft mainsail for heavy weather
- Storm jib - small jib for heavy weather
I have a big table below that explains the sail types and uses in detail .
I know, I know ... this list is kind of messy, so to understand each sail, let's place them in a system.
The first important distinction between sail types is the placement . The mainsail is placed aft of the mast, which simply means behind. The headsail is in front of the mast.
Generally, we have three sorts of sails on our boat:
- Mainsail: The large sail behind the mast which is attached to the mast and boom
- Headsail: The small sail in front of the mast, attached to the mast and forestay (ie. jib or genoa)
- Specialty sails: Any special utility sails, like spinnakers - large, balloon-shaped sails for downwind use
The second important distinction we need to make is the functionality . Specialty sails (just a name I came up with) each have different functionalities and are used for very specific conditions. So they're not always up, but most sailors carry one or more of these sails.
They are mostly attached in front of the headsail, or used as a headsail replacement.
The specialty sails can be divided into three different categories:
- downwind sails - like a spinnaker
- light air or reacher sails - like a code zero
- storm sails

The parts of any sail
Whether large or small, each sail consists roughly of the same elements. For clarity's sake I've took an image of a sail from the world wide webs and added the different part names to it:

- Head: Top of the sail
- Tack: Lower front corner of the sail
- Foot: Bottom of the sail
- Luff: Forward edge of the sail
- Leech: Back edge of the sail
- Clew: Bottom back corner of the sail
So now we speak the same language, let's dive into the real nitty gritty.
Basic sail shapes
Roughly speaking, there are actually just two sail shapes, so that's easy enough. You get to choose from:
- square rigged sails
- fore-and-aft rigged sails
I would definitely recommend fore-and-aft rigged sails. Square shaped sails are pretty outdated. The fore-and-aft rig offers unbeatable maneuverability, so that's what most sailing yachts use nowadays.

Square sails were used on Viking longships and are good at sailing downwind. They run from side to side. However, they're pretty useless upwind.
A fore-and-aft sail runs from the front of the mast to the stern. Fore-and-aft literally means 'in front and behind'. Boats with fore-and-aft rigged sails are better at sailing upwind and maneuvering in general. This type of sail was first used on Arabic boats.
As a beginner sailor I confuse the type of sail with rigging all the time. But I should cut myself some slack, because the rigging and sails on a boat are very closely related. They are all part of the sail plan .
A sail plan is made up of:
- Mast configuration - refers to the number of masts and where they are placed
- Sail type - refers to the sail shape and functionality
- Rig type - refers to the way these sails are set up on your boat
There are dozens of sails and hundreds of possible configurations (or sail plans).
For example, depending on your mast configuration, you can have extra headsails (which then are called staysails).
The shape of the sails depends on the rigging, so they overlap a bit. To keep it simple I'll first go over the different sail types based on the most common rig. I'll go over the other rig types later in the article.
Bermuda Sloop: the most common rig
Most modern small and mid-sized sailboats have a Bermuda sloop configuration . The sloop is one-masted and has two sails, which are front-and-aft rigged. This type of rig is also called a Marconi Rig. The Bermuda rig uses a triangular sail, with just one side of the sail attached to the mast.
The mainsail is in use most of the time. It can be reefed down, making it smaller depending on the wind conditions. It can be reefed down completely, which is more common in heavy weather. (If you didn't know already: reefing is skipper terms for rolling or folding down a sail.)
In very strong winds (above 30 knots), most sailors only use the headsail or switch to a trysail.
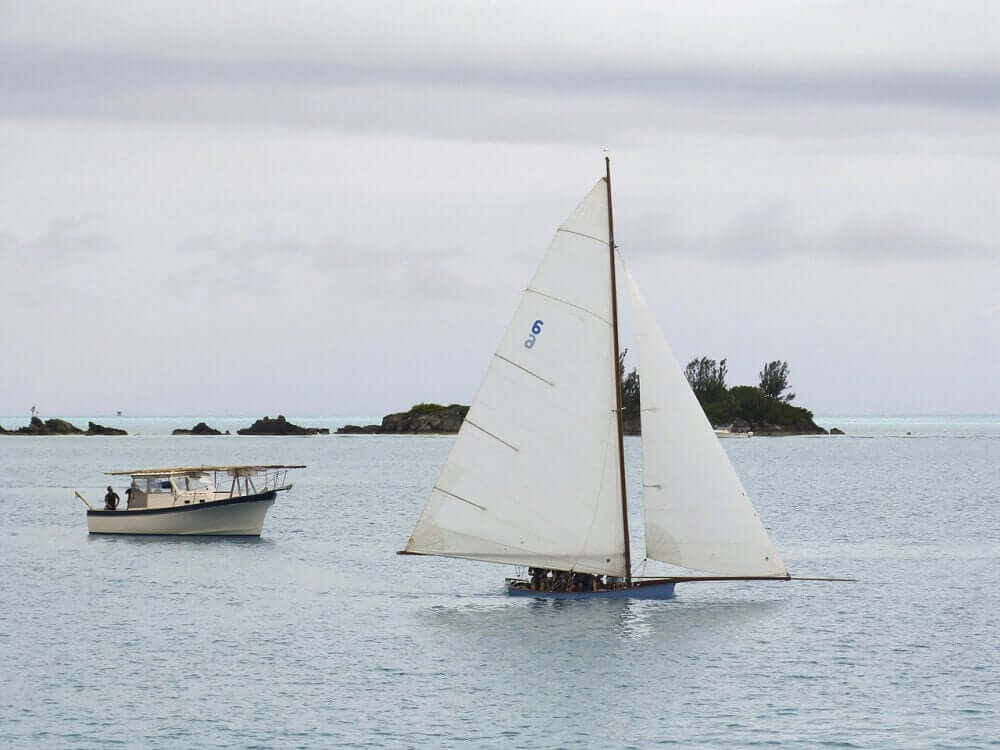
The headsail powers your bow, the mainsail powers your stern (rear). By having two sails, you can steer by using only your sails (in theory - it requires experience). In any case, two sails gives you better handling than one, but is still easy to operate.
Let's get to the actual sails. The mainsail is attached behind the mast and to the boom, running to the stern. There are multiple designs, but they actually don't differ that much. So the following list is a bit boring. Feel free to skip it or quickly glance over it.
- Square Top racing mainsail - has a high performance profile thanks to the square top, optional reef points
- Racing mainsail - made for speed, optional reef points
- Cruising mainsail - low-maintenance, easy to use, made to last. Generally have one or multiple reef points.
- Full-Batten Cruising mainsail - cruising mainsail with better shape control. Eliminates flogging. Full-length battens means the sail is reinforced over the entire length. Generally have one or multiple reef points.
- High Roach mainsail - crossover between square top racing and cruising mainsail, used mostly on cats and multihulls. Generally have one or multiple reef points.
- Mast Furling mainsail - sails specially made to roll up inside the mast - very convenient but less control; of sail shape. Have no reef points
- Boom Furling mainsail - sails specially made to roll up inside the boom. Have no reef points.
The headsail is the front sail in a front-and-aft rig. The sail is fixed on a stay (rope, wire or rod) which runs forward to the deck or bowsprit. It's almost always triangular (Dutch fishermen are known to use rectangular headsail). A triangular headsail is also called a jib .
Headsails can be attached in two ways:
- using roller furlings - the sail rolls around the headstay
- hank on - fixed attachment
Types of jibs:
Typically a sloop carries a regular jib as its headsail. It can also use a genoa.
- A jib is a triangular staysail set in front of the mast. It's the same size as the fore-triangle.
- A genoa is a large jib that overlaps the mainsail.
What's the purpose of a jib sail? A jib is used to improve handling and to increase sail area on a sailboat. This helps to increase speed. The jib gives control over the bow (front) of the ship, making it easier to maneuver the ship. The mainsail gives control over the stern of the ship. The jib is the headsail (frontsail) on a front-and-aft rig.
The size of the jib is generally indicated by a number - J1, 2, 3, and so on. The number tells us the attachment point. The order of attachment points may differ per sailmaker, so sometimes J1 is the largest jib (on the longest stay) and sometimes it's the smallest (on the shortest stay). Typically the J1 jib is the largest - and the J3 jib the smallest.
Most jibs are roller furling jibs: this means they are attached to a stay and can be reefed down single-handedly. If you have a roller furling you can reef down the jib to all three positions and don't need to carry different sizes.

Originally called the 'overlapping jib', the leech of the genoa extends aft of the mast. This increases speed in light and moderate winds. A genoa is larger than the total size of the fore-triangle. How large exactly is indicated by a percentage.
- A number 1 genoa is typically 155% (it used to be 180%)
- A number 2 genoa is typically 125-140%
Genoas are typically made from 1.5US/oz polyester spinnaker cloth, or very light laminate.

This is where it gets pretty interesting. You can use all kinds of sails to increase speed, handling, and performance for different weather conditions.
Some rules of thumb:
- Large sails are typically good for downwind use, small sails are good for upwind use.
- Large sails are good for weak winds (light air), small sails are good for strong winds (storms).
Downwind sails
Thanks to the front-and-aft rig sailboats are easier to maneuver, but they catch less wind as well. Downwind sails are used to offset this by using a large sail surface, pulling a sailboat downwind. They can be hanked on when needed and are typically balloon shaped.
Here are the most common downwind sails:
- Big gennaker
- Small gennaker
A free-flying sail that fills up with air, giving it a balloon shape. Spinnakers are generally colorful, which is why they look like kites. This downwind sail has the largest sail area, and it's capable of moving a boat with very light wind. They are amazing to use on trade wind routes, where they can help you make quick progress.
Spinnakers require special rigging. You need a special pole and track on your mast. You attach the sail at three points: in the mast head using a halyard, on a pole, and on a sheet.
The spinnaker is symmetrical, meaning the luff is as long as its leech. It's designed for broad reaching.

Gennaker or cruising spinnaker
The Gennaker is a cross between the genoa and the spinnaker. It has less downwind performance than the spinnaker. It is a bit smaller, making it slower, but also easier to handle - while it remains very capable. The cruising spinnaker is designed for broad reaching.
The gennaker is a smaller, asymmetric spinnaker that's doesn't require a pole or track on the mast. Like the spinnaker, and unlike the genoa, the gennaker is set flying. Asymmetric means its luff is longer than its leech.
You can get big and small gennakers (roughly 75% and 50% the size of a true spinnaker).
Also called ...
- the cruising spinnaker
- cruising chute
- pole-less spinnaker
- SpinDrifter
... it's all the same sail.

Light air sails
There's a bit of overlap between the downwind sails and light air sails. Downwind sails can be used as light air sails, but not all light air sails can be used downwind.
Here are the most common light air sails:
- Spinnaker and gennaker
Drifter reacher
Code zero reacher.
A drifter (also called a reacher) is a lightweight, larger genoa for use in light winds. It's roughly 150-170% the size of a genoa. It's made from very lightweight laminated spinnaker fabric (1.5US/oz).
Thanks to the extra sail area the sail offers better downwind performance than a genoa. It's generally made from lightweight nylon. Thanks to it's genoa characteristics the sail is easier to use than a cruising spinnaker.
The code zero reacher is officially a type of spinnaker, but it looks a lot like a large genoa. And that's exactly what it is: a hybrid cross between the genoa and the asymmetrical spinnaker (gennaker). The code zero however is designed for close reaching, making it much flatter than the spinnaker. It's about twice the size of a non-overlapping jib.

A windseeker is a small, free-flying staysail for super light air. It's tall and thin. It's freestanding, so it's not attached to the headstay. The tack attaches to a deck pad-eye. Use your spinnakers' halyard to raise it and tension the luff.
It's made from nylon or polyester spinnaker cloth (0.75 to 1.5US/oz).
It's designed to guide light air onto the lee side of the main sail, ensuring a more even, smooth flow of air.
Stormsails are stronger than regular sails, and are designed to handle winds of over 45 knots. You carry them to spare the mainsail. Sails
A storm jib is a small triangular staysail for use in heavy weather. If you participate in offshore racing you need a mandatory orange storm jib. It's part of ISAF's requirements.
A trysail is a storm replacement for the mainsail. It's small, triangular, and it uses a permanently attached pennant. This allows it to be set above the gooseneck. It's recommended to have a separate track on your mast for it - you don't want to fiddle around when you actually really need it to be raised ... now.

| Sail | Type | Shape | Wind speed | Size | Wind angle |
|---|---|---|---|---|---|
| Bermuda | mainsail | triangular, high sail | < 30 kts | ||
| Jib | headsail | small triangular foresail | < 45 kts | 100% of foretriangle | |
| Genoa | headsail | jib that overlaps mainsail | < 30 kts | 125-155% of foretriangle | |
| Spinnaker | downwind | free-flying, balloon shape | 1-15 kts | 200% or more of mainsail | 90°–180° |
| Gennaker | downwind | free-flying, balloon shape | 1-20 kts | 85% of spinnaker | 75°-165° |
| Code Zero or screecher | light air & upwind | tight luffed, upwind spinnaker | 1-16 kts | 70-75% of spinnaker | |
| Storm Trysail | mainsail | small triangular mainsail replacement | > 45 kts | 17.5% of mainsail | |
| Drifter reacher | light air | large, light-weight genoa | 1-15 kts | 150-170% of genoa | 30°-90° |
| Windseeker | light air | free-flying staysail | 0-6 kts | 85-100% of foretriangle | |
| Storm jib | strong wind headsail | low triangular staysail | > 45 kts | < 65% height foretriangle |
Why Use Different Sails At All?
You could just get the largest furling genoa and use it on all positions. So why would you actually use different types of sails?
The main answer to that is efficiency . Some situations require other characteristics.
Having a deeply reefed genoa isn't as efficient as having a small J3. The reef creates too much draft in the sail, which increases heeling. A reefed down mainsail in strong winds also increases heeling. So having dedicated (storm) sails is probably a good thing, especially if you're planning more demanding passages or crossings.
But it's not just strong winds, but also light winds that can cause problems. Heavy sails will just flap around like laundry in very light air. So you need more lightweight fabrics to get you moving.
What Are Sails Made Of?
The most used materials for sails nowadays are:
- Dacron - woven polyester
- woven nylon
- laminated fabrics - increasingly popular
Sails used to be made of linen. As you can imagine, this is terrible material on open seas. Sails were rotting due to UV and saltwater. In the 19th century linen was replaced by cotton.
It was only in the 20th century that sails were made from synthetic fibers, which were much stronger and durable. Up until the 1980s most sails were made from Dacron. Nowadays, laminates using yellow aramids, Black Technora, carbon fiber and Spectra yarns are more and more used.
Laminates are as strong as Dacron, but a lot lighter - which matters with sails weighing up to 100 kg (220 pounds).
By the way: we think that Viking sails were made from wool and leather, which is quite impressive if you ask me.
In this section of the article I give you a quick and dirty summary of different sail plans or rig types which will help you to identify boats quickly. But if you want to really understand it clearly, I really recommend you read part 2 of this series, which is all about different rig types.
You can't simply count the number of masts to identify rig type But you can identify any rig type if you know what to look for. We've created an entire system for recognizing rig types. Let us walk you through it. Read all about sail rig types
As I've said earlier, there are two major rig types: square rigged and fore-and-aft. We can divide the fore-and-aft rigs into three groups:
- Bermuda rig (we have talked about this one the whole time) - has a three-sided mainsail
- Gaff rig - has a four-sided mainsail, the head of the mainsail is guided by a gaff
- Lateen rig - has a three-sided mainsail on a long yard

There are roughly four types of boats:
- one masted boats - sloop, cutter
- two masted boats - ketch, schooner, brig
- three masted - barque
- fully rigged or ship rigged - tall ship
Everything with four masts is called a (tall) ship. I think it's outside the scope of this article, but I have written a comprehensive guide to rigging. I'll leave the three and four-masted rigs for now. If you want to know more, I encourage you to read part 2 of this series.
One-masted rigs
Boats with one mast can have either one sail, two sails, or three or more sails.
The 3 most common one-masted rigs are:
- Cat - one mast, one sail
- Sloop - one mast, two sails
- Cutter - one mast, three or more sails
1. Gaff Cat

2. Gaff Sloop
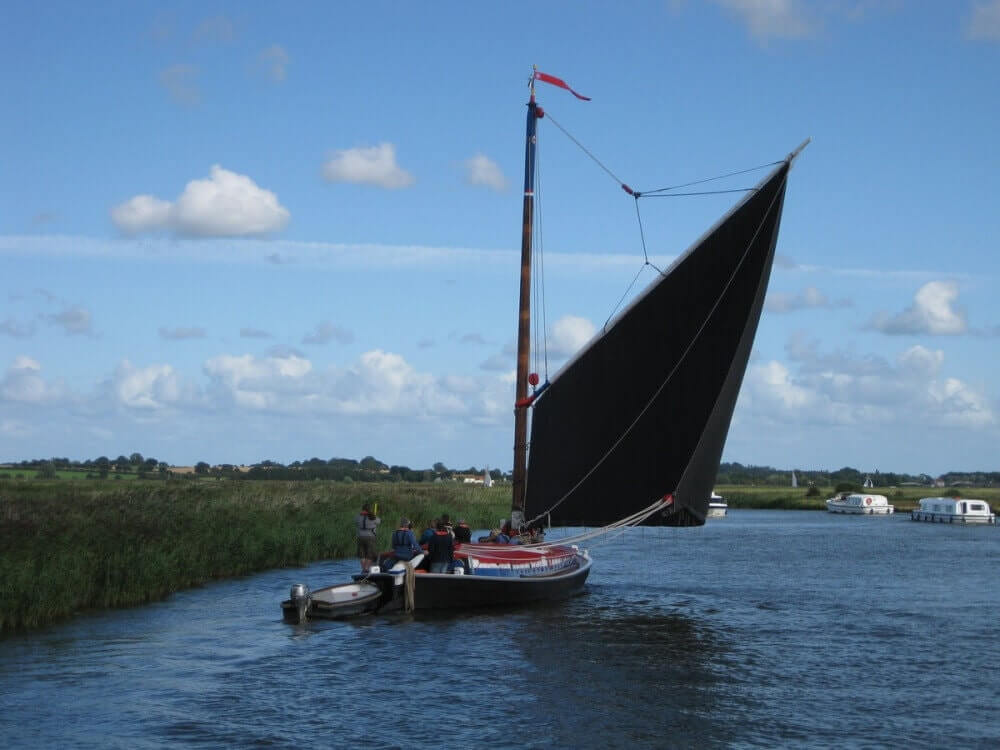
Two-masted rigs
Two-masted boats can have an extra mast in front or behind the main mast. Behind (aft of) the main mast is called a mizzen mast . In front of the main mast is called a foremast .
The 5 most common two-masted rigs are:
- Lugger - two masts (mizzen), with lugsail (cross between gaff rig and lateen rig) on both masts
- Yawl - two masts (mizzen), fore-and-aft rigged on both masts. Main mast much taller than mizzen. Mizzen without mainsail.
- Ketch - two masts (mizzen), fore-and-aft rigged on both masts. Main mast with only slightly smaller mizzen. Mizzen has mainsail.
- Schooner - two masts (foremast), generally gaff rig on both masts. Main mast with only slightly smaller foremast. Sometimes build with three masts, up to seven in the age of sail.
- Brig - two masts (foremast), partially square-rigged. Main mast carries small lateen rigged sail.

4. Schooner

5. Brigantine

This article is part 1 of a series about sails and rig types If you want to read on and learn to identify any sail plans and rig type, we've found a series of questions that will help you do that quickly. Read all about recognizing rig types
Related Questions
What is the difference between a gennaker & spinnaker? Typically, a gennaker is smaller than a spinnaker. Unlike a spinnaker, a gennaker isn't symmetric. It's asymmetric like a genoa. It is however rigged like a spinnaker; it's not attached to the forestay (like a jib or a genoa). It's a downwind sail, and a cross between the genoa and the spinnaker (hence the name).
What is a Yankee sail? A Yankee sail is a jib with a high-cut clew of about 3' above the boom. A higher-clewed jib is good for reaching and is better in high waves, preventing the waves crash into the jibs foot. Yankee jibs are mostly used on traditional sailboats.
How much does a sail weigh? Sails weigh anywhere between 4.5-155 lbs (2-70 kg). The reason is that weight goes up exponentially with size. Small boats carry smaller sails (100 sq. ft.) made from thinner cloth (3.5 oz). Large racing yachts can carry sails of up to 400 sq. ft., made from heavy fabric (14 oz), totaling at 155 lbs (70 kg).
What's the difference between a headsail and a staysail? The headsail is the most forward of the staysails. A boat can only have one headsail, but it can have multiple staysails. Every staysail is attached to a forward running stay. However, not every staysail is located at the bow. A stay can run from the mizzen mast to the main mast as well.
What is a mizzenmast? A mizzenmast is the mast aft of the main mast (behind; at the stern) in a two or three-masted sailing rig. The mizzenmast is shorter than the main mast. It may carry a mainsail, for example with a ketch or lugger. It sometimes doesn't carry a mainsail, for example with a yawl, allowing it to be much shorter.
Special thanks to the following people for letting me use their quality photos: Bill Abbott - True Spinnaker with pole - CC BY-SA 2.0 lotsemann - Volvo Ocean Race Alvimedica and the Code Zero versus SCA and the J1 - CC BY-SA 2.0 Lisa Bat - US Naval Academy Trysail and Storm Jib dry fit - CC BY-SA 2.0 Mike Powell - White gaff cat - CC BY-SA 2.0 Anne Burgess - Lugger The Reaper at Scottish Traditional Boat Festival
Hi, I stumbled upon your page and couldn’t help but notice some mistakes in your description of spinnakers and gennakers. First of all, in the main photo on top of this page the small yacht is sailing a spinnaker, not a gennaker. If you look closely you can see the spinnaker pole standing on the mast, visible between the main and headsail. Further down, the discription of the picture with the two German dinghies is incorrect. They are sailing spinnakers, on a spinnaker pole. In the farthest boat, you can see a small piece of the pole. If needed I can give you the details on the difference between gennakers and spinnakers correctly?
Hi Shawn, I am living in Utrecht I have an old gulf 32 and I am sailing in merkmeer I find your articles very helpful Thanks
Thank you for helping me under stand all the sails there names and what there functions were and how to use them. I am planning to build a trimaran 30’ what would be the best sails to have I plan to be coastal sailing with it. Thank you
Hey Comrade!
Well done with your master piece blogging. Just a small feedback. “The jib gives control over the bow of the ship, making it easier to maneuver the ship. The mainsail gives control over the stern of the ship.” Can you please first tell the different part of a sail boat earlier and then talk about bow and stern later in the paragraph. A reader has no clue on the newly introduced terms. It helps to keep laser focused and not forget main concepts.
Shawn, I am currently reading How to sail around the World” by Hal Roth. Yes, I want to sail around the world. His book is truly grounded in real world experience but like a lot of very knowledgable people discussing their area of expertise, Hal uses a lot of terms that I probably should have known but didn’t, until now. I am now off to read your second article. Thank You for this very enlightening article on Sail types and their uses.
Shawn Buckles
HI CVB, that’s a cool plan. Thanks, I really love to hear that. I’m happy that it was helpful to you and I hope you are of to a great start for your new adventure!
Hi GOWTHAM, thanks for the tip, I sometimes forget I haven’t specified the new term. I’ve added it to the article.
Nice article and video; however, you’re mixing up the spinnaker and the gennaker.
A started out with a question. What distinguishes a brig from a schooner? Which in turn led to follow-up questions: I know there are Bermuda rigs and Latin rig, are there more? Which in turn led to further questions, and further, and further… This site answers them all. Wonderful work. Thank you.
Great post and video! One thing was I was surprised how little you mentioned the Ketch here and not at all in the video or chart, and your sample image is a large ship with many sails. Some may think Ketch’s are uncommon, old fashioned or only for large boats. Actually Ketch’s are quite common for cruisers and live-aboards, especially since they often result in a center cockpit layout which makes for a very nice aft stateroom inside. These are almost exclusively the boats we are looking at, so I was surprised you glossed over them.
Love the article and am finding it quite informative.
While I know it may seem obvious to 99% of your readers, I wish you had defined the terms “upwind” and “downwind.” I’m in the 1% that isn’t sure which one means “with the wind” (or in the direction the wind is blowing) and which one means “against the wind” (or opposite to the way the wind is blowing.)
paul adriaan kleimeer
like in all fields of syntax and terminology the terms are colouual meaning local and then spead as the technology spread so an history lesson gives a floral bouque its colour and in the case of notical terms span culture and history adds an detail that bring reverence to the study simply more memorable.
Hi, I have a small yacht sail which was left in my lock-up over 30 years ago I basically know nothing about sails and wondered if you could spread any light as to the make and use of said sail. Someone said it was probably originally from a Wayfayer wooden yacht but wasn’t sure. Any info would be must appreciated and indeed if would be of any use to your followers? I can provide pics but don’t see how to include them at present
kind regards
Leave a comment
You may also like, 17 sailboat types explained: how to recognize them.
Ever wondered what type of sailboat you're looking at? Identifying sailboats isn't hard, you just have to know what to look for. In this article, I'll help you.

How Much Sailboats Cost On Average (380+ Prices Compared)
Tips About Sailing with Symmetric Spinnakers
- Private Sailing Courses
- Fast Track to Cruising
- Learn to Sail Certification Courses
- Fast Track to Sailing
- Family Learn to Sail Programs
- Sailing Lessons and Sailing Rides
- Small Sailboat Cruising Course
- Online Learn to Sail Course
- Docking Refresher Course on a Catamaran or Monohull
- Fast Track to Monohull Cruising
- Live Aboard Cruising Courses
- Bareboat Charter Courses
- Catamaran Cruising Courses
- IPC Prep With Cruising Certification & Catamaran Endorsement
- Catamaran Endorsement & Refresher
- Boat Handling & Docking
- Women-Only Sailing Programs
- Navigation Courses
- Performance Sailing Courses
- Fast Track to Sailboat Racing Courses
- Performance Racing Clinics
- Coastal Passage Making Courses
- Offshore Passage Making Courses
- Celestial Navigation Courses
- Powerboat Courses
- Sailing Certifications
- Top 10 Tips for Learning How to Sail
- Safety and Comfort Aboard
- Sails & Sail Trim
- Steering and Maneuvering
- Handling Spinnakers
- Engine Maintenance
- Become an Instructor
- How to Choose a Sailing School
- Yacht Lease Management
Tips for Sailing with a Spinnaker
In the Learn to Sail Course you get to sail downwind with a spinnaker. In our Performance Sailing Course , you practice over and over how to properly set a spinnaker. Performance Race Week truly hones your racing skills downwind while flying a spinnaker.
How to Douse a Spinnaker to Leeward
In this video you learn how to bring your spinnaker down on the leeward side of the boat. Here are some helpful hints:
- Reach up under the boom and start to pull the clew of the sail around the boat while releasing the after guy
- As the clew comes toward you, release the halyard, pull the sail down and into the boat manually, stuff it into the cabin down the companionway
- Make sure there are no twists as you haul the sail in or you will have to repack the spinnaker
- Secure the pole on deck
How to Douse a Spinnaker to Windward
In this video you learn how to bring a symmetric spinnaker down on the windward side of the boat. Here are some helpful hints:
- Send someone forward to disconnect the pole and stow it on the leeward side
- Pull the sail around to the windward side of the boat, and release the after guy as you bring the sail into the boat
- The pole and the lines controlling the spinnaker are now on the leeward side, ready for a tack set when you go around the next windward mark
- Be sure you run the afterguy through the end of the pole, before setting up for your next hoist
GET IN TOUCH
Call us today.
888-454-7015 or 239-454-1700
Ask our experts about training, group packages, vacations, and more!
6338 Presidential Court, #201 Fort Myers, Florida 33919
SPECIALS COURSES
LOCATIONS CONTACT US
ABOUT US SAILING TIPS
[email protected] Site Map Privacy Policy
© 2024 Offshore Sailing School - Official Site. OffshoreSailing.com is managed by Offshore Sailing School.
- Privacy Policy
- Fast Track to Sailing | Beginner to Advanced in Six Days
- Fast Track to Catamaran Cruising
- Fast Track to Boat Handling & Docking
- Ultimate Cruising Course
- Private Courses
- Catamaran Refresher & 114 Endorsement
- Team Building Programs
- Women’s Sail Sip Spa Week in the British Virgin Islands
- Top 10 Tips Learning How to Sail
- How to Become a Sailing Instructor
- Yacht Lease Management Opportunities
- Bookstore New!
- About Sailing
- Cape Coral Marina Village
- Fort Myers Beach
- St. Petersburg
- Captiva Island
- Scrub Island
- St. Lucia & Windward Islands
- Greece Ionian Islands
- Sicily In The Aeolian Islands
- Dubrovnik-Montenegro Flotilla Cruise
- Italy’s Amalfi Coast Flotilla
- Tahiti’s Society Islands
- Team Building
- Testimonials
- SAILING TIPS
- SPECIAL EVENTS
- Offshore Sailing School Returns to Captiva Island, Florida
- Sailing – Out & About SWFL
- America’s Cup Endeavor Program Videos
- Growing Up Moorings
- Doris Colgate Sailing Clinic & Cup
- Steve Colgate Inducted Into National Sailing Hall of Fame
- OSS Student Proposes During Course
- Steve Colgate and National Sailing Hall of Fame
- St. Lucia and Windward Islands Flotilla Cruise
- Weathering Unexpected Bad Weather
- A Sailing Adventure He Still Can’t Believe Was Real
- 2016 Croatia Flotilla Cruise Diary
- How We Teach
- Steve & Doris Colgate
- Steve Colgate
- Doris Colgate
- Management Team
- Employment Opportunities
- Our Mission
- Our History
- Alumni Benefits
- Awards & Accolades
- Our Philanthropy
- Certification Levels
- GET STARTED
The Worldwide Leader in Sailmaking
- Sail Care & Repair
- Sailing Gear
- Find A Loft
- Sail Finder
- Custom Sails
- One Design Sails
- Flying Sails
- New Sail Quote
- 3Di Technology
- Helix Technology
- Sail Design
- AEROTECH Spinnaker Cloth
- NPL RENEW Sustainable Sailcloth
- Sailcloth & Material Guide
- Polo Shirts
- Sweaters & Cardigans
- Sweatshirts & Hoodies
- Accessories
- Shop the look
- Mid & Baselayers
- Deckwear & Footwear
- Luggage & Accessories
- Fall Winter '24
- North Sails x 37th America's Cup
- Sailor Jackets
- SALT X North Sails
- NS x Slowear
- T-shirts & Tops
- Sailor Jacket
- Sustainability
- North Sails Blog
- Sail Like A Girl
- 37th America's Cup
- Icon Sailor Jacket
- Our Locations
- Certified B Corporation
- North SUP Boards
- North Foils
- North Kiteboarding
- North Windsurfing
SAIL FINDER
SAILING GEAR
COLLECTIONS & COLLAB
WE ARE NORTH SAILS
ACTION SPORTS
Popular Search Terms
Organic cotton
Scuba fleece
Drawstring hood
Utility pocket
Stand collar
Sorry, no results for ""
Subscription
Welcome aboard.
We want to make our emails as relevant as possible for you.
Interests saved
Something went wrong, please try again
Welcome to North Sails
Stay up to date with the latest North Sails news.
Receive a 10% discount code for your first apparel order. Excludes sails and SUP’s. See our Terms and Conditions .
Yes, I agree to the terms of use and privacy policy.
AEROTECH: A REVOLUTIONARY HIGH-PERFORMANCE WOVEN DOWNWIND SAILCLOTH
North sails introduces aerotech, a groundbreaking advancement in sailcloth, leveraging cutting-edge innovations from ultralight gliders, sport parachutes, and wind-driven sports like foiling kites and wings. .
The North Advanced Textiles Division was created to push the boundaries of material innovation and meet the performance demands of modern sailing. Aerotech is the first major leap forward in downwind sail materials in decades, engineered exclusively for North Sails.
Aerotech is an ultra-light, performance-driven woven sailcloth that redefines downwind racing for sailors seeking maximum strength, speed, and precision on the racecourse. Drawing on recent technical developments from industries beyond sailing, North Sails has developed a material that sets a new benchmark for competitive downwind performance.

A NEW ERA OF DOWNWIND SAILING
As sailboats evolve with modern designs and advanced rigging, they are experiencing tighter wind angles and faster apparent wind speeds. The lines between upwind and downwind sailing are increasingly blurred, with sailors demanding greater performance and reliability from their woven downwind sailcloth. Aerotech responds to this need, delivering unmatched durability, low stretch, and enhanced shape-holding properties.
While advancements like 3Di have revolutionized Code and Flying sails for tight reaching, materials for wider-angle asymmetric spinnakers have lagged, often leading to performance limitations and durability issues. Aerotech solves this challenge.

ENGINEERED FOR PERFORMANCE
After three years of rigorous development by a world-class team of sail designers, material scientists, and textile partners, Aerotech represents the ideal woven coated racing fabric for modern boats. It optimizes performance at higher speeds and tighter wind angles during downwind sailing.
Crafted using high-quality weaving and finishing techniques, Aerotech’s two specialized materials—Aerotech P (polyester) and Aerotech N (nylon)—deliver superior strength, minimal stretch, and exceptional durability. Aerotech P is designed for high-performance, high-load asymmetric sails , while Aerotech N is the leading choice for deeper angle asymmetric spinnakers. From One Design classes to the intense demands of Maxi 100 racing, Aerotech offers a comprehensive range of solutions.

LED BY EXPERTS IN INNOVATION
The development of Aerotech was spearheaded by Tom Davis, Product Director, and Grand Prix Segment Leader Paul Westlake, along with the expertise of renowned sail designers such as Mickey Ickert, JB Braun, and Dave Lenz. Their combined experience, knowledge, and design technology have culminated in a product that revolutionizes downwind sailcloth.
“A long and careful R&D period has brought us to this moment, where we’re proud to introduce Aerotech as part of the NPC Downwind range at North Sails,” said Tom Davis, Head of North Advanced Textiles and Aerotech Project Leader. “This is not the polyester spinnaker cloth of yesterday. Aerotech P redefines expectations with its engineered woven styles and durable polyurethane coatings, setting a new standard for downwind performance.
“And Aerotech N stands as the most advanced spinnaker nylon on the market, ideal for wider-angle oriented asymmetric spinnakers. Precision weaving and our super durable coating ensure that when nylon is the right fabric, Aerotech N is the optimal choice.”
Aerotech is available to order now. Learn more by submitting a quote request online or contacting your local North Sails loft.
GET IN TOUCH
REQUEST A QUOTE
BROWSE ALL SAILS
FIND YOUR SAIL
Featured stories, explaining the world’s most advanced sail technology, north 3di: frequently asked questions, the reason north 3di is a must-have.
- Refresh page
IMAGES
VIDEO
COMMENTS
I join up with my friend Sam, a retired Air Force pilot and retired Delta pilot. We go out on his boat, a Catalina 22, for a step-by-step guide to rigging an...
A spinnaker connects the boat with a halyard at the head of the sail to hoist it, a sheet on the leeward side, and a guy on the windward side. While the guy is a pole control, some boats use dedicated sheets and guys, while some use a single line that switches function between sheet and guy as the sail jibes from side to side. In either case ...
The spinnaker is an additional sail that can only be used at certain times b... This video will take you through how to sail a small sailboat with a spinnaker. The spinnaker is an additional sail ...
Spinnaker sheets run outside everything to a block on the quarter. They need to be long. In the case of a broach you need to be able to let out several metres to depower the sail. Spinnaker guy. The guy is the line which connects the spinnaker to the pole. It runs through the 'beak' of the pole before attaching to the sail.
To be able to pull the sail clear out of the wind-shadow created by the mainsail, we can use a spinnaker pole set quite low on the mast because an Asymmetrical Spinnaker is cut with a very low tack. When the pole is set, you can run a new sheet, sometimes called a brace or guy, through the outboard end of the pole and to the tack line, where or ...
Spinnaker - Wikipedia ... Spinnaker
The Spinnaker in Competitive Sailing. In competitive sailing, the spinnaker plays a crucial role in strategy and speed. This part explores how spinnakers are used in famous sailing races and regattas, highlighting their impact on race outcomes and tactics. Through anecdotes and examples from notable competitions, it illustrates the critical ...
HOW TO SAIL with a SPINNAKER | Top Tips | Sailing Yacht ...
Pull the snuffer over the sail before dropping. Once set, the folded tube stays at the head of the sail. To retrieve the spinnaker, the boat is sailed on a run to blanket the spinnaker and the snuffer tube is pulled back down. What could be easier - except of course if it jams on the way down.
Discover the art of spinnaker sailing with our in-depth guide. From rigging essentials to flying techniques, explore the world of symmetrical and asymmetrical spinnakers. Learn how to navigate challenges, choose the right sail for your sailboat, and enhance your sailing skills. Dive into the thrill of spinnaker sailing and set your course for an exhilarating journey on the open waters.
SETTING THE SPINNAKER How to Accomplish the Perfect Spinnaker Set. Nothing takes as much teamwork and practice as spinnaker handling. Here we'll cover the skills and techniques needed to handle and control conventional spinnakers, set from poles. Throughout the discussion the 'Divide and Conquer' approach to boat handling will be central: one team sails the boat as fast as possible with ...
Spinnaker pole: the normal length of a pole is the same as the J measurement, i.e., the distance from the front of the mast to the base of the forestay. Pole attachment ring on mast: typically about 5ft (1.5m) above the deck on a 26-footer. The objective is to fly the spinnaker with the pole horizontal and the clews level.
Pulling the halyard backward hoists the spinnaker up the mast; pulling the halyard forward pulls the spinnaker back inside its chute. Choose a quiet day for rigging, put the boat where there is plenty of space, and lay the spinnaker out flat beside it. First of all, look carefully at the shape of the sail to identify the three corners.
Stingy stage 3 - Add a spinnaker halyard and masthead block. This stage solves the problem of chafing caused by reusing the jib halyard. As you can see in the following drawing, when the jib halyard runs under the forestay pin and then in front of the forestay, it can make a quarter turn around the forestay.
Your Spinnaker sails on the outside of your other sails and needs a strong line to support it. In light wind, however, you must strike a balance between the weight of the hoisted line and the durability required to support the sail through extended use. While you can often read manual specifications, Ron recommended the Fosters a 10mm line to ...
Simply pull the clew hard as the helmsman drives the boat down deep, to relieve pressure in the sail. The bow person will lift the foot of the spinnaker over the lifelines and hand the foot to the person in the bow hatch. The steps that follow are the same as the windward douse. Remember to practice all of these nuances.
Compared to a symmetrical spinnaker, with its uphauls, downhauls, pole, sheets and guys, an A-sail is simplicity itself—just a halyard, a tack line and a pair of sheets. If you sail with enough bodies on board to drop and pack the kite, that's great, but if you sail as a couple, or your kids are too young to help, you have two options to ...
This video produced by longterm bluewater cruising couple Amy and Matt on their sailing yacht Florence is the perfect, step-by-step and hands-on guide for ge...
In short, a gennaker has a genoa's form (asymmetric, head and tack pinned, sheets tied to the clew) with the wide girth of a spinnaker. The gennaker is an all-purpose downwind sail, while spinnakers are built for specific downwind apparent wind angles. Because designs are changing so quickly, the term gennaker can seem complicated.
Spinnaker. A free-flying sail that fills up with air, giving it a balloon shape. Spinnakers are generally colorful, which is why they look like kites. This downwind sail has the largest sail area, and it's capable of moving a boat with very light wind. They are amazing to use on trade wind routes, where they can help you make quick progress.
Here are some helpful hints: Send someone forward to disconnect the pole and stow it on the leeward side. Pull the sail around to the windward side of the boat, and release the after guy as you bring the sail into the boat. The pole and the lines controlling the spinnaker are now on the leeward side, ready for a tack set when you go around the ...
The asymmetrical spinnaker is now used on some contemporary racing sailboats. Its advantage is the simplicity of the rig without the pole. Our discussion of spinnakers will focus on the symmetrical spinnaker and pole rig. The spinnaker is a triangular sail, with a head, tack, and clew. The tack of the spinnaker is in a fixed position-at the end ...
In part ten of our series on advanced sailing techniques, Pip Hare describes how to hoist a spinnaker. Become a FREE SUBSCRIBER to Yachting World's YouTube ...
"This is not the polyester spinnaker cloth of yesterday. Aerotech P redefines expectations with its engineered woven styles and durable polyurethane coatings, setting a new standard for downwind performance. "And Aerotech N stands as the most advanced spinnaker nylon on the market, ideal for wider-angle oriented asymmetric spinnakers.